VRChat is a popular VR game, and one of the best parts is being able to record a clip of your gameplay. VRChat isn't just a game; it's a whole social world where your interactions feel alive. Sometimes you'll want to capture those moments like a funny conversation with friends, an epic dance battle, or a memorable hangout spot. Knowing how to record in VRChat makes all the difference. In this tutorial, we'll show you how to record in VRChat on your PC using three effective methods.
Part 1. How to Record VRChat on PC and Mac in the Best Quality
VRChat is not just limited to VR headsets like Oculus. You can also enjoy this social VR game on your personal computer, which is often more comfortable and flexible if you like having full control. And when those fun moments happen, it's worth capturing them, especially if you're creating content.
Tipard Screen Capture is the perfect software for flexibility. It's a crowd favorite because of its on-the-go features and easy-to-use interface. With just a few clicks, you can record whatever you want. The best part is that you can choose to capture only audio, only video, or both, depending on what you need.
High-quality output is a must, and this software delivers. It supports 1080p, 4K, HEVC, and AV1, making sure your recordings look sharp. It's also built for long-duration recording without lag. Plus, if you're particular about file formats, you'll love the flexibility to save in MP4, MKV, M4V, AVI, FLV, WMV, and more.
How to use Tipard Screen Capture:
Step 1 To acquire the software, click the Free Download button below. Install the software by clicking the downloaded file twice. Then, run the program.
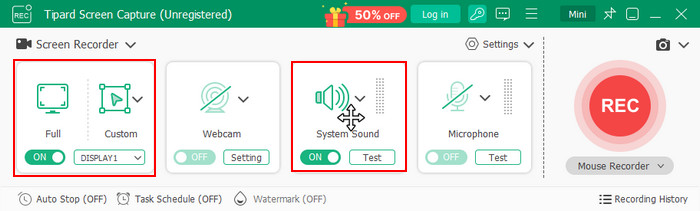
Step 2 On the main interface, choose whether to record the screen in Full or Custom mode. The Custom option lets you select a specific area of the screen. You can also enable System Sound, Webcam, or Microphone, depending on your needs.
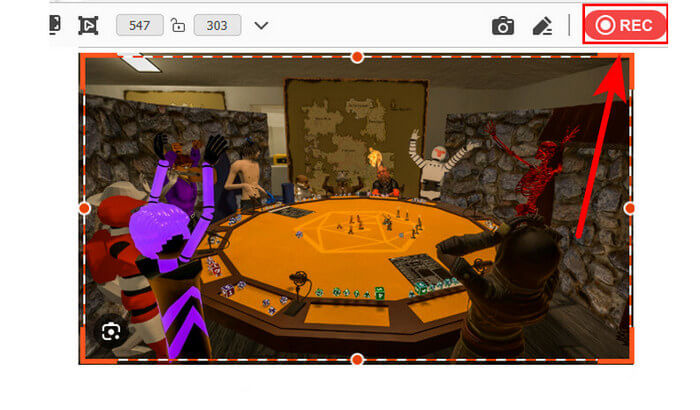
Step 3 When you're ready to begin, click the REC button. To avoid accidentally moving the recording area, click the Lock button to fix the resolution.
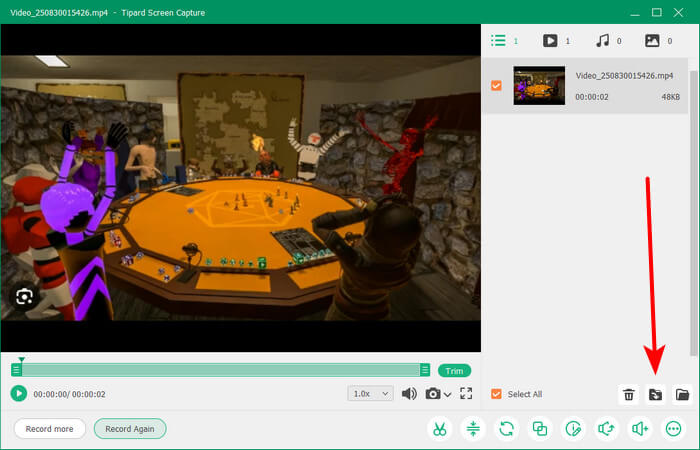
Step 4 Once you're finished recording, go to the lower-right corner and click the Import button. From there, choose the destination folder where you want to save your recording.
Part 2. How to Record VRChat with Oculus Quest 2
Aside from playing VRChat on PC, you can also enjoy it on the Oculus Quest 2. This all-in-one VR headset doesn't need a computer, which means you can just grab the headset and controllers and dive straight into the game. It's built for convenience, letting you play anytime and anywhere without the extra setup. And while many guides focus on how to record in VRChat on PC, the Quest 2 gives you another simple way to capture gameplay.
The best part is that you can record your sessions directly on the Oculus Quest 2. No cables, no extra software, just the headset itself. In the next section, we'll walk you through the exact steps to capture game clips so you can save and share your VRChat moments with ease.
Step 1 Put on your Oculus headset and press the Oculus button on the right controller to open the universal menu.
Step 2 Select the Share icon (right arrow), choose Record Video, and turn on Include Mic Audio if you want to capture your voice.
Step 3 Click Start Recording and play your game. A red dot will appear to show that recording is active. To stop, open the universal menu again and select Stop Recording.
The Quest 2 saves your clips in 720p by default, which is good enough for casual sharing. For clearer visuals, dim unnecessary background lights in VRChat worlds. Bright maps look great, but can reduce recording quality. Stick to balanced environments for cleaner and smoother videos. If you want higher quality, transfer your clips to a PC later for editing.
Part 3. How to Record VRChat with OBS
When it comes to how to record VRChat with OBS, it can feel powerful but also a little technical at first. What's great is that OBS isn't only for gamers. Many staff and teachers actually use it as a meeting recorder app, which shows just how versatile it is. The same features that make it perfect for recording online classes or work meetings also work beautifully for VRChat. You can capture the whole screen or just the game window, adjust the resolution, and even add your webcam or overlays. Whether you're teaching, streaming, or just having fun in VRChat, OBS gives you full control to make your recordings look polished.
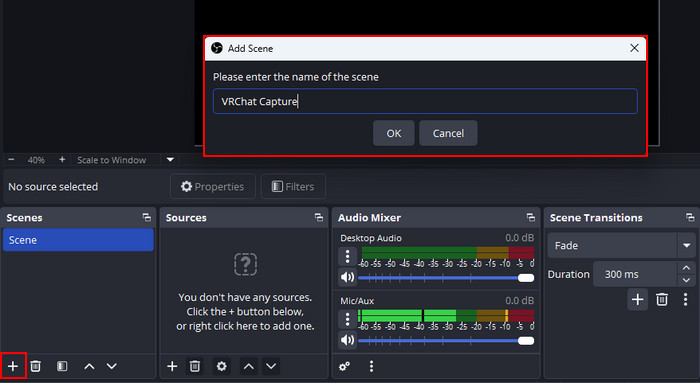
Step 1 In the Scene panel, click the + button, create a new scene (e.g., name it VRChat), and select it.
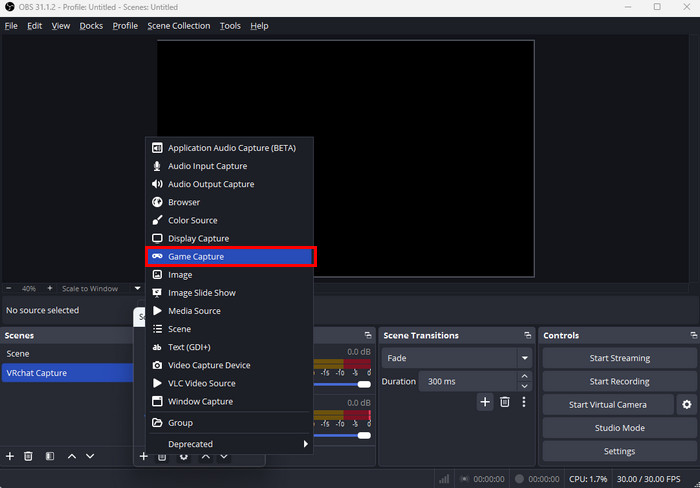
Step 2 In the Source panel, click the + button, choose Game Capture, and set the mode to Capture Specific Window. Open VRChat, then select it as the source window.
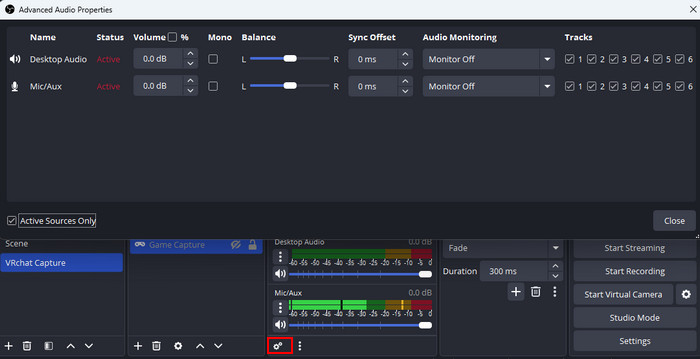
Step 3 In the Audio Mixer panel, open Settings to check if your system audio and microphone are active. Adjust the audio levels to your preference.
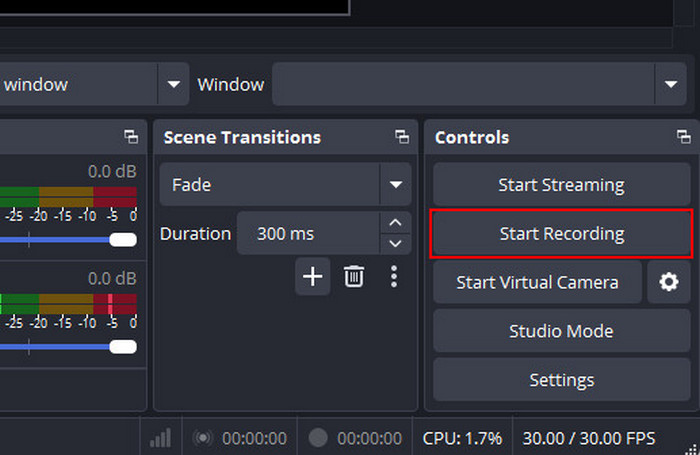
Step 4 Once ready, click Start Recording to begin capturing your gameplay.
The best part? OBS doesn't just record, it actually helps optimize your gameplay. With the right encoder settings, you can capture VRChat without your performance taking a big hit. If you have a strong GPU, switching to hardware encoding like NVENC on NVIDIA cards makes everything run smoother while OBS handles the recording.
Sure, OBS takes a bit more effort to set up, but that's also why it's so powerful. You get more control, advanced features, and better quality results. If you've been wondering how to record your screen in a way that looks smooth and professional, OBS is one of the best options out there. And since it's free, it's definitely worth a try.
Conclusion
Knowing how to record in VRChat lets you capture your funniest chats, epic dance-offs, and unforgettable moments with friends. Whether you're on PC with OBS or using your Oculus Quest 2, there are now easy ways to save all those great moments. Each method has its own strengths, but the goal is the same: to keep your favorite moments in the best quality possible. And if you want something faster and easier, try using Tipard Screen Capture.
More Reading

About the Author