Even with auto captions or closed captions, editors will still need to make manual fixes. These tools often misinterpret words, miss punctuation, or fail to match timing and readability standards. And with some software, you won't get much control over design or how subtitles appear. Many users will feel frustrated when their captions don't look right or take too long to adjust. That's where Premiere Pro will stand out. It's a professional editor that offers both accuracy and flexibility. In this post, you'll learn the easiest way to add subtitles in Premiere Pro.

Part 1. How to Add Subtitles in Premiere Pro Manually
If you're the type of editor who likes precision and total control, manual subtitle creation in Premiere Pro might be your go-to method. Sure, it takes a little more time, but you'll get subtitles that match your exact pacing, tone, and style.
Here's how to do it:
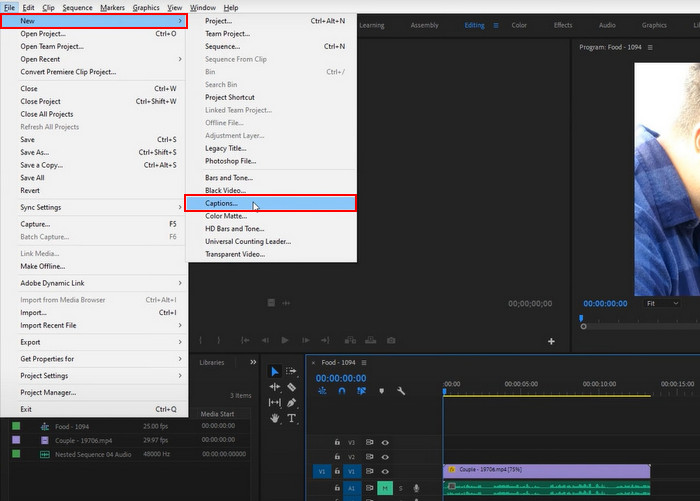
Step 1 Open Premiere Pro and load the video you want to work on. Go to the top menu, click File > New > Captions.
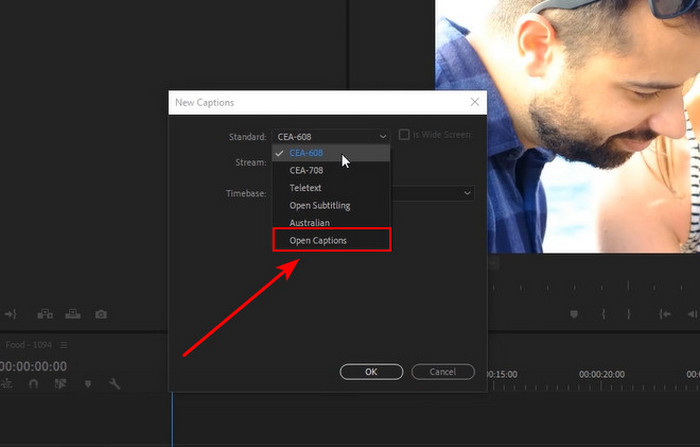
Step 2 In this tutorial, we'll use Open Captions. This option will burn the captions directly into the video. If you prefer, you can export them separately later. Click OK to confirm.
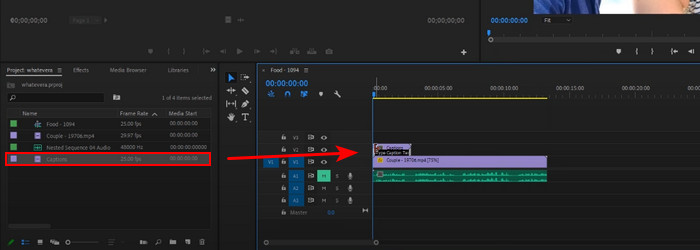
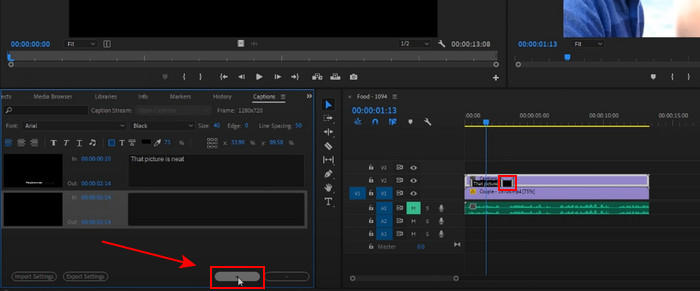
Step 3 In the project panel (lower left), drag the Caption file onto the timeline. Stretch it to match the full duration of your video.
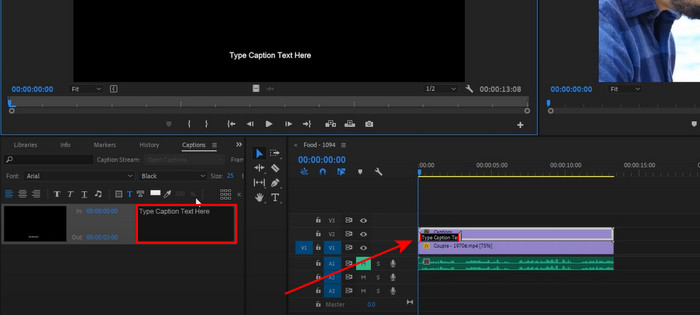
Step 4 Double-click the Caption layer (black box) to open the Caption panel. Here, you can type your captions manually. Resize the panel to see editing options such as font size, position, and spacing.
Step 5 In the Caption panel, click the + button to add another caption block. The new block will appear on the timeline, and you can drag it anywhere you need.
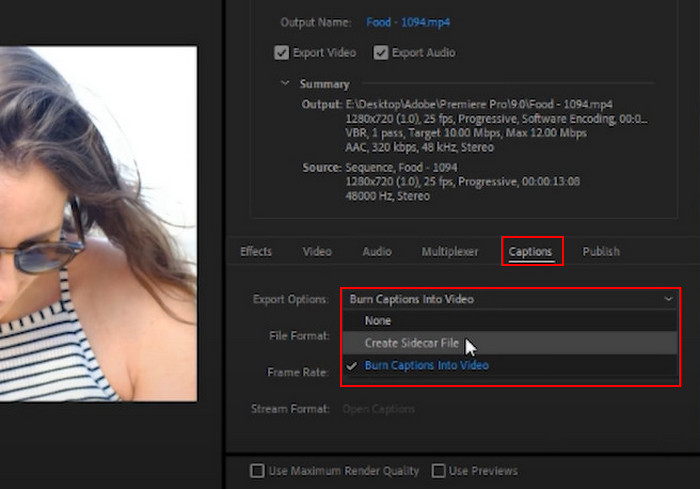
Step 6 When exporting your video, open the Caption settings in the Export menu. Choose whether to burn the captions into the video or create a separate caption file.
It may look like a lot of steps, but once you've done it a couple of times, it becomes second nature. The best part about this method is control. Every pause, every sigh, every laugh can be timed exactly how you want. Manual subtitles are especially useful for projects where accuracy is important, like tutorials, corporate videos, or content for international audiences.
Part 2. How to Add Subtitles in Premiere Pro Automatically
Now, let's talk speed. Sometimes you don't have hours to type out every line of dialogue manually. That's where the auto-captioning feature comes in, and learning how to add auto-captioning in Premiere Pro can save you a lot of time.
Here's how you can make it work:
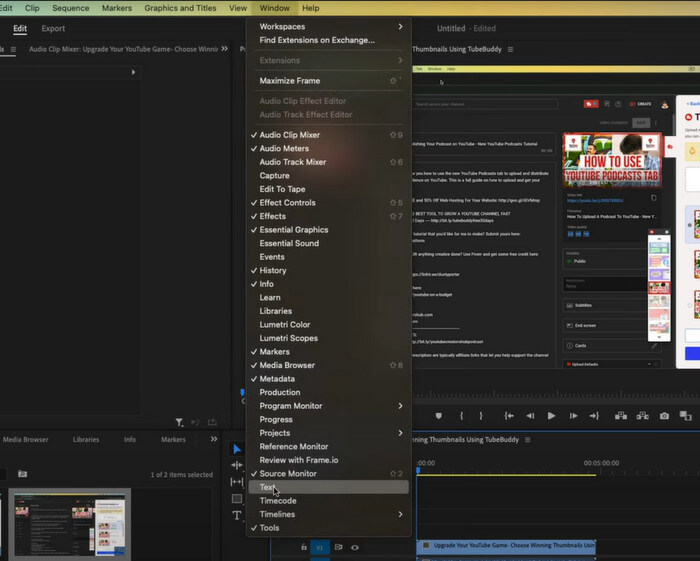
Step 1 On the top bar, click Window, then select Text.
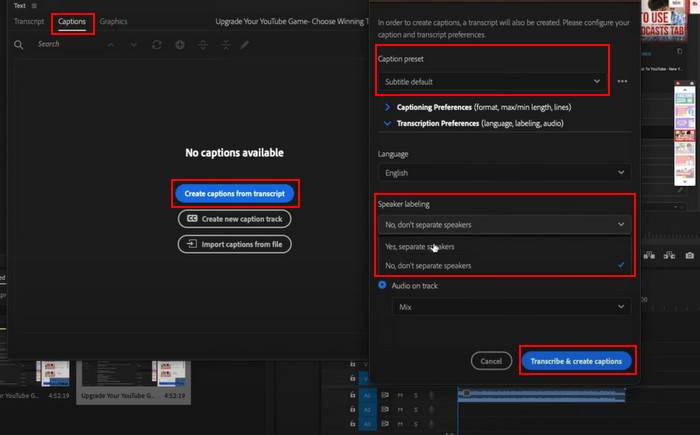
Step 2 In the Text panel, choose Captions, then click Create captions from transcript. Set the preset to default, or adjust it if needed. If multiple people are speaking, set Speaker Labeling to separate speakers. Once everything is set, click Transcribe & create captions.
Step 3 On the timeline, each caption block will be placed automatically. Select a block to view its text in the Text panel, where you can edit or adjust it as you prefer. Click the Export button when you're done.
The beauty of this feature is speed. You can generate a full set of subtitles in minutes instead of hours. But accuracy depends on the audio quality. If your video has background noise, heavy accents, or overlapping voices, you'll still need to make some edits.
Even so, auto subtitles are a big help for creators who upload often, especially on platforms like YouTube or TikTok, where captions improve accessibility, SEO, and viewer retention.
Part 3. Easier Way to Add Subtitles to Videos
When you add captions in Premiere Pro, you'll notice it's not always the fastest or most beginner-friendly way to add subtitles. If you want something simpler that works with just a click, check out the following software.
Tipard Video Converter Ultimate is one of the best media tools for adding subtitles, allowing you to import subtitle files and apply them to your video in just one click. Its accuracy and real-time preview make it a favorite among users. On top of that, it also includes powerful editing features such as video enhancement, DVD editing, format conversion, and more.
How to use Tipard Video Converter Ultimate:
Step 1 To get the software, simply click the Free Download button below. Install the downloaded file by clicking it twice. Run the program afterward.
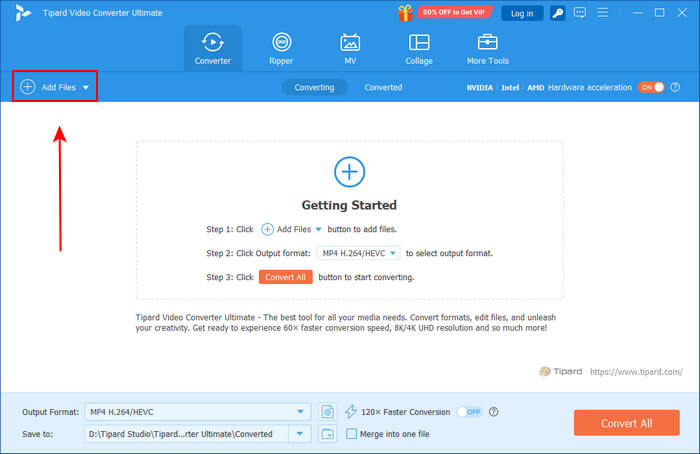
Step 2 Click on the Add Files button to load the video you want to edit. Alternatively, drag and drop the video into the program's interface.
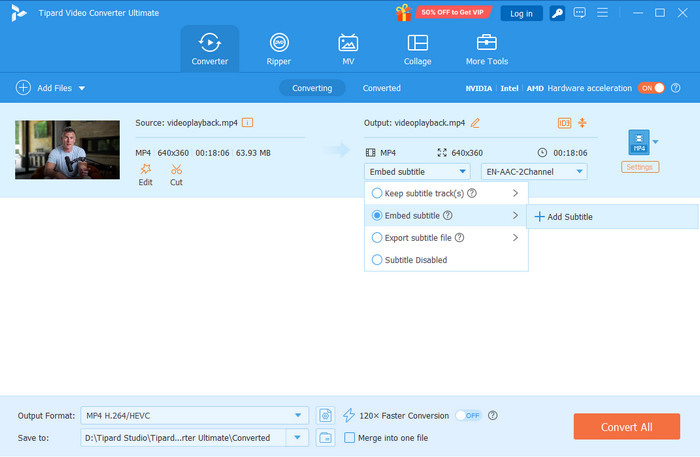
Step 3 To embed subtitles into your video, change Keep subtitle track(s) to Embed subtitle. Then click Add Subtitle and upload your subtitle file, make sure it's in SRT format.
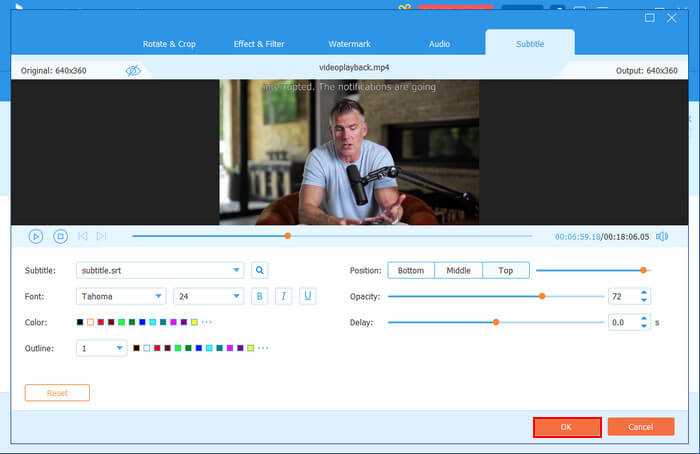
Step 4 Once added, the subtitle will appear automatically. You can customize it by adjusting the font, color, outline, position, opacity, or even the delay. Click OK when you're done.
More Tips. What's the Difference Between Subtitles and Closed Captions
This is where many people get confused, so let's break it down clearly.
Subtitles
Subtitles are mainly used for translation. They assume the viewer can hear the audio but may not understand the language being spoken. For example, if you're watching a French film with English subtitles, you can still follow the dialogue even if you don't speak French.
Closed Captions (CC)
Closed captions go a step further. They're designed for viewers who cannot hear the audio at all. CC includes not only the dialogue but also sound effects, speaker identification, and even music cues. For instance, you might see captions like [phone ringing] or [dramatic music playing] in addition to the spoken words.
Understanding the difference matters because viewers may expect either captions or subtitles. If you download a video without subtitles, using the best subtitle generator helps you quickly create accurate captions or subtitles to improve accessibility and viewing experience.
Conclusion
Adding subtitles in Premiere Pro doesn't have to feel overwhelming. And if you're wondering about the best way to add subtitles in Premiere Pro, the choice depends on your project. You can go manual for full precision, rely on automatic captions when you need speed, or use an alternative like Tipard Video Converter Ultimate for a faster one-click solution.
More Reading


About the Author