In QuickTime video editing, you can trim clips to cut parts you do not want. You can crop the frame to fit better. You can add filters to change colors or styles. You can put text on your video for titles or notes. You can do more to make your video look good. Fortunately, this write-up will teach you how to do everything in your QuickTime video. You will master how to edit QuickTime videos using the tools presented. Check it out now!

Part 1. How to Edit QuickTime Videos with Tipard Video Converter Ultimate
Platform: Windows & Mac
Tipard Video Converter Ultimate is more than just a tool to change video formats. It can also edit QuickTime videos. It supports MOV files, which is the format QuickTime uses. It makes it easy to work with your videos.
Tipard Video Converter's MV feature lets you edit your video. You can crop out parts you do not need. You can rotate to fix a sideways or upside-down video. You can add text, like titles or notes. You can also pick themes to make your video look better. It does not stop there; it also has many other editors in the toolbox. Impressive, right?
- Create cool music videos with themes.
- Changes videos to over 500 formats.
- Combine videos and pictures into one screen.
- Crop, cut, rotate, add watermark, use filters, and merge videos.

Step 1First, get the software and install it on your computer. Once it is ready, open it up.
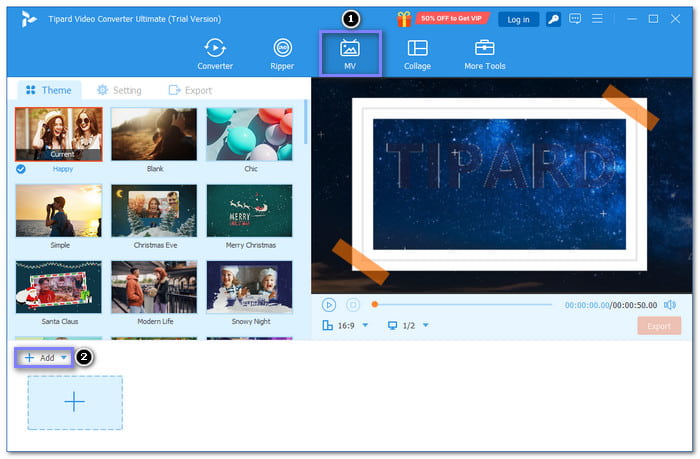
Step 2Head to the MV tab. Then, press the + Add button to upload the QuickTime video you want to edit.
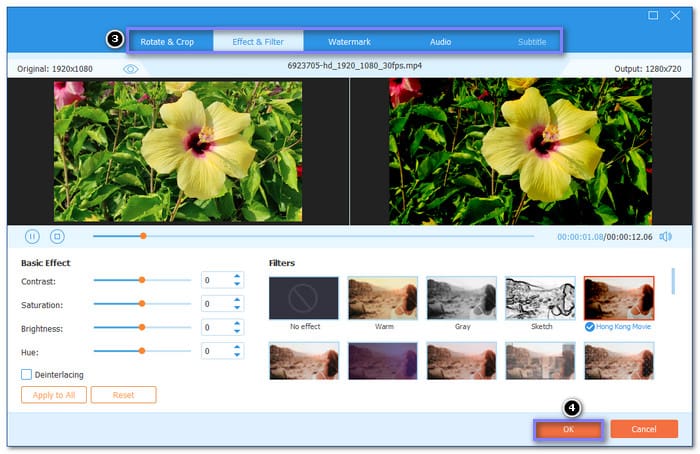
Step 3Let us dive into editing your video. Hit the Edit button to access the Rotate & Crop, Effect & Filter, Watermark, and Audio options.
- You can rotate your video left, right, horizontally, and vertically and remove unnecessary frames under Rotate & Crop.
- You can fine-tune basic effects, like contrast and brightness, and choose a specific filter to apply to your video under Effect & Filter.
- You can add a text or image watermark under Watermark.
- You can fine-tune the volume and delay under Audio.
Do not forget to hit OK to apply all your changes.
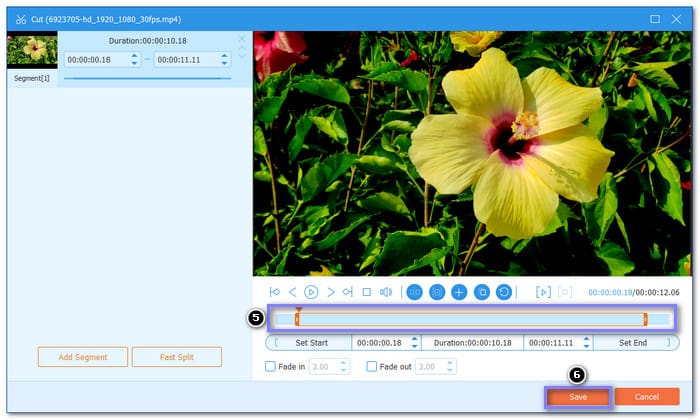
Step 4If there are starting or end parts you want to remove, go to the Trim button beside Edit. After that, click the Save button to retain only the parts you want.
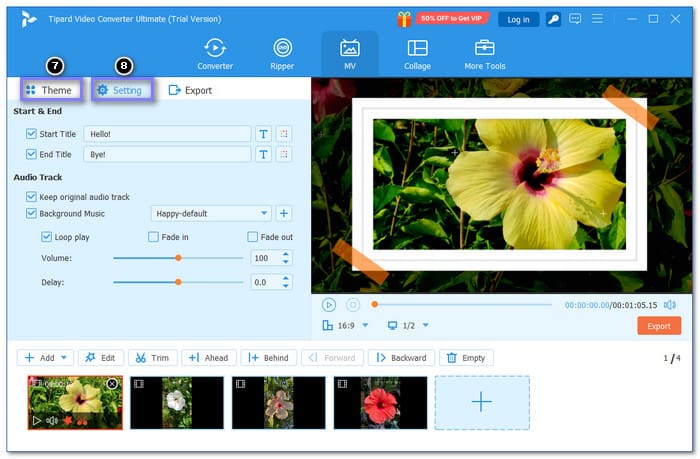
Step 5Now, select a Theme; there are Happy, Blank, Chic, Simple, Christmas Eve, Modern Life, Snowy night, and more you can choose from. Then, move to Set, and enable Start Title & End Title to add introduction and ending text.
Step 6Lastly, head to the Export tab and choose the preferred format, resolution, etc. Then, hit the Start Export button to get your edited Quicktime video!

Part 2. Edit QuickTime Videos with iMovie
For Mac users, iMovie is undoubtedly one of the most user-friendly video editing applications. You can perform many video editing like trimming, cropping, and splitting clips. It allows you to edit video speed, contrast, text addition, etc. Follow the steps below to learn how to edit a QuickTime video on Mac!
Step 1Open iMovie.
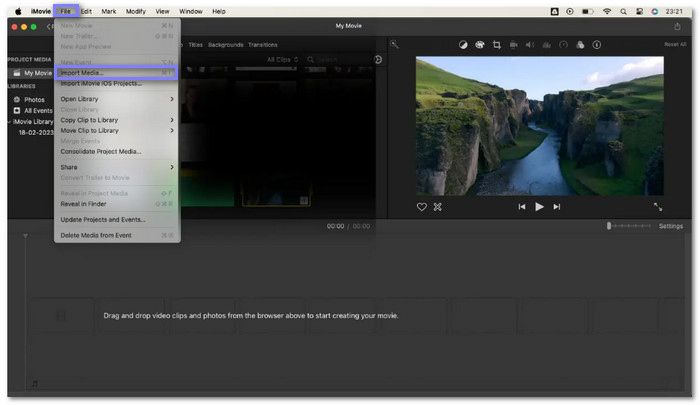
Step 2Go to File, then Import Media. Select the QuickTime video you wish to edit, then click Import Selected.
Step 3Drag your video to the timeline. Trim, split, or crop it by selecting the area you want to adjust. Use tools like Playhead to trim and split clips.
Step 4You can adjust its volume, mute background noise, or add effects. Use tools such as Noise Reduction and Equalizer to improve your sound.
Step 5Once done editing, click Share, then File. Name your video, pick a resolution, and click Save.
Part 3. Edit QuickTime Videos with Final Cut Pro
Final Cut Pro works smoothly with QuickTime videos, enabling you to import, edit, and export them. You can trim, add text, music, and effects, or even color adjustments. With its intuitive tools and professional features, Final Cut Pro helps you create polished videos.
Step 1Run Final Cut Pro. Go to File, New, and then Project. Name your project and click OK. To import your QuickTime video, click File, Import, and then Media. Choose your video and click Import Selected.
Step 2Drag the video from the Browser to the Timeline. Trim clips by dragging their edges. Move the clips around to get the correct order.
Step 3To add text, click the Titles button. Pick a title and drag it to the timeline. Double-click to edit the text. Then, fine-tune its timing like you did with the clips.
Step 4To add music, click the Photos and Audio button. Pick a song and drag it to the timeline under your video clips. After that, fine-tune the music length to match your video.
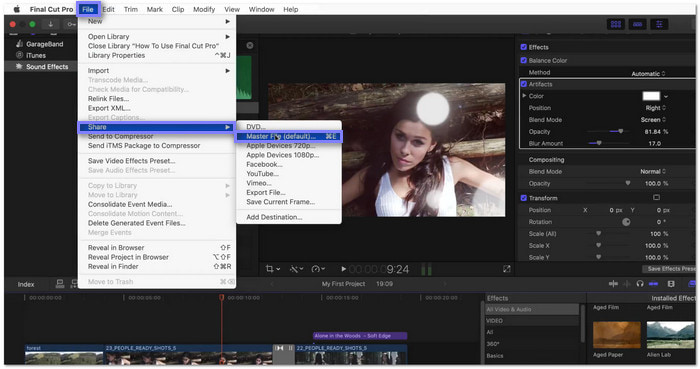
Step 5Once done, click File, Share, and then Master File. Choose where to save the video. Please wait for it to render, and you are finished!
Part 4. Edit QuickTime Videos with Adobe Premiere Pro
A popular and robust video editing software, Adobe Premiere Pro, can also help you edit QuickTime videos. It enables you to trim, cut, and add effects. You can also fine-tune color, add transitions, and work with audio in many ways. Its powerful features make it great for creating professional videos or simple edits.
Step 1Open Premiere Pro and click New Project. Name your project, select your video folder, and import your QuickTime footage.
Step 2Use the Razor Tool (C) to cut out the start and end of clips. You can also use the Playhead to find points to trim.
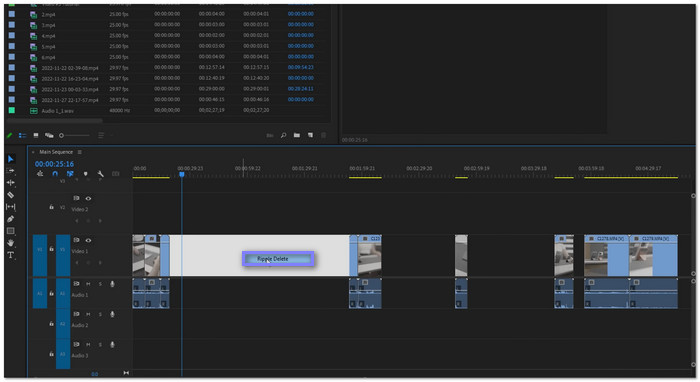
Step 3Delete unwanted sections and use the Ripple Delete function to close gaps, automatically keeping your timeline tidy.
Step 4Right-click clips to change their speed or apply the Warp Stabilizer effect to fix shaky footage. You can also adjust color using adjustment layers.
Step 5Once editing is complete, click Export and choose H.264 format. Then, adjust the bitrate settings for the best quality when posting on social media.
Part 5. Edit QuickTime Videos with Shotcut
Shotcut is a free, open-source video editing program that works well for editing QuickTime videos. It provides an easy-to-use interface with features like trimming, cropping, adding text, and splitting clips. You can also fine-tune video speed and add transitions. Shotcut supports many video formats, making it an excellent choice for beginners and professionals.
Step 1Open Shotcut, and click on New Project. Name it, choose your video mode, and click Start.
Step 2Select the Timeline Project layout. It gives you a preview window, timeline, and properties panel for editing.
Step 3Go to File and Open File to select your QuickTime video. You can also drag the video directly into the playlist. After that, drag it into the timeline to start editing.
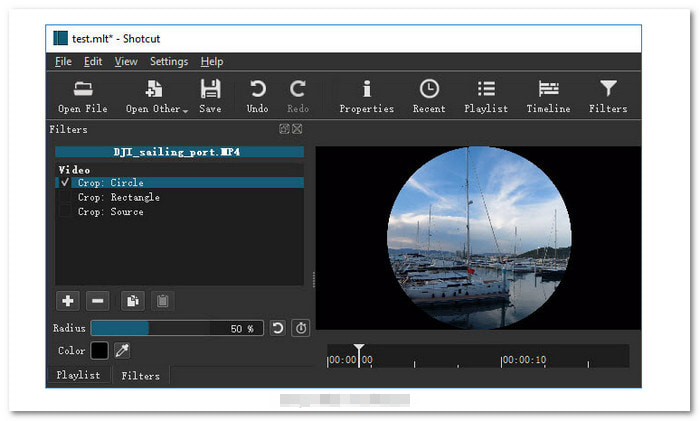
Step 4Click on Filters, then select Text: Simple or Text: 3D. Type your text, choose a font, and adjust the size and color.
Step 5Once done, go to File and Export Video. Choose your export settings (e.g., YouTube). Hit Export File to save your edited video.
Conclusion
You have learned how to edit a QuickTime video on Mac and Windows using Tipard Video Converter Ultimate, iMovie, Final Cut Pro, Adobe Premiere Pro, and Shotcut. Each tool can help you edit your videos. Some are easy, and some need more skill. But all can get the job done. But with Tipard Video Converter Ultimate, editing is simple. You do not need to be an expert to master it!
More Reading


About the Author