When you record a video only to find it looks blurry or mismatched for your platform, a video resolution converter becomes essential. Whether you are preparing clips for YouTube, editing family footage, or optimizing videos for social media, the right converter lets you upscale, resize, or compress while maintaining clarity. This guide explores the best tools to enhance your video quality efficiently.
Top 1. Tipard Video Converter Ultimate (Most Recommended)
The Tipard Video Converter Ultimate program excels as a quality video resolution converter. Having the capacity to convert videos to 8K and retaining their graphical quality, Tipard Video Converter Ultimate converts and enhances videos by offering additional tools, including video to GIF converters, collage makers, video embellishment, and more creativity tools. A 30-day money back guarantee, as well as a special limited time offer as well and a free version to new customers are great incentives to use Tipard products.

- Enhance low-resolution videos to ultra-high definition for a sharper look.
- Convert homemade DVDs to digital files while keeping original subtitles and audio.
- Adjust playback speed or reverse clips for fun and creative results.
- Edit file details like title, artist, and creation date for easy media organization.
- Combine multiple videos or photos into one frame using flexible templates and music.

- Automated color and sharpness adjustments.
- Audio delay and sync issues repair tools.
- Creative effects, filters, and subtitles.
- User-friendly for all.
- Supports Windows and Mac.
- Learning curve for beginner video editors.
Top 2. VLC Media Player
VLC Media Player is free and open-source software for Windows, macOS and Linux. It can resize, convert and compress videos in almost all formats. It provides all the basic editing tools for free, which can otherwise require additional plugins and subscriptions.

- No ads and 100% free.
- Every audio and video format is supported.
- Basic tools for video editing.
- Lightweight for older machines.
- No AI tools for video editing.
- Resizing controls require manual adjustment through menus in VLC DVD Player.
Top 3. CyberLink PowerDirector
Like Windows and Mac versions, resizing parameters and CyberLink PowerDirector offer aspect ratio advanced controls. Smart presets let you use drag-and-drop editing to create YouTube, TikTok, and Instagram videos with PowerDirector.
- Vertical, square, and widescreen resizing.
- Intuitive interface that balances simplicity and powerful functionality.
- Social media targeted exporting.
- An initial payment is required for the full version.
- Time wasted for resizing.
Top 4. Shotcut
As with Windows and Mac versions, Shotcut is also free to use for video editing on Linux. It offers video resizing, cropping, and format conversion. It offers video editing free of charge, with no subscriptions, for SD to 4K video editing.
- No watermarks on exported videos.
- Support for almost all video file types.
- Basic video editing tools for cropping, resizing, trimming, and adding simple filters.
- Works on Windows, macOS, and Linux operating systems.
- No sophisticated editing tools.
- No automatic tools for resizing and setting aspect ratios.
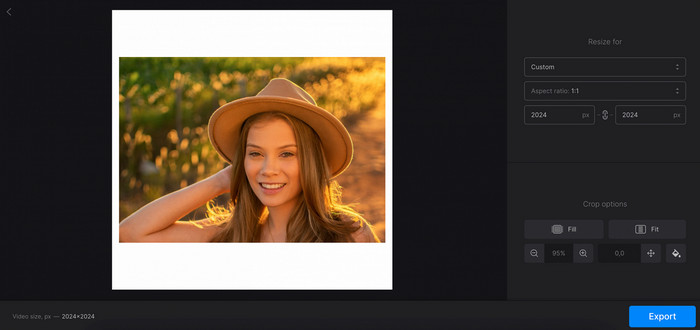
Top 5. Canva
Canva online video resizer is simple and effective for changing dimensions for YouTube, TikTok, and Instagram videos. No installation is needed; just upload the video, resize it, and export it directly from your internet browser.
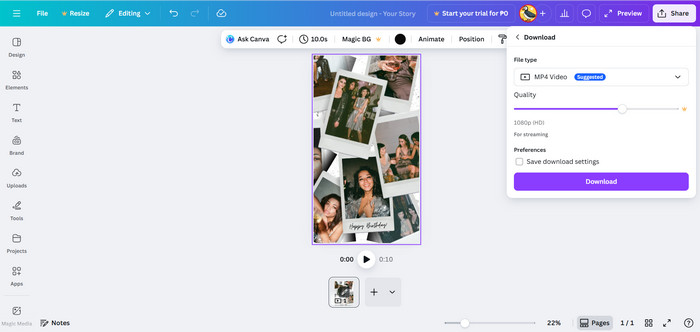
- Canva Video Editor allows social media format resizing in no time.
- Any device and browser.
- Intuitive and easy workflow for novices.
- Full-quality exports need a paid plan.
- An internet connection is a must.
Top 6. Clideo
Clideo offers quick, simple, and fast video resizing through a web browser. You can choose from the dimensions given, or set your own is ideal for resizing videos for casual use or social media.
- Custom size and preset options available.
- Free version for small video uploads.
- Any platform via browser.
- The free plan adds watermarks.
- Editing options are limited.
Top 7. VEED.io
VEED.io is a web-based video editor and resizer. It lets users change the resolution, aspect ratio, and framing in HD quality, ideal for content creators and social media managers.
- It instantly resizes and reformats videos.
- User-friendly drag-and-drop upload.
- Social media presets are included, and it maintains HD quality.
- Large video files take time to process.
- The system is dependent on your upload and download speeds.
Comparison Table
| Tool | Tipard Video Converter Ultimate | VLC Media Player | CyberLink PowerDirector | Shotcut | Canva | Clideo | VEED.io |
|---|---|---|---|---|---|---|---|
| High-Resolution Conversion |  |
 |
|
|
|
|
|
| Aspect Ratio Control | |
|
|
|
|
|
|
| Batch Processing | |
|
|
|
|
|
|
| Video Compression | |
|
|
|
|
|
|
| Speed Optimization (GPU) | |
|
|
|
|
|
|
| Editing Tools | |
|
|
|
|
|
|
| Watermark-Free Export | |
|
|
|
|
|
|
Top 9. Bonus: How to Convert Video Resolution: A Quick Guide
To change the video resolution while keeping quality manageable and in control, follow these specific steps.
Step 1 Download and Install the Tool
Go to the official Tipard Video Converter Ultimate site and download the installer for your operating system, and complete the download. This is a simple downloading tool. Then follow the setup guide to install and open the program on your computer.
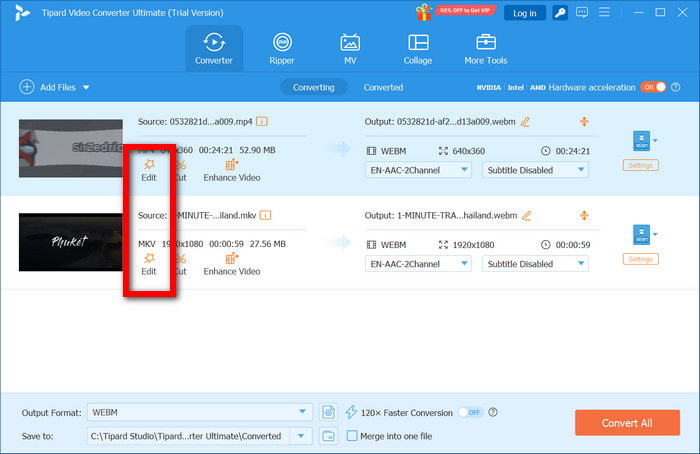
Step 2 Add the Video File
On the main interface, click the Add Files button, which will allow you to import the video you wish to convert. The software also allows the user to upload multiple videos at the same time if needed, which will aid in batch processing.
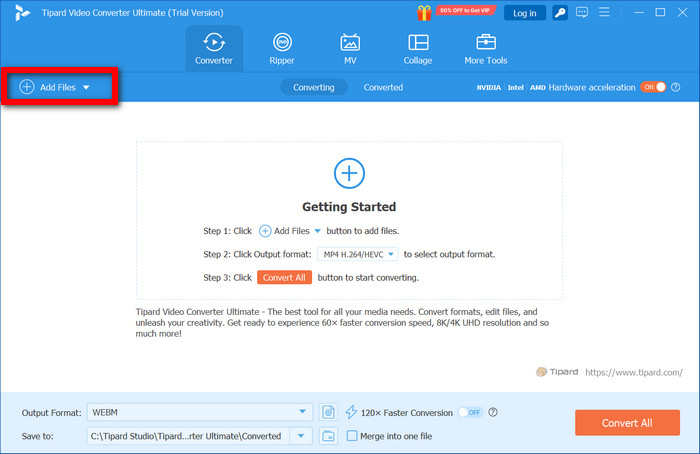
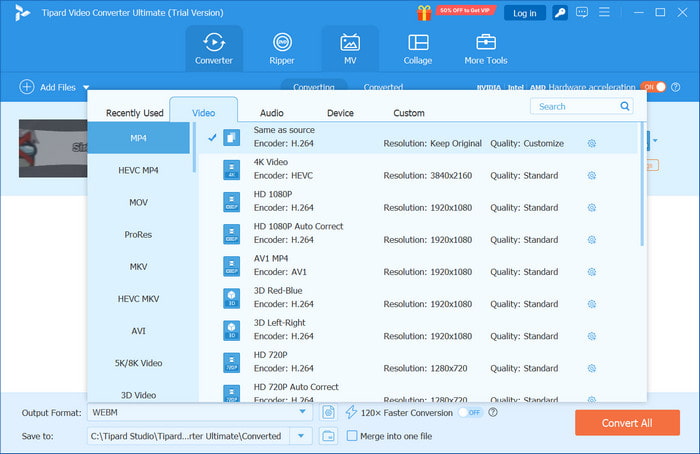
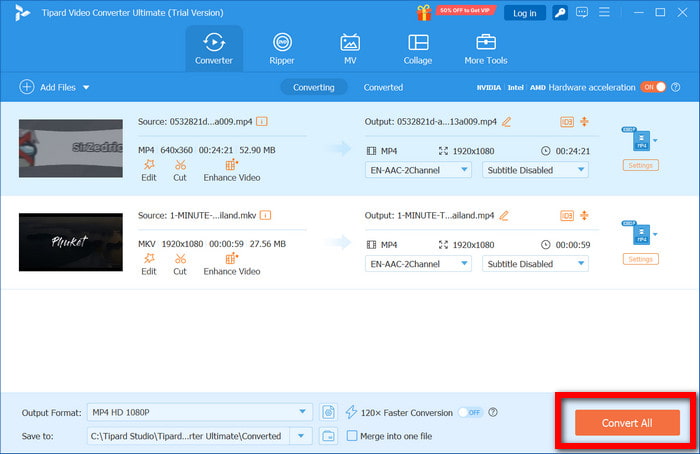
Step 3 Choose the Output Format
Go to the Output Format option, which is a drop-down menu on the right of the screen. A menu will open, and you have formatted it the way you like. You may select the format you would like for your video.

Step 4 Select the Desired Resolution
You will be given multiple options to choose the format you would like to convert your video to, as well as basic details like 720p resolution, 1080p resolution, 4K resolution and 8K resolution, which will help in quality.
Step 5 Edit Video
Prior to conversion, the Edit button allows you to adjust your video. Here, you can crop, trim, rotate, subtitle your video, and apply filters and effects to help polish your video.
Step 6 Convert and Save Video
When you are happy with the settings, tap Convert All. Tipard will take the video in the resolution and format you chose and will save the edited clip in your output folder.
Conclusion
Knowing how to convert video resolution is fundamental in optimally maintaining quality, irrespective of the device or platform. Tipard Video Converter Ultimate is one of the most effective tools to help you upscale, resize, and enhance your videos, as well as make sure that every output is clear and professionally edited for personal and creative projects.
More Reading

About the Author