While many screen recorders offer a variety of options, not all of them provide a balanced combination of usability and features. Icecream Screen Recorder, however, is a cut above the rest as far as quick and effortless high-quality captures go. This lightweight tool is handy when it comes to capturing gameplay, creating tutorials, conducting online lessons, and even taking screenshots. Icecream provides webcam overlays, real-time annotations, and a budget-friendly license, and so strikes the right balance of power for casual or even professional use. This is a tool worth taking a look at.
Part 1. What Is Icecream Screen Recorder
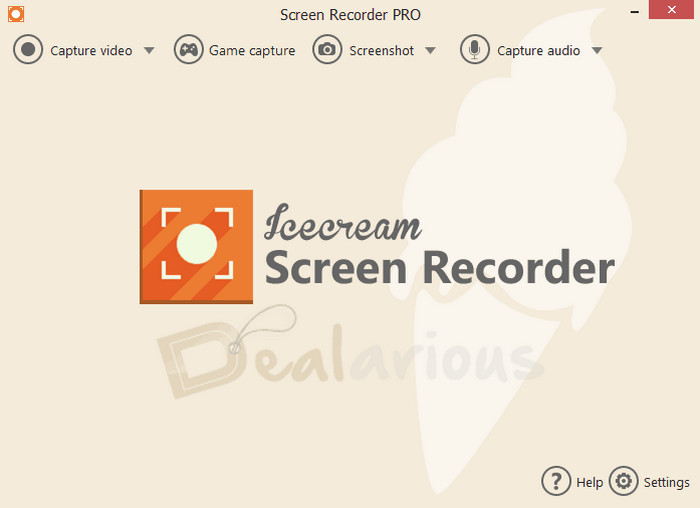
For Windows and Mac users, Icecream Screen Recorder is a lightweight yet powerful screen capture tool. This software comes equipped with features to record a desktop, particular windows, gameplay, and even take screenshots. It has a user-friendly interface that allows even the newest users to get off to a good start, and optional webcam and annotation tools make Icecream even more useful.
Key functions include:
- Recording of the screen for tutorials, meetings, and webinars.
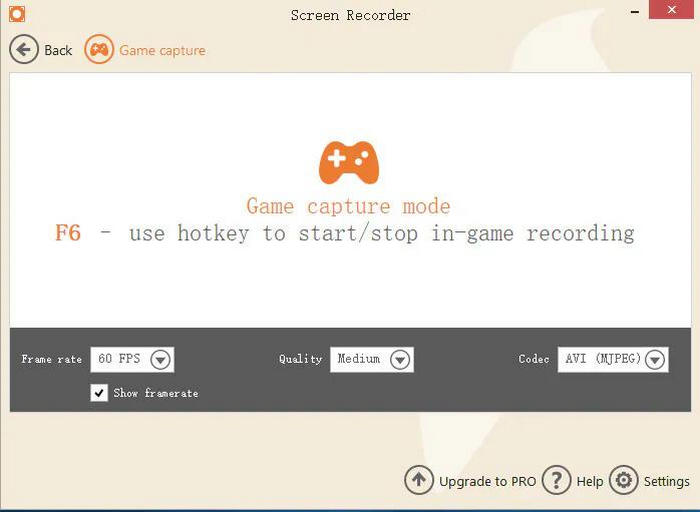
- Recording of computer games with a frame rate up to 60 FPS.
- Taking screenshots of the full screen, as well as parts of it.
- Overlaying webcam images to include the user in the recordings.
- Text and drawings highlighting tools for annotations.
- Recording of system sound, microphone sound, or both.
Part 2. Full Icecream Screen Recorder Review
Recording Options
You have an option to record a full screen, a section, or just around the cursor. There is a specific Game Mode to record gameplay at a maximum of 60 FPS. Uncommonly for lightweight recorders, multiple regions can be recorded simultaneously, making it even suitable to record Roblox videos with smooth performance.
Annotations and Editing
One of the most notable abilities is the option to sketch and mark the screen as the video is being recorded. It is also possible to add arrows, words, sections, and highlights live. Once the video is done, the only edits possible for the video are to trim the start or end. For anything more complicated than that, one would need to use a separate video editing software.
Pros & Cons
- Beginner-friendly design
- Real-time annotations while recording
- Game mode with 60 FPS support
- Webcam overlay
- Affordable lifetime license
- The free version is too restricted
- No MKV or H.265 codec support
- Limited editing tools
- Scaling issues on 4K displays
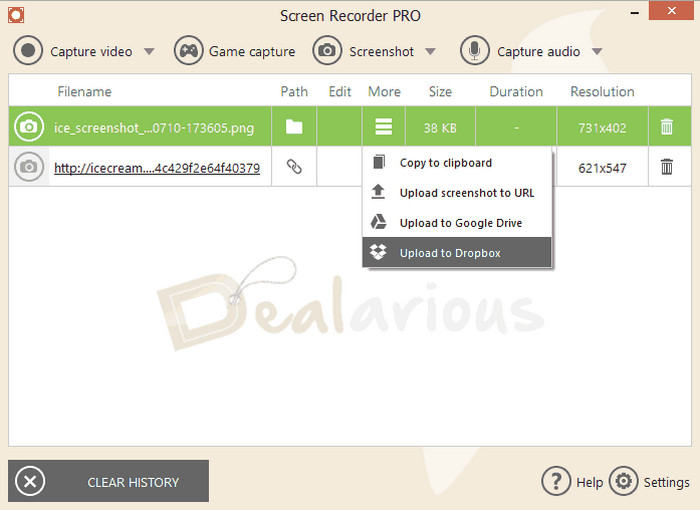
Screenshots and Sharing
Screenshots can also be taken at the same time and edited with highlights, arrows and notes. Files can be shared directly through Google Drive, Dropbox or through its own cloud. One concern, however, is the lack of HTTPS security on their cloud.
Webcam Integration
With the Pro version, a webcam video can be superimposed during recording, which is great for tutors or gamers who want a facecam feature. You can resize the webcam box to any dimensions and shift it to any position on the screen.
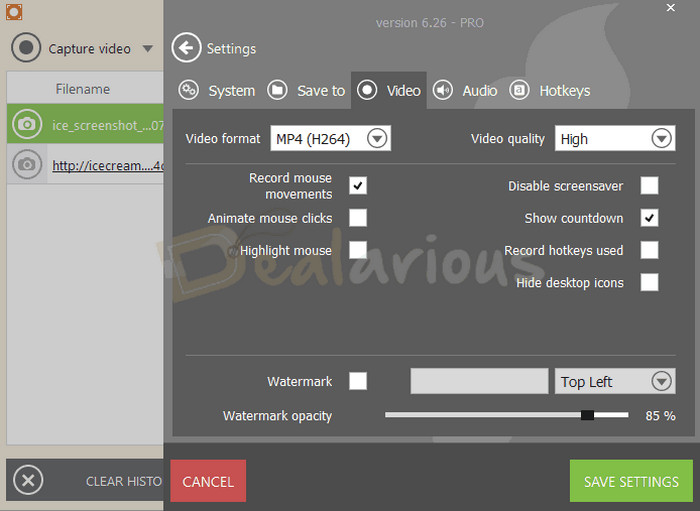
Audio Capabilities
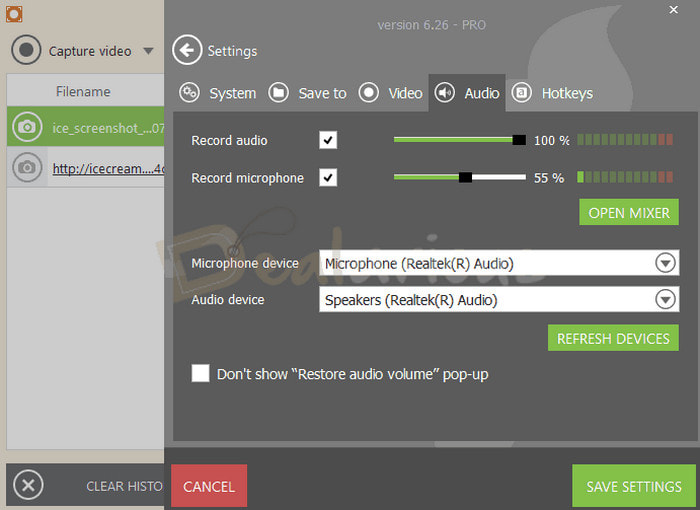
Icecream captures system sounds and microphones at the same time. Although the software does not provide advanced bitrate controls, it works well as an audio recorder, making it good enough for creating tutorials, making calls, or basic content creation.
Output Quality
Both screenshots and video recordings are crisp, though Icecream struggles on 4K monitors, where scaling issues make it less reliable. For most standard HD use cases, however, the output is smooth and clear.
Pricing & Value
| Plan | Price (Lifetime) | Best For |
|---|---|---|
| Free Version | $0 | Quick captures with a 10-minute limit and a watermark. |
| Pro Version | $17.97 - $25.99 | Unlimited recordings, multiple export formats, and editing tools. |
Part 3. How to Use Icecream Screen Recorder
The process to get started is streamlined and can be done in under five minutes:
Step 1 Install from the official website and get the 54MB installer. It will be downloaded alongside video clips from smartphones and video recording devices like Windows and Macs.
Step 2 Start the application, and the home screen will show four windows for the user. They include Capture Video, taking a screenshot, game recording and settings.
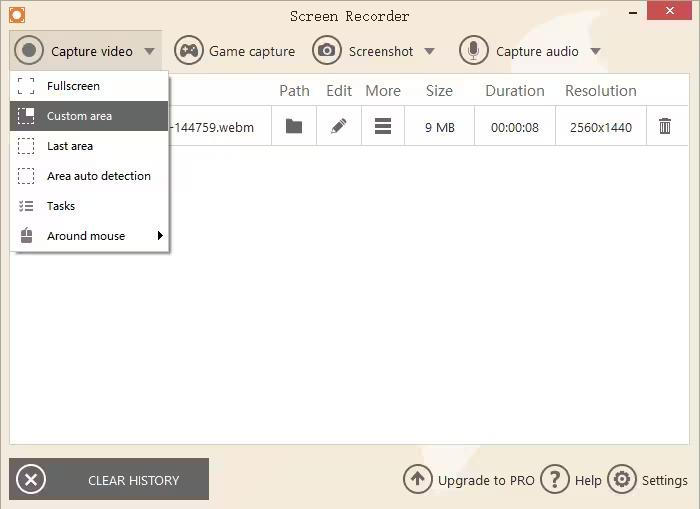
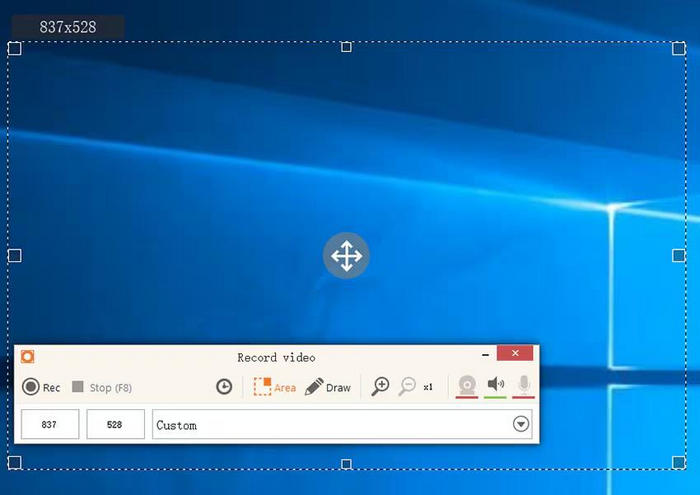
Step 3 The user can choose from a rectangle, full screen, and cursor rectangle mode to choose the recording area.
Step 4 Recording starts with the red Rec button or by pressing F8. While recording, annotations with text, shapes, and arrows can be added.
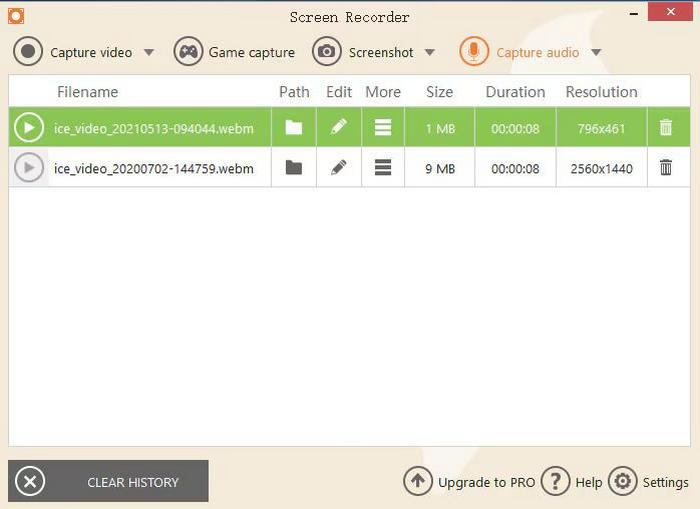
Step 5 F8 will stop the recording, and the file will automatically be saved and listed in the recordings library.
Step 6 Optional settings include Game Mode for smoother FPS, webcam overlays, or advanced formats for output in the Pro version.
Part 4. Perfect Alternative to Icecream Screen Recorder
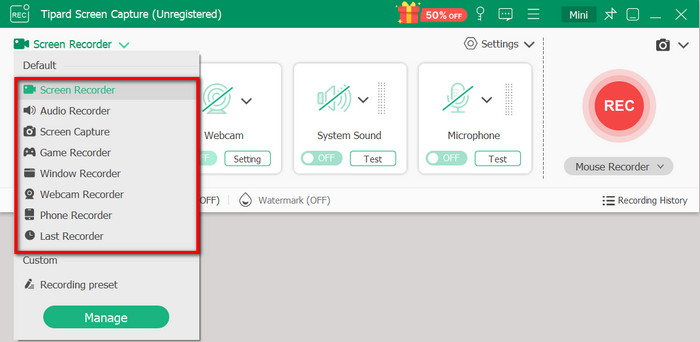
Tipard Screen Capture allows users to record any screen activity effortlessly and in excellent quality. This application can record video tutorials, capture gameplay, and even hold online meetings. It can also record from other devices, including smartphones. It offers flexibility for Windows and Mac users, and anyone can create professional recordings without a steep learning curve.
- Record screen, audio, webcam, gameplay, or phone in any area you choose.
- Capture smooth videos in top resolution, saved in MP4, MKV, and more.
- Instantly review, trim, merge, or snapshot your recordings.
- Clean design with cursor effects and keystroke display for tutorials.
- Runs on Windows and Mac, with support for iPhone and Android capture.

Step 1 Tool Download and Installation
For Tipard, and its official website, locate its download link for Windows or Mac. Follow the setup instructions, and launch the program upon installation completion.
Step 2 Selecting Recording Options
Select an option from its main interface, either Screen Recorder, Audio Recorder, Screen Capture, and more. In the case of capturing gameplay, you may also connect your phone or get it ready.
Step 3 Customize the Software Parameters
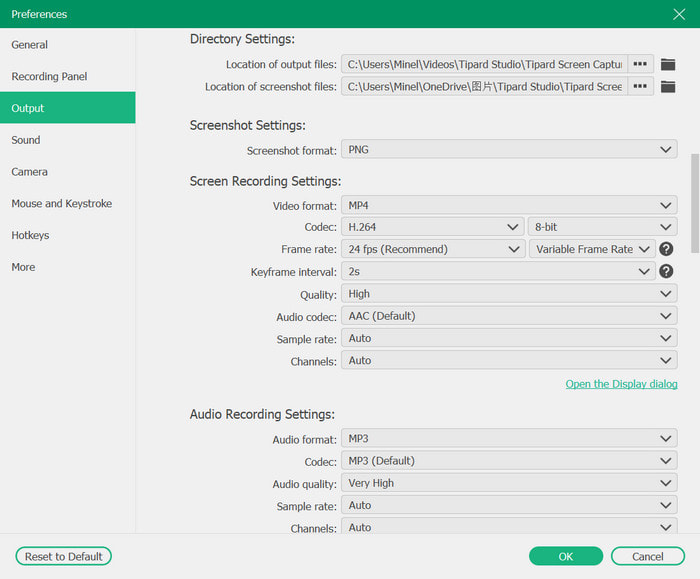
Set the audio sources, output format, video quality, and other relevant components in the Settings button. Make sure to activate the mouse cursor effects and keystroke display for the tutorial’s purposes to enhance its quality.
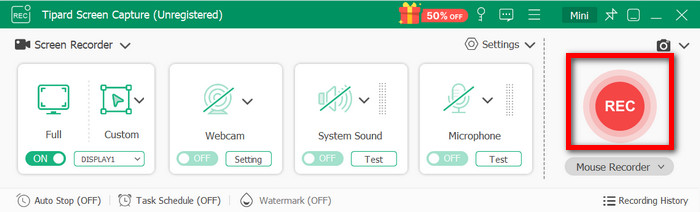
Step 4 Recording Process
Capture your screen by pressing the REC button. During the recording session, you can also draw on the screen, add callouts to your presentation, or add images. For your explanations, you can also use the whiteboard feature.
Step 5 Post Production and Exporting
The recording can only be reviewed and edited by trimming it in the preview window. Once completed, click the Stop button. It can be saved in the format of your choice and shared directly to different platforms.
Conclusion
This Icecream Screen Recorder review shows that the software is a simple yet capable choice for everyday screen recording needs. From tutorials and meetings to gameplay and quick snapshots, it delivers reliable performance with an easy-to-use interface. While its editing tools and advanced options are limited, the affordable lifetime plan makes it attractive for casual users. For those seeking more flexibility and professional-grade features, Tipard Screen Capture serves as an excellent alternative without sacrificing ease of use.
More Reading


About the Author