Looking to compress MP4 videos without losing quality? This guide covers the easiest desktop, command-line, and online methods to reduce MP4 file size quickly. From Tipard Video Converter Ultimate to VLC, HandBrake, FFmpeg, and free online tools, you will learn step-by-step how to shrink videos while maintaining clarity and compatibility.

Part 1. How to Compress MP4 Easily and Quickly
Tipard Video Converter Ultimate is one of the best desktop solutions because of its speed and ease of use for MP4 compression. Thanks to its support for over 500 formats and multiple built-in editing tools. MP4 files can be compressed depending on your preferences. If you prefer to control the size of the file yourself, you can use one of the tools in the software for free compression at your preferred size. If you want to do simple compression, the software also edits videos. The software is useful for editing videos.

- It adjusts the compression rate with a simple slider.
- You can set a target MP4 file size.
- It supports batch MP4 compression.
- It lets you change codec, frame rate, resolution, and bitrate.
- It includes a trimming tool to reduce file size.

Method 1. Compress MP4 Using the Built-in Video Compressor Tool
Step 1 Download and install Tipard Video Converter Ultimate Software on your computer and then start the software.
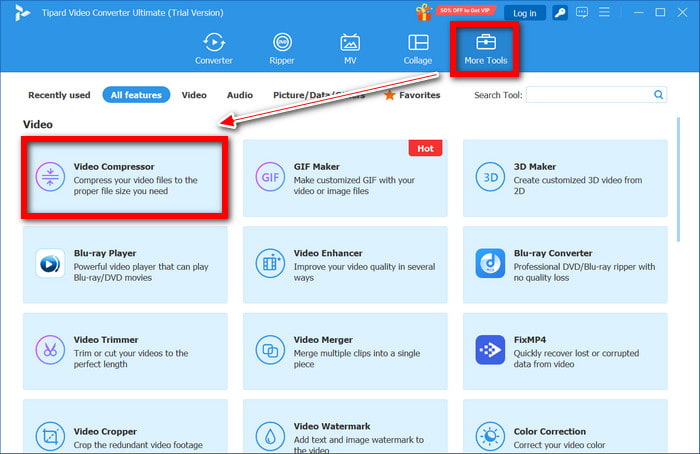
Step 2 Once the software is launched, in the main interface of the software, click on the More Tools tab and open Video Compressor.
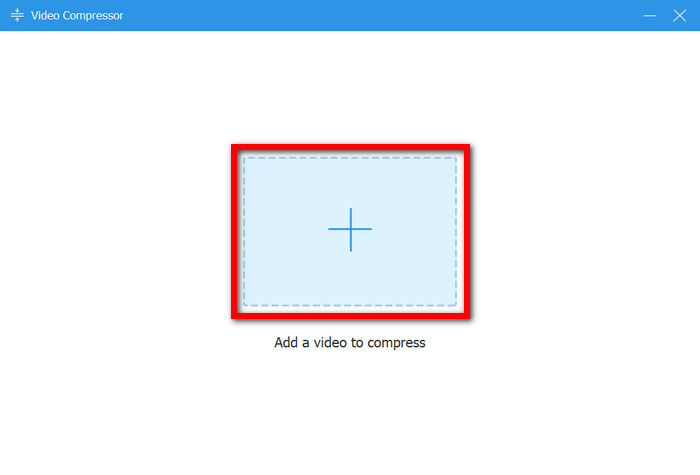
Step 3 Click the Add button to import the MP4 file that you want to compress into the software.
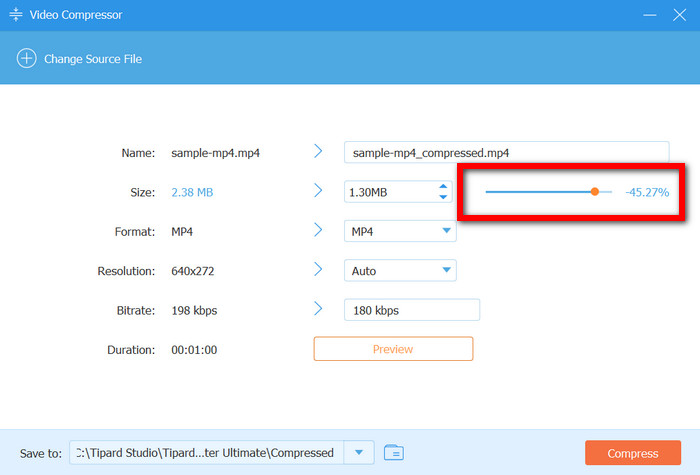
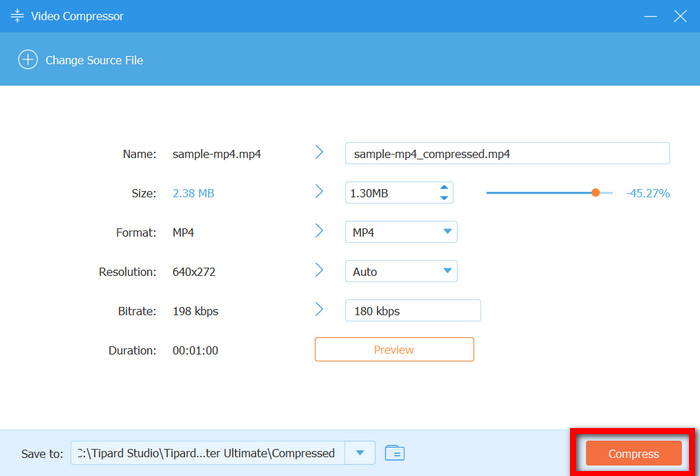
Step 4 Adjust the Compression Rate (Size) slide to your desired file size or enter the file size you want. If you want to, you can also change the output file type, output file resolution, and output file bitrate.
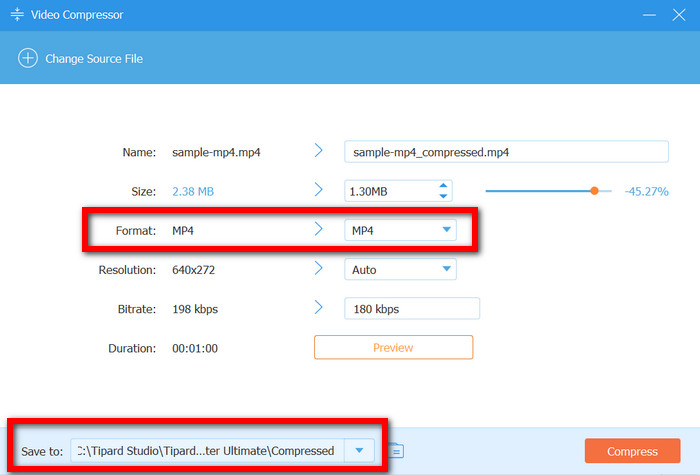
Step 5 Once you have the desired file size or adjusted the compression rate, select the Output File to your desired destination folder on your computer.
Step 6 After you have done all the previous steps, click on Compress to reduce the file size of the MP4 file and save the compressed file.
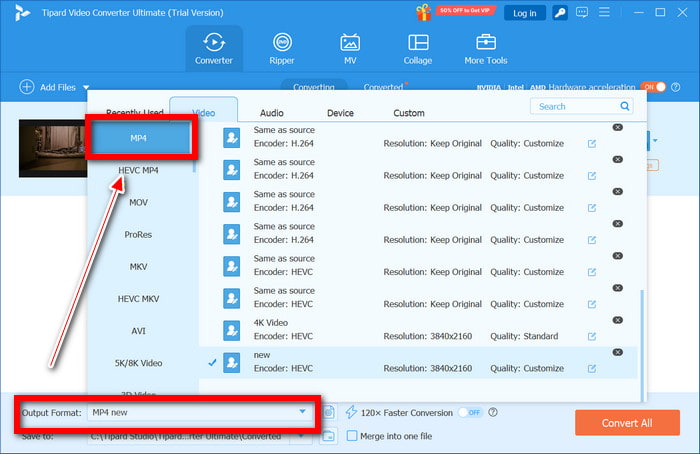
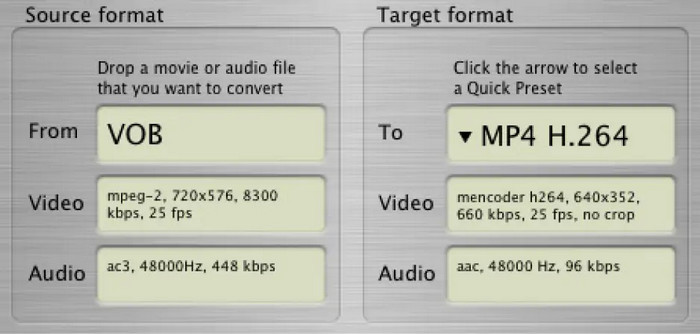
Method 2. Compress MP4 by Editing Output Format Settings
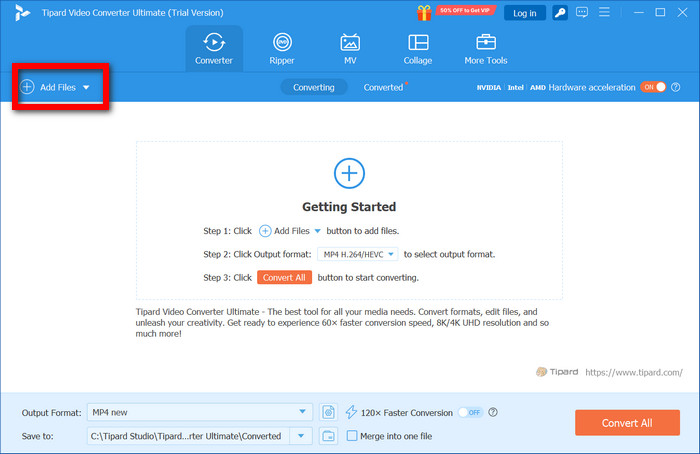
Step 1 Start the tool software to compress your video, and click Add Files to import the MP4 video that you want to compress.
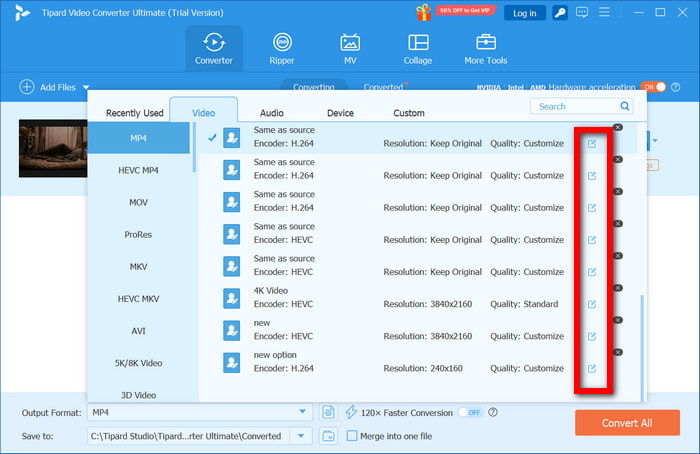
Step 2 Click on the Output Format button. Then, under the Video tab, choose MP4.
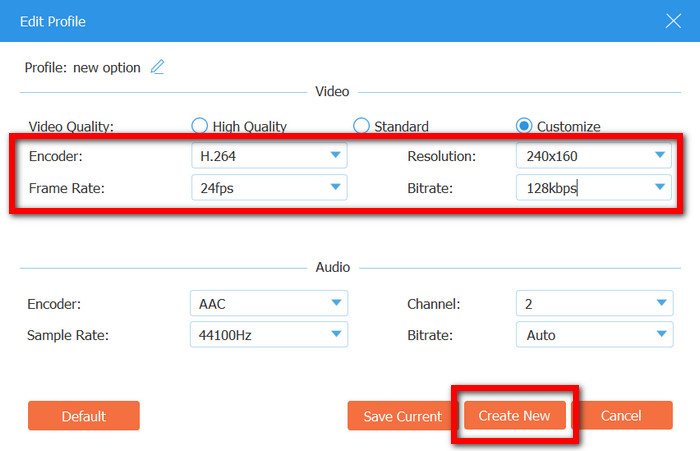
Step 3 You will see multiple MP4 options. You should click the Pen button near one option so you can toggle some profile settings.
Step 4 In the Profile Settings menu, you will be able to reduce the size of your MP4 file. You can lower the video resolution, the frame rate, the video bitrate, and or change the codec.
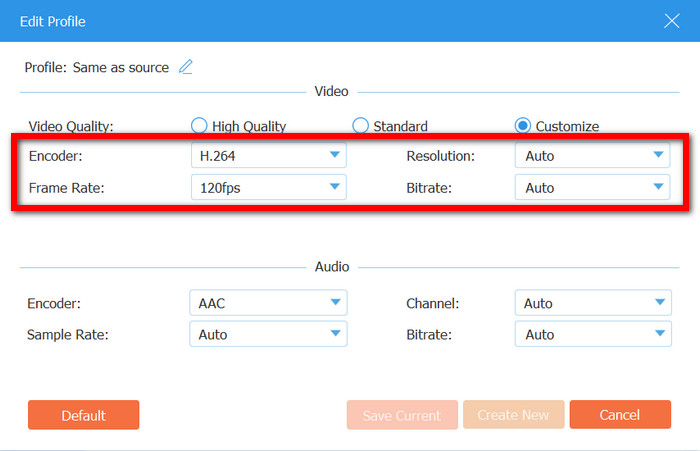
Step 5 Once you finish setting adjustments and renaming the Profile, click Create New to make a custom profile.
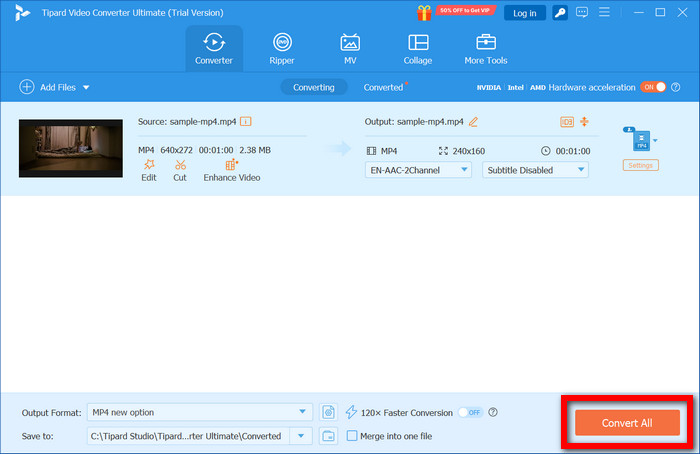
Step 6 To finalize the profile settings for an MP4 file, you need to select a destination output folder and press Convert All to create the file with the modified settings.
Method 3. Compress MP4 by Trimming the Video
Step 1 You can start by opening Tipard Video Converter Ultimate and clicking Add Files to upload an MP4.
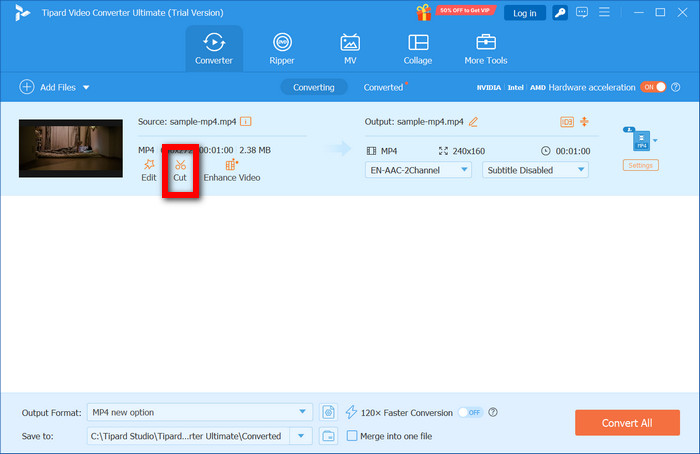
Step 2 There will be a video thumbnail where you can select the Cut option.
Step 3 You can eliminate any parts of the video by adjusting the sliders or putting in the start and end times.
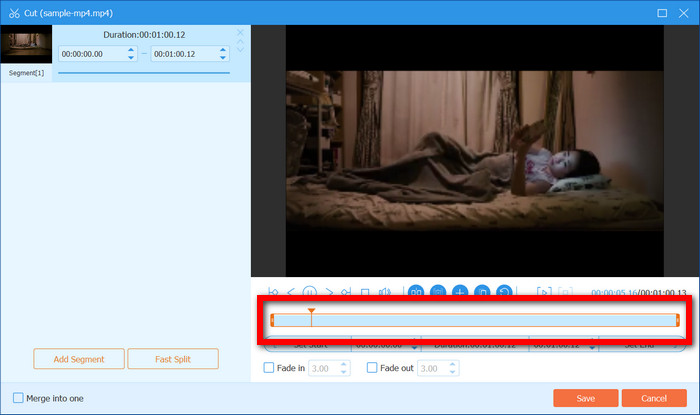
Step 4 Once you Save the segment you want, you should be brought back to the main screen.
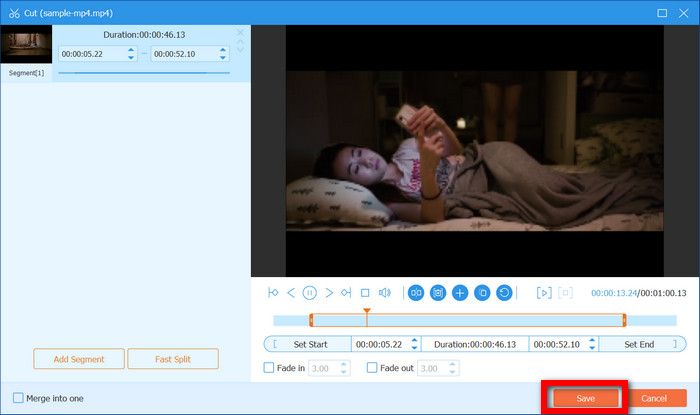
Step 5 You can select MP4 to be the Output Format and change the quality settings if you would like to.
Step 6 You can hit Convert All to save the MP4 file that is shorter in time and size.
Part 2. How to Compress MP4 Video with VLC
OS: Windows, macOS, Linux
Best for: Users who already use VLC and want a simple, free desktop option.
Vlc Media Player is better known for being an open-source media player; however, it does include a feature for video conversion and compression, though very basic.
Step 1 Open VLC Media Player, select Media and then select Convert/Save.
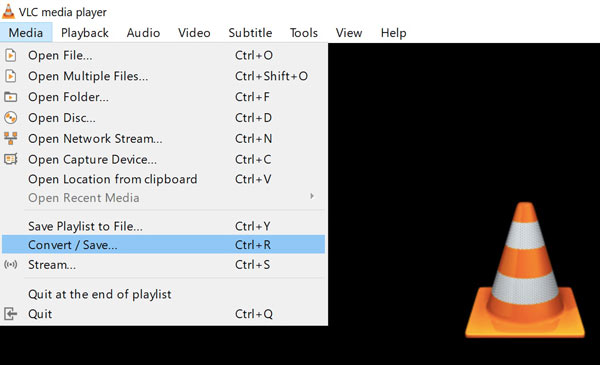
Step 2 Select your MP4 file using the Add command, and then select Convert/Save again.
Step 3 Select as output profile Video - H.264 + MP3 (MP4).
Step 4 Click the Edit Profile button, go to the Video Codec tab and lower the bitrate for the video.
Step 5 Select the folder where the converted file will be located, enter the file name as your choice, ensure that it ends in .mp4, and then click Start.
- A good option where the user does not have to pay any fees.
- Users of different operating systems can make use of it.
- High volumes of files will take a long time to convert.
- Users cannot preview the videos in real time or view the file size.
Part 3. How to Compress MP4 Video with HandBrake
OS: Windows, macOS, Linux
Best for: Users who want detailed control over bitrate and quality for free.
HandBrake, on the other hand, is an open-source video transcoder and is a better option over vlc as it gives the users more control. Through enabling users to adjust bitrate, resolution, and encoding settings, it places HandBrake as a good option for users willing to learn how to work its interface.
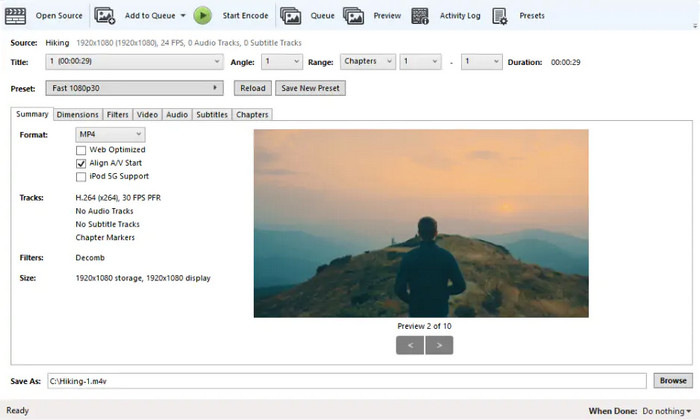
Step 1 On your computer, download and open Handbrake.
Step 2 Select Open Source and choose the MP4 you want to upload.
Step 3 Set your Format as MP4 and set your codec as H.264 or H.265.
Step 4 Alter the bitrate or use Constant Quality to reduce the size of your file.
Step 5 To start compression, select Start Encode.
- Open-source and free of charge.
- Users have control over compression and its level of quality.
- The interface is difficult for new users.
- Limited compression options.
- There is no compression support.
Part 4. How to Compress MP4 Video with FFmpeg
OS: Windows, macOS, Linux
Best for: Advanced users who need automation and batch compression.
FFmpeg is an advanced, command-line compression framework that is best suited for those who need to keep an eye on advanced features or need to automate the process with multiple files.
When using FFmpeg, the compression is as such:
- One can use H.264, setting a CRF value, to have a balance between file size and quality.
- Another option is to use H.265, since it has smaller file sizes and the quality is retained.
- Free and open to the public.
- It is extremely powerful and flexible, offering many options.
- Batch processing is easy and has automation.
- Since the command line is the only option.
- There are no tutorials or other materials to learn with, for the platform has a steep curve.
Part 5. 3 Ways to Compress MP4 Video Free Online
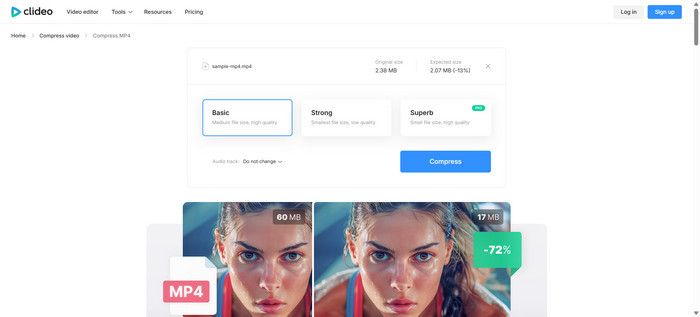
1. Clideo
OS: Any (browser-based)
Best for: Quick online MP4 compression with minimal setup.
Clideo is a quick MP4 compressor that is user-friendly and works entirely from a web browser, eliminating the need for an install. It is ideal for quick, one-time compression services, although the results are free of charge.
Instructions:
To begin, access Clideo and upload a video of your choice by selecting Choose File and finding your MP4 video in your device or cloud storage. Once a video is uploaded, it automatically compresses. Once the video processing completes, you can either download the video with a watermark or purchase a subscription plan to remove the watermark.
- No download required.
- Extremely user-friendly.
- The free plan includes a watermark.
- Very little control over the compression level.
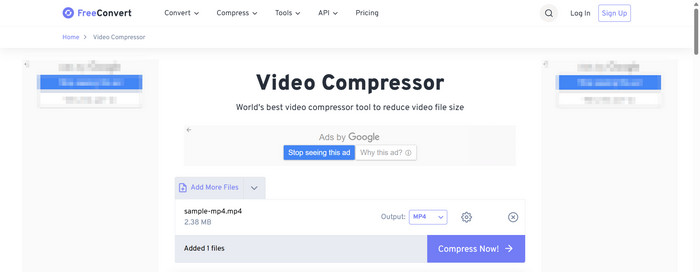
2. FreeConvert
OS: Any (browser-based)
Best for: Fast online compression with file size control and no login.
Online video compressor enables you to compress MP4 videos without creating an account, and it is free of charge. The video can be of a sizable length, and the service is ideal for people in need of quick compression on an internet browser.
Instructions:
Head over to FreeConvert and, by selecting Choose File, upload your MP4 video. There is no need to change anything because by virtue of the FreeConvert interface, defaults are set to recommend maximum compression. Once done, the smaller video file can be downloaded.
- No account creation is required.
- Large file videos can be uploaded.
- The free option gives the least functionality and has limited support for HEVC video extensions.
- Advanced features of the compressor are offered only on a paid plan.
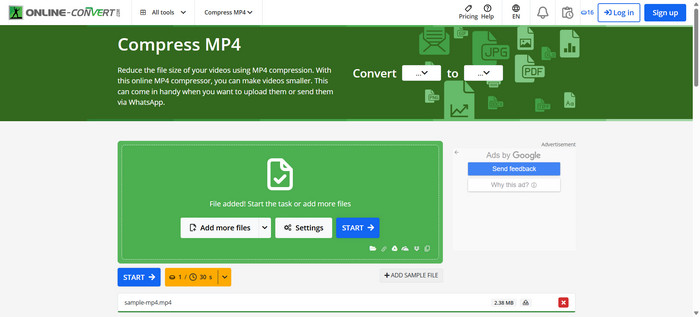
3. Online-Convert
OS: Any (browser-based)
Best for: Short MP4 clips requiring precise bitrate or file size control.
Online-Convert is an online video compressor that provides greater control over MP4 compression and allows you to change your target compression to bitrate and file size. Because of its credit-based system, it is best for short videos.
Instructions:
Visit the Online-Convert website and upload your MP4 file. Enter a target file size, adjust bitrate, or decrease video resolution as needed, then click Start conversion. After the process finishes, download the compressed video directly from the browser.
- Precise size and bitrate controls.
- No software download needed.
- Free plans are very limited.
- Not suitable for long videos.
Conclusion
MP4 compression is easier than ever with desktop tools like Tipard Video Converter Ultimate, VLC, HandBrake, and FFmpeg, or free online options such as Clideo and FreeConvert. Choose the method that fits your needs for fast, efficient, and high-quality video reduction.
More Reading
About the Author