- Method 1. How to Denoise Vdieo in Tipard Video Converter Ultimate
- Method 2. How to Denoise Video in Adobe Premiere Pro
- Method 3. How to Denoise Video in Neat Video
- Method 4. How to Denoise Video in Noise Reducer
- Method 5. How to Denoise Video in Veed
- Method 6. How to Denoise Video in Cleanvoice AI
- Method 7. How to Denoise Video in InShot
Imagine you want to denoise a video and instantly improve its clarity and quality. Whether it is old footage, low-light recordings, or noisy audio tracks, removing unwanted background noise can make your videos look professional. This guide explores seven reliable tools, from Tipard Video Converter Ultimate to InShot, offering step-by-step methods to clean, enhance, and optimize your videos efficiently.

- Method 1. How to Denoise Vdieo in Tipard Video Converter Ultimate
- Method 2. How to Denoise Video in Adobe Premiere Pro
- Method 3. How to Denoise Video in Neat Video
- Method 4. How to Denoise Video in Noise Reducer
- Method 5. How to Denoise Video in Veed
- Method 6. How to Denoise Video in Cleanvoice AI
- Method 7. How to Denoise Video in InShot
Method 1. How to Denoise Vdieo in Tipard Video Converter Ultimate
Tipard Video Converter Ultimate offers multiple functions under its video editing and converting software. Their Video Enhancer function aids in improving portions and fixing videos by removing distracting noise, counteracting the effects of shakiness, and improving the quality. When restoring old video clips or home videos, it is advanced video-restoring and old-home recording software ensures results in quality and clarity, as well as repairing videos with the aid of GPU acceleration.

- Remove video noise and grain for clean, professional-looking visuals.
- Enhance video quality by increasing resolution up to 8K for sharper details.
- Let you view the denoising effect instantly before the final output.
- Denoise multiple videos at once without compromising quality.
- Boost conversion and enhancement speed up to 60x faster.

Step 1 Download and Install
To get the software, start by visiting the Tipard website to get the software by clicking Free Download. When the setup finishes downloading, click on it to run and follow the rest of the instructions.
Step 2 Add Your Video
Click Add Files and choose the video that is going to be denoised. There is also the option of dragging the file to the software. If the user is planning to process multiple videos, multiple files are able to be added.

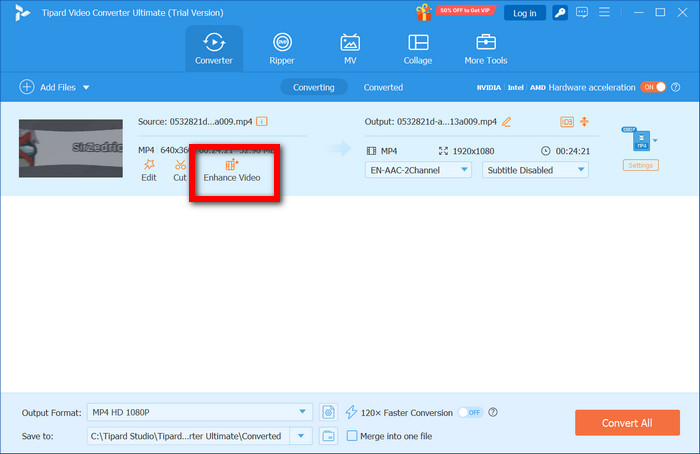
Step 3 Open the Enhance Video Tool
To access the improvement options after you have added the video, click the Enhance Video option on the toolbar or in the Toolbox to open the enhancement workspace, where you can access all the video improvement options.
Step 4 Enabling Remove Video Noise
Next, click on the Remove Video Noise option to eliminate the background grain, which increases the clarity of the video. You may also activate Upscale Resolution and Optimize Brightness and Contrast for additional video improvements.
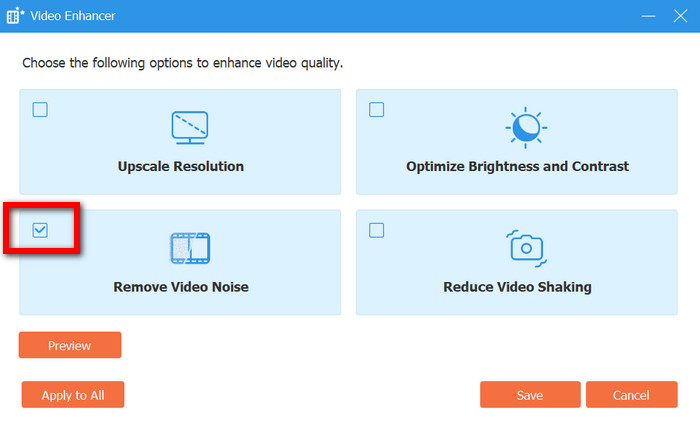
Step 5 Preview and Save
Denoising is enabled, so you can click Preview to see how it looks and Save.

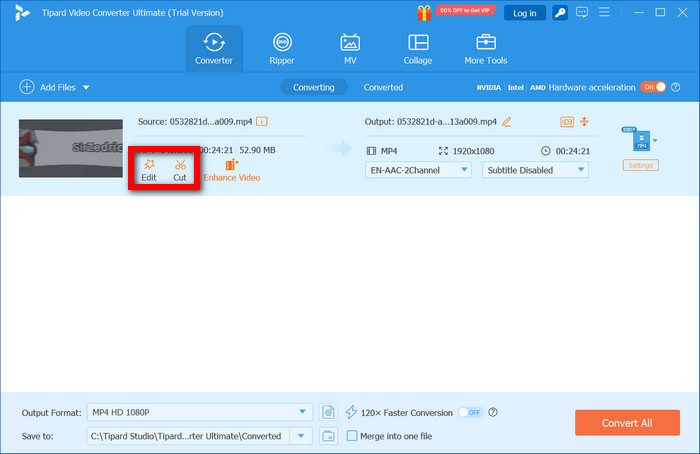
Step 6 Edit or Cut (Optional)
You are free to refine the video further by using the Edit or Cut functions to trim, crop, and rotate, or by adjusting the brightness and applying filters and effects to give it a professional touch.
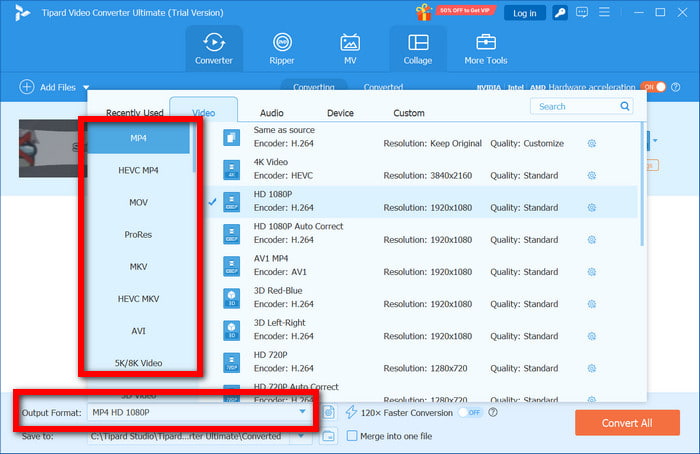
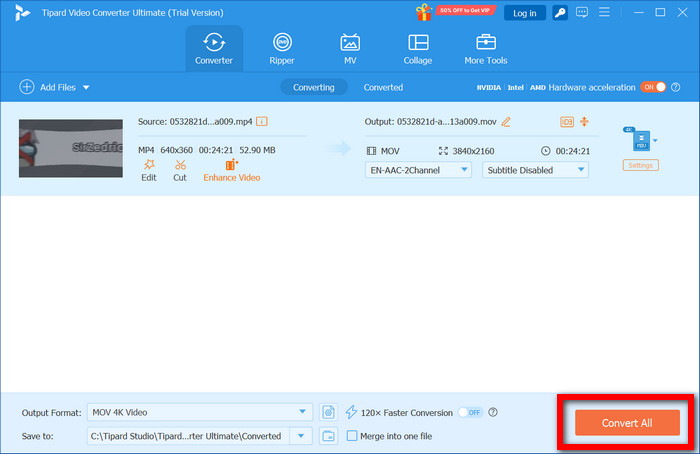
Step 7 Choose Output Format
You can now click Output Format to choose the target output format, which is MP4, MKV, MOV, or a device-optimized preset.
Step 8 Convert All
You are now at the last stage and can click Convert All, so all the changes will take effect.
Method 2. How to Denoise Video in Adobe Premiere Pro
For professional video editing and post-production work, this software works wonders as you can refine and reduce noise, as well as maintain video details. You can also fade audio in Premiere to smooth transitions. The unwanted film grain is gotten rid of, and the overall clarity is enhanced.
Step 1 Launch Premiere Pro and import a video into a sequence.
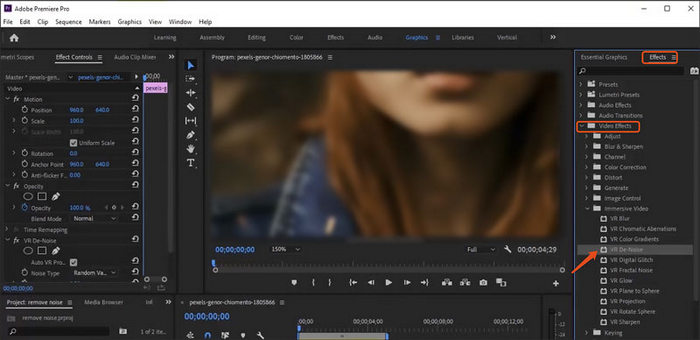
Step 2 Locate VR Denoise or Median inside the Effects panel, drag and drop it into your clip.
Step 3 Access Effect Controls and gradually adjust either Noise Level (VR Denoise) or Radius (Median).
Step 4 Use masks if you only want the effect on certain areas. Render the sequence to check for smooth playback.
Step 5 Use File > Export > Media to export the final video.
Method 3. How to Denoise Video in Neat Video
Neat Video is a professional plugin designed to remove noise while preserving fine detail. It is designed for low-light footage or high ISO recordings. Editors requiring denoising control on high-precision videos will appreciate this plugin.
Step 1 Install the Neat Video plugin for your editor.
Step 2 Import your clip, then apply the Reduce Noise 6 effect to the clip or the adjustment layer.
Step 3 Open the Neat Video window, then select the range of Noise Level.
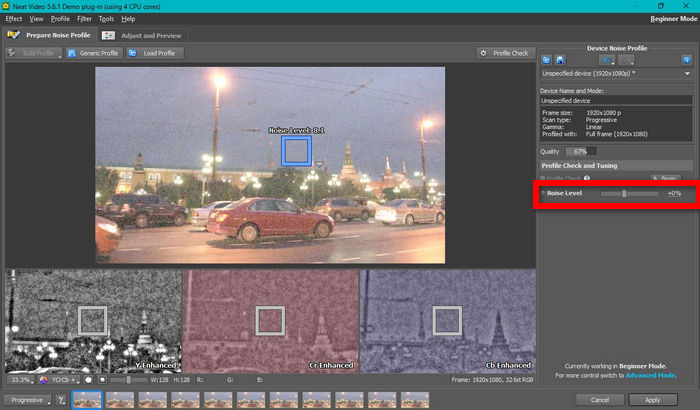
Step 4 Fine-tune your denoising filters (Temporal and Spatial) to retain detail.
Step 5 Apply, then render and export the cleaned video.
Method 4. How to Denoise Video in Noise Reducer
Noise Reducer is an AI online tool designed to remove background noise from video or audio quickly. It is for creators wanting fast noise reduction without complex editing, software, or installation.
Step 1 Open Noise Reducer and upload your video or audio.
Step 2 Let the AI remove background noise or click Denoise.
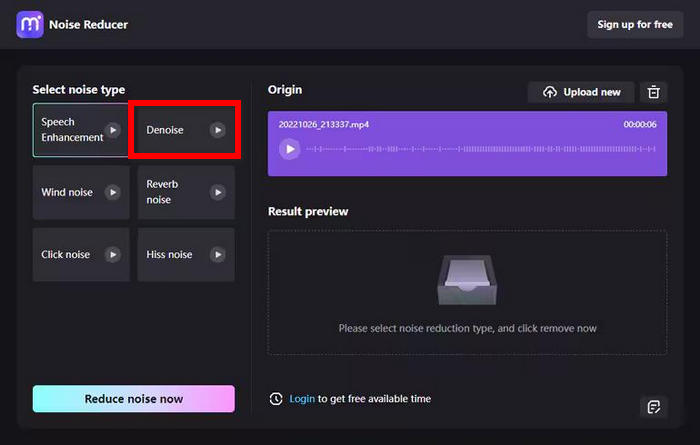
Step 3 If necessary, use the intensity sliders to adjust the levels for a more pronounced effect of noise reduction. Then, take a look at the cleaned-up video or audio.
Step 4 Download the processed file. Re-import into your editor if needed.
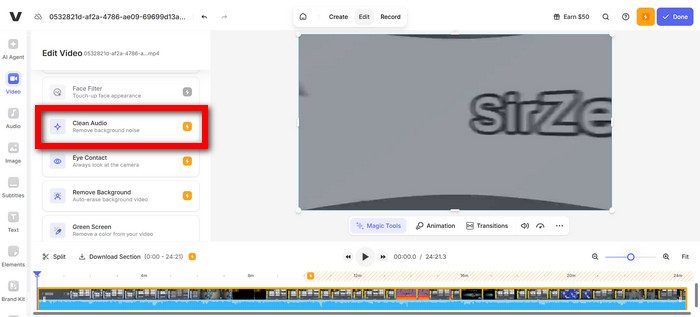
Method 5. How to Denoise Video in Veed
VEED.io converter serves as an online video editor for social media videos, as it quickly eliminates audio and visual distractions. Users may adjust and fine-tune all settings within their browser for audio and video clarity as well as masking distractions.
Step 1 On VEED.io, everyone first uploads their video.
Step 2 Noise can visually be toned by using the Adjust panel for brightness, contrast, sharpness and saturation.
Step 3 To remove noise from the audio track, select the audio track and then click Clean Audio.
Step 4 Improvements can be checked by previewing the video.
Step 5 Additional edits can include trim, crop and filters.
Step 6 The last step is to export the video in the format you want.
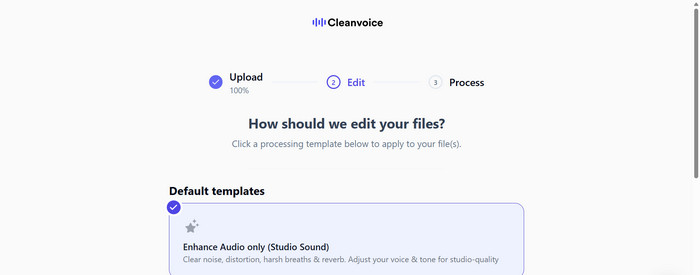
Method 6. How to Denoise Video in Cleanvoice AI
Creators who need professionally sounding and clear audio and video can also use Cleanvoice AI for audio as it eliminates background noise, filler words and audio hums.
Step 1 Using the Cleanvoice AI, first, log in and open it. Then upload your video or audio.
Step 2 The AI eliminates audio distractions and filler sounds automatically. You may preview the file.
Step 3 The final step is to download the processed file.
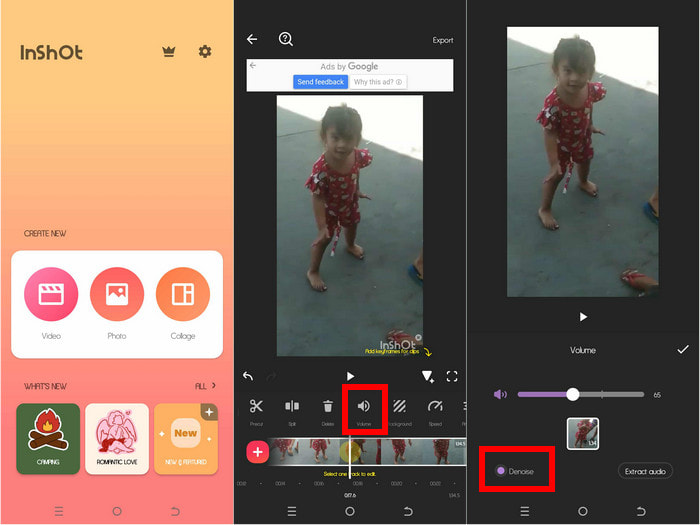
Method 7. How to Denoise Video in InShot
InShot is a mobile video editor with built-in noise reduction tools. InShot helps creators seamlessly edit their videos and quickly eliminate background noise, making it a breeze to produce crisp and professional-sounding audio straight from a smartphone or tablet.
Step 1 Launch InShot and bring your video into the app.
Step 2 Choose Volume, then click Denoise and move the slider to your preferred position.
Step 3 Check the video to confirm the audio is clear.
Step 4 Go to Edit to range from trimming, cropping, rotating, and applying effects.
Step 5 Choose your preferred resolution and format under Output Settings. Export the finished video to complete the denoising process.
Conclusion
Having a good video denoiser helps you change your footage from noisy and unclear to clear and polished. There is more to it; you can smooth the footage and get it to high quality, which helps your audience engage better, thus making your visuals and content more impressive.
More Reading


About the Author