- Method 1. Rotate & Save Permanently in the Photos App (The Easiest Way)
- Method 2. Rotate with More Control in iMovie (For Precision)
- Method 3. Using Third-Party Apps (For Advanced Features)
- Method 4. Try a More Professional Method for the Best Quality
- Troubleshooting. "iPhone Video Not Rotating" & Quality Issues
A video that shifts into the wrong orientation can break the flow of your edit. It can also make your clip look unpolished when you try to post it. This guide explains how to rotate a video on an iPhone in a way that is easy to follow. You will see the top methods for fast edits, precise adjustments, and advanced controls. We will also take a closer look at the pro tools that protect video quality. Last, you will find answers to common issues when your clip will not rotate at all.

- Method 1. Rotate & Save Permanently in the Photos App (The Easiest Way)
- Method 2. Rotate with More Control in iMovie (For Precision)
- Method 3. Using Third-Party Apps (For Advanced Features)
- Method 4. Try a More Professional Method for the Best Quality
- Troubleshooting. "iPhone Video Not Rotating" & Quality Issues
Method 1: Rotate & Save Permanently in the Photos App (The Easiest Way)
The Photos app is the fastest place to fix the angle of any clip on your device. It lets you rotate, flip, crop, and straighten your footage without using extra tools. This is the best choice when you want a quick edit that saves right away. Use this method if you want to rotate movie iPhone files with simple and direct controls.
Step 1 Open the Photos app on your device. Choose the video you want to adjust.
Step 2 Tap the Edit button at the base of the screen. Tap the Rotate button to turn the video left. Keep tapping until the angle looks right.
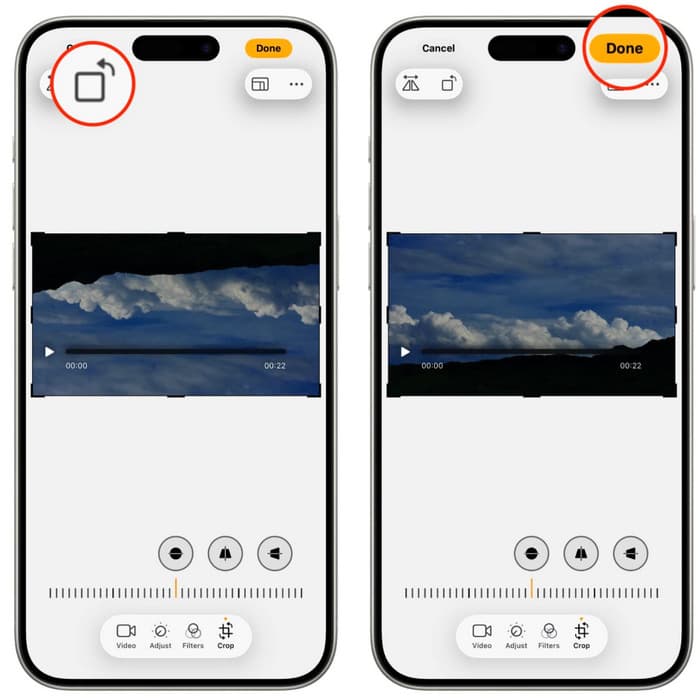
Step 3 Tap the Flip button if you want a mirrored version of the clip. Save your edit to apply the new orientation for good.
Method 2: Rotate with More Control in iMovie (For Precision)
iMovie gives you more control when you need a cleaner and more accurate rotation. It is a free tool from Apple with features like stabilization, color adjustment, and simple effects. This makes it useful when you want to fix the angle without losing quality. It is also a strong choice when you want to handle and rotate video on the iMovie iPhone task with better precision.
Step 1 Open iMovie and upload the video you want to alter. Select the clip, and tap Edit to open it on the timeline.
Step 2 Place two fingers on the video and turn them in the direction you want. A large Rotate button will appear as you turn the clip. Tap Done in the top left corner once the angle looks correct.
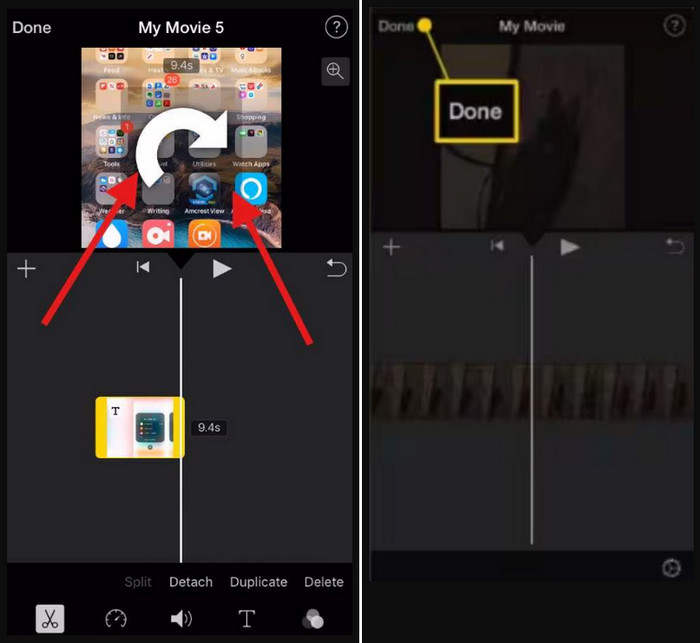
Step 3 Tap the Export icon to prepare the file. Pick Save Video to store the rotated version on your device.
Method 3: Using Third-Party Apps (For Advanced Features)
If you need more control over rotating videos or want additional editing options, third-party apps offer advanced tools and precise adjustments. They are especially helpful when built-in options cannot handle complex rotations or high-resolution footage. Here are three recommended apps, with step-by-step instructions and expert insights for performing a rotate movie on iPhone.
1. CapCut
CapCut is a free, versatile video editor that makes video rotation on iPhone simple and precise. It allows you to rotate, flip, trim, and apply effects easily. CapCut is beginner-friendly yet powerful enough for more detailed adjustments, making it ideal for fast edits while maintaining good video quality.
Step 1 Open CapCut and tap New Project. Import the video you want to rotate from your camera roll.
Step 2 Tap the uploaded file in the timeline and select Edit > Rotate. Tap the Rotate button repeatedly until the video reaches the correct angle.
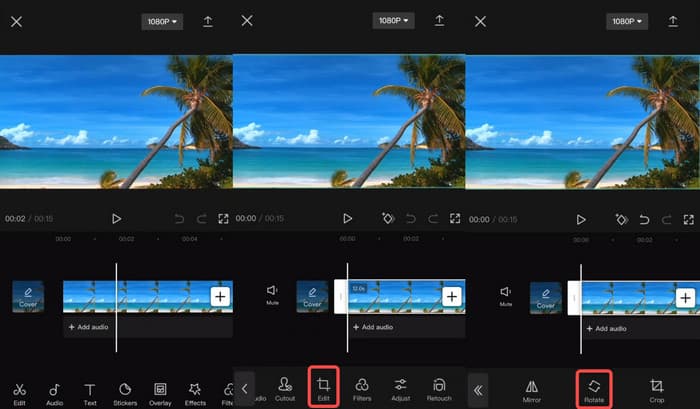
Step 3 Tap Export and save the rotated video to your iPhone.
2. Filmora for Mobile
Filmora offers precise control for rotations, including 90-degree turns, mirrors, and flips. It is especially useful when your iPhone video is not rotating in standard apps. The app also allows previewing edits in real time and supports high-quality exports.
Step 1 Install Filmora from the App Store and open the app. Tap New Project and import the video you want to edit.
Step 2 Tap the clip in the timeline to open the Edit/Trim menu. Select the Rotate tool and choose the direction: Right, Left, Mirror, or Flip.
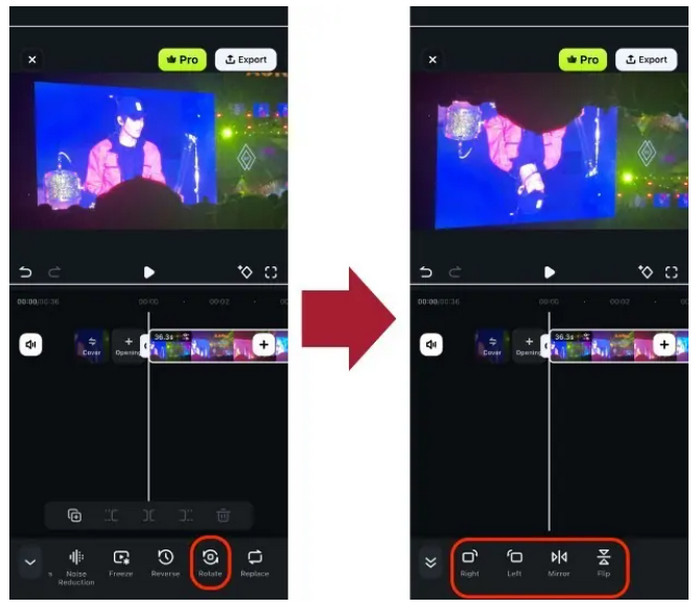
Step 3 Preview the video to confirm it is correctly oriented. Tick Export in the top-right corner to save the rotated video.
3. PowerDirector by CyberLink
PowerDirector is a professional-grade editor that supports high-resolution footage and precise rotations. It is perfect for users who want to maintain top quality while performing iPhone video rotate tasks. PowerDirector also provides tools to crop, trim, and adjust video without introducing black bars.
Step 1 Install PowerDirector from the App Store. Open the app and tap New Project.
Step 2 Import your video into the timeline. Tap Edit > Rotate and tap until the clip reaches the correct orientation.
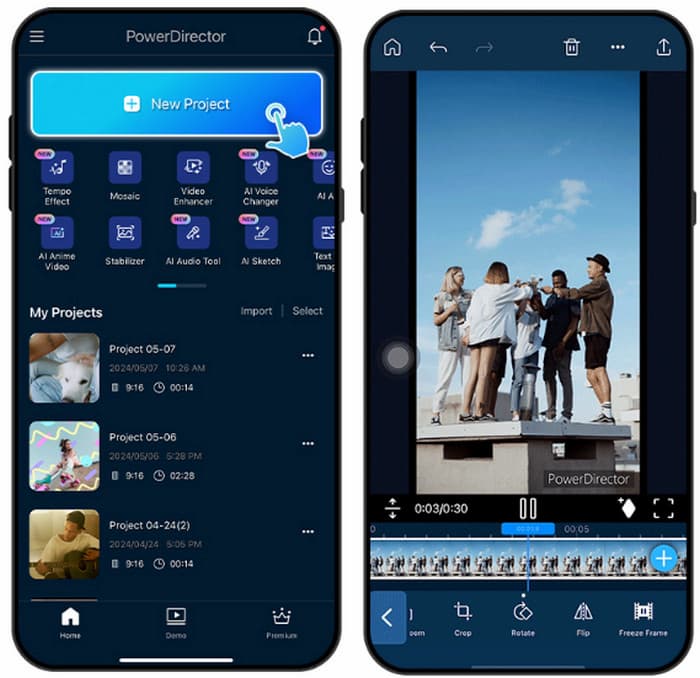
Step 3 Preview the video to confirm the rotation. Tap Save/Export, select your preferred resolution, and save the video.
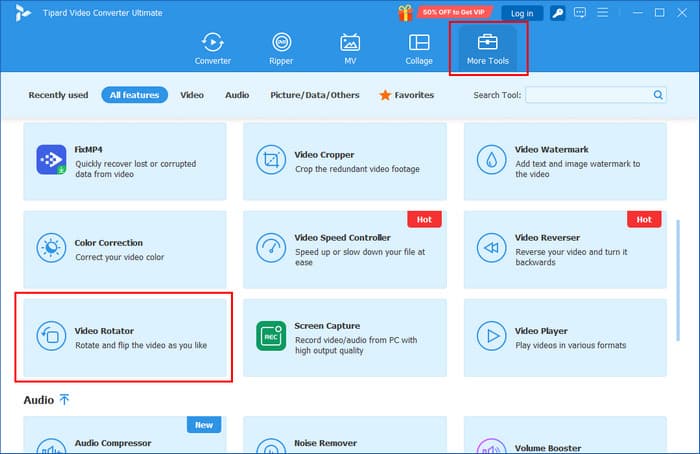
Method 4: Try a More Professional Method for the Best Quality
If you want the best video quality, use Tipard Video Converter Ultimate. It can rotate videos easily and keep the original resolution. You can turn videos 90 degrees or any angle you want. The software works with all common video formats. It can also convert files, improve video quality, and rotate many videos at once. With Tipard, your videos stay clear and look professional.
Step 1 Download and install the Tipard software on your computer by clicking the appropriate download button that we have here.
Step 2 Open More Tools and click the Video Rotator to access the editing feature of the app, wherein you can start rotating it in the way you want to achieve. Then, click the + button to import it here.
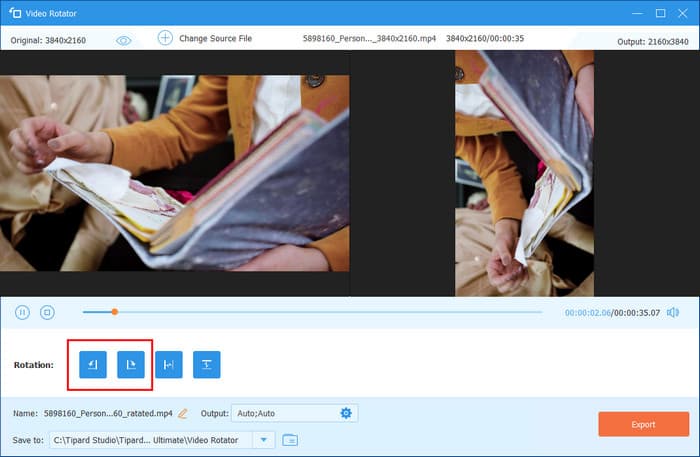
Step 3 On the rotation, choose the left or right button to start rotating the video into the orientation you want to achieve. Likewise, you can also use the other button to flip and turn the video according to what you want.
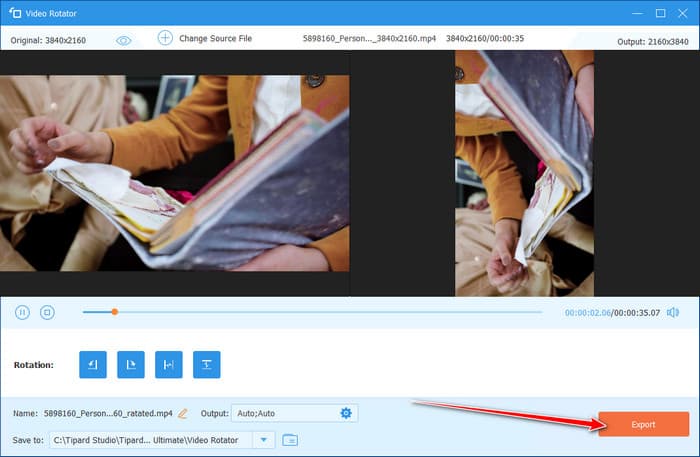
Step 4 Once you are done rotating it, click the Export button to save the final output.
Troubleshooting: "iPhone Video Not Rotating" & Quality Issues
1. The rotation doesn't "stick" after hitting Done
This usually happens when the app fails to save changes. Make sure your iPhone has enough storage and that the video is not locked or from a shared album.
2. The video looks low-quality after rotating
Some apps compress the video when saving. To keep quality, use a professional tool or export at the highest resolution available after you rotate your video.
3. The rotate option is grayed out in Photos
This can occur if the video format is not supported or if the file is corrupted. Converting the video to a standard format like MP4 usually fixes the issue.
Conclusion
Rotating a video on an iPhone is easy with the right tool. You can use Photos for quick edits. iMovie or third-party apps give more control. Tipard is best for keeping the highest quality. By following these methods, you can rotate iPhone movie videos clearly and quickly.
More Reading


About the Author