- Part 1. Why Do You Need to Remove Audio from Video
- Part 2. Remove Audio from Video on iPhone or iPad
- Part 3. Remove Audio from Video on Android
- Part 4. Remove Audio from Video on Windows 10 and 11
- Part 5. Remove Audio from Video on Mac
- Part 6. Remove Audio from Video Free Online
- Bonus: Removing Audio vs. Detaching Audio
Ever had a video with unwanted noise? Ever wanted to replace its music? Ever wished it were completely silent for a fresh start?
Good thing you are here! In this guide, we will show you exactly how to remove audio from video. No matter what device you use, we will introduce the best tools for each operating system to make your videos clean, quiet, and ready for new sound.

- Part 1. Why Do You Need to Remove Audio from Video
- Part 2. Remove Audio from Video on iPhone or iPad
- Part 3. Remove Audio from Video on Android
- Part 4. Remove Audio from Video on Windows 10 and 11
- Part 5. Remove Audio from Video on Mac
- Part 6. Remove Audio from Video Free Online
- Bonus: Removing Audio vs. Detaching Audio
Part 1. Why Do You Need to Remove Audio from Video
A video is not just about what you see. Sound also affects the whole experience. If the audio feels wrong, your video may not work well. Here are simple reasons to remove audio from video:
1. Add New Audio
You may want to add music, a voiceover, or better sound effects. Removing the old audio makes space for new sound that fits the mood.
2. Eliminate Unwanted Noise
Viewers may become distracted by background noise such as wind, traffic, or unrelated sounds. You can replace the audio with a cleaner track by deleting it.
3. Improve Sound Quality
If the sound is unclear or too low, you can remove it and add better-quality audio.
4. Change the Story
Different audio can create a new feeling. It helps you tell the story in a stronger way.
Part 2. Remove Audio from Video on iPhone or iPad
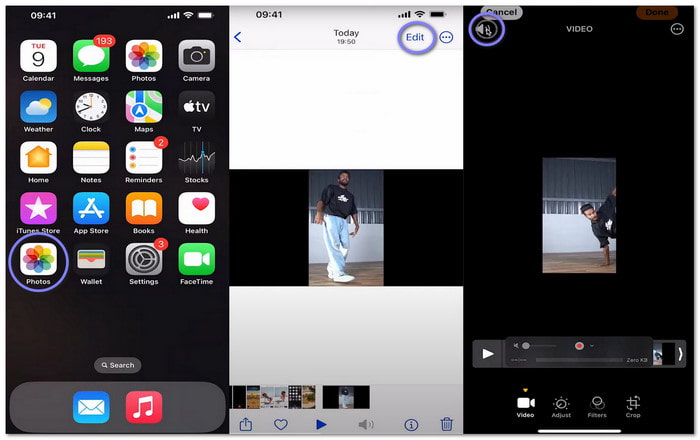
Your iPhone or iPad already has a simple tool to mute videos, and that is the Photos app. It lets you delete audio from video with one tap inside the edit screen. After muting, you can also rotate, crop, or auto-enhance the same clip.
Step 1Run the Photos app and pick the video you want to edit.
Step 2Tap Edit at the top right corner. The editing tools will appear on the screen.
Step 3Tap the yellow Volume option at the top left. Once you tap it, the symbol turns grey. It means the video is now muted.
Step 4Tap Done to save your changes. The video will stay in the app without sound.
Part 3. Remove Audio from Video on Android
If you use an Android phone, Google Photos gives you a simple way of removing audio from video without extra apps. The mute option is built into the editing tools so that you can turn off the volume in just a few taps. Beyond muting, you can trim clips, crop, rotate, apply filters, and stabilize video footage.
Step 1Launch Google Photos and select the video you want to mute.
Step 2Press Edit at the bottom of your screen. Editing options will show up right away.
Step 3Tap the Volume button on the left side. The sound will turn off once you tap it.
Step 4Tap Save copy to keep the muted version on your device.

Part 4. Remove Audio from Video on Windows 10 and 11
For Windows 10 and 11 users, you can count on Tipard Video Converter Ultimate to remove audio from videos easily. It lets you turn off all audio tracks in your video, so you get exactly the silent version you want. It works with a large number of video formats and codecs, which means you do not have to worry about compatibility.
Looking to save time? Tipard Video Converter Ultimate even supports batch conversion, so that you can remove audio from many videos at once without hassle. Plus, it uses full hardware acceleration, making the process super fast and efficient.
Why We Select It
Tipard Video Converter Ultimate supports many formats like MP4, MOV, AVI, and MKV. You can remove audio from those formats, and your muted video is ready in seconds. You can also change the format or improve clarity up to 4K. Even though your video is muted, your video stays sharp and clear.
Now, let us look at the steps below to learn how to remove audio from a video:
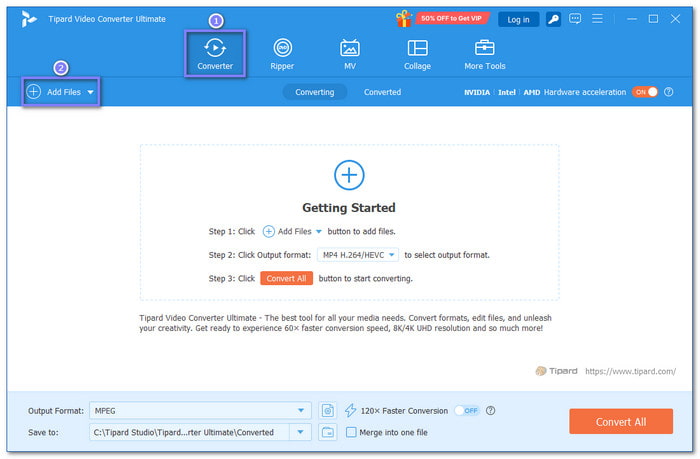
Step 1What you need to do first is to download Tipard Video Converter Ultimate on your Windows 10 or 11 computer. You can also use it on your Mac computer. Then, please install it like any normal program. Once ready, open the program and let it load fully.
Step 2You are now on the Converter tab. Here, click the Add Files button to import the video you want to mute. You can add one file or many videos at the same time.
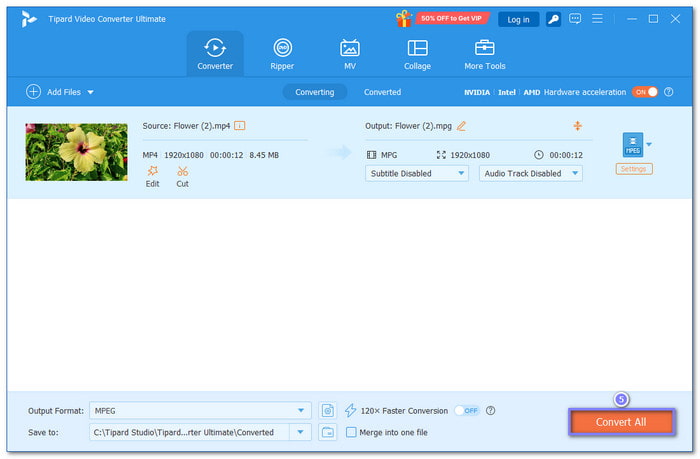
Step 3After the video appears in the list, look for the Audio menu. Then, click the drop-down option beside the audio track. From the list, choose Audio Track Disabled. Once selected, your video will have no sound.

Step 4At last, click the Convert All button at the bottom right corner. The program will process the file and save the muted video to your local folder automatically. And that is it; your video is now clean and silent.
Part 5. Remove Audio from Video on Mac
If you want to delete audio from a video Mac, you do not need an extra program. It is because QuickTime Player 10 is already built in. It is free and ready to use. The program has a direct remove audio feature in the menu, which clears the sound in seconds. After that, you can export the file in your preferred clarity.
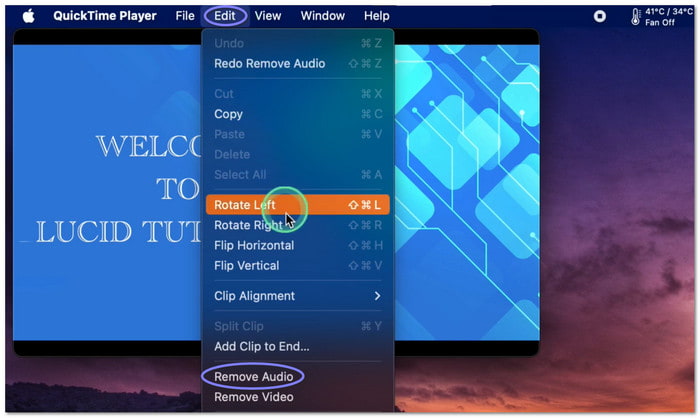
Step 1Run QuickTime Player 10 on your Mac. Click File, then choose Open File to import your video.
Step 2After the video loads, click Edit on the top menu bar. Then, choose Remove Audio from the drop-down list.
Step 3QuickTime will remove the sound right away. Next, click File again and select Export As.
Step 4Choose the video quality, type a file name, pick a location, then click Save. Your video will now be stored without audio!
Part 6. Remove Audio from Video Free Online
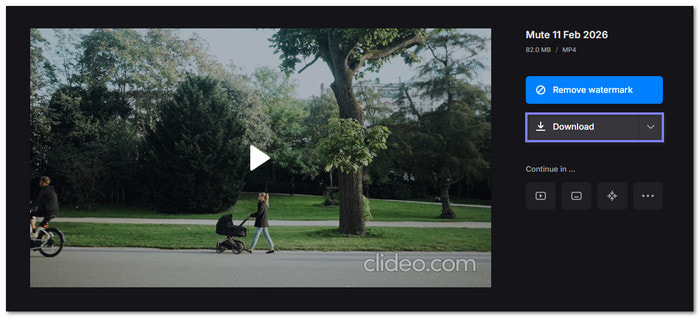
If you prefer an online platform, Clideo offers a quick way to remove audio from video online for free. The best thing about it is that it will automatically remove the sound from your MP4 as soon as the file is uploaded. You can preview the muted video before saving it to your device. However, the free version adds a watermark, which you can remove by signing in.
Step 1Open your web browser and search for Clideo - Remove Audio from Video. On the main page, click Choose Files to upload your video.
Step 2Please wait for the upload to finish. Clideo will automatically mute the video once it is uploaded.
Step 3Preview the muted video to make sure the sound is gone.
Step 4Press Download to save the file. If you want to remove the watermark, you need to sign in first.
Bonus: Removing Audio vs. Detaching Audio
Many people think removing and detaching audio are the same. They are not. Each one serves a different purpose.
Removing Audio
Removing audio means the sound is fully deleted from the video file. After this, the video stays silent forever. You cannot get the original sound back unless you keep another copy.
With Tipard Video Converter Ultimate, you can turn off the audio track before converting. The output video will have no sound at all. It is best when you want a clean and quiet clip.
Detaching Audio
Detaching audio means you separate the sound from the video. The video and audio become two different files. You can edit the sound alone or replace it later.
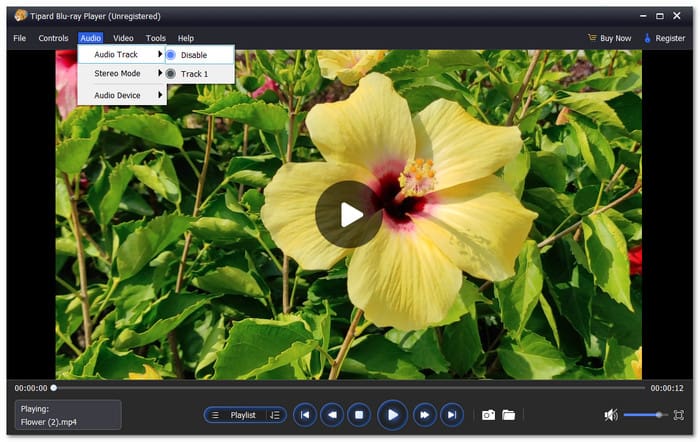
If you only want to play a video without hearing sound, use Tipard Blu-ray Player. It can play videos while turning off audio tracks during playback. All you need to do is click the Audio option, choose Audio Track, then select Disable. You can also mute the volume. The original video will stay untouched.
Conclusion
So many reasons why you need to remove background audio from video. Whether it is unwanted noise, replacing music, or improving sound quality, Tipard Video Converter Ultimate can help. It can completely mute the audio from your video, not just one file, but many at the same time.
More Reading


About the Author