Watching a video ruined by a watermark can be frustrating, especially when you want to share it on social media or use it for a project. Many content creators, students, and marketers often encounter this problem when working with downloaded clips, tutorials, or stock footage. Knowing how to remove watermarks from video efficiently can make a huge difference, saving time while preserving quality. From beginner-friendly tools like Tipard Video Converter Ultimate to professional software like Adobe Premiere Pro, as well as online platforms and mobile apps, there are multiple solutions to help you get clean, polished videos ready for sharing or editing.

Part 1. How to Remove Watermark from Video Easily
Watermark removal generally does not need specialization and can be completed in less than an hour. Using Tipard Video Converter Ultimate is one of the fastest and most convenient options available. This software can seamlessly erase a watermark and maintain the video quality afterward. It contains a video watermark removal tool that can erase logos and texts within seconds. It is suitable for all skill levels as editing professionals can create complex editing and beginner editors can complete easy edits. This software is cheaper than most editing software, which is a plus, as it has a free trial and is sponsored frequently.

- A built-in Watermark tool makes the task simple, even without editing experience.
- Wide format support covers MP4, AVI, MKV, MOV, WebM, and GIF.
- Original video quality stays intact after the watermark is removed.
- GPU acceleration delivers faster processing, even for large or high-resolution files.
- Built-in editing tools like crop, rotate, trim, and filters allow further enhancements.

Step 1 Download and Setup
Get Tipard Video Converter Ultimate from its official site and install it on your computer. Then, open the application after installation is completed.
Step 2 Import the Video with Watermark
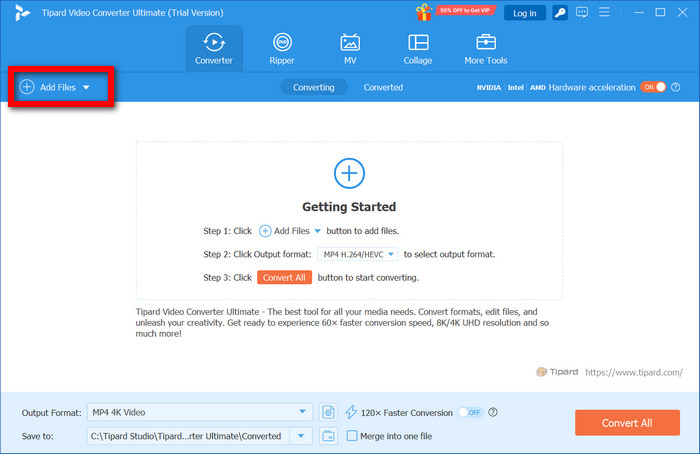
On the primary window, press the Add Files button, and load the watermarked video.
Step 3 Access Edit Section
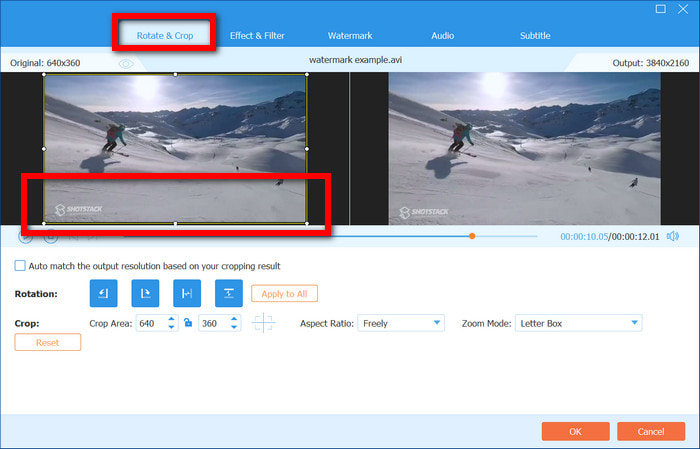
When the video is ready, press the Edit button next to the respective video file. Inside the available editing options, press the Rotate & Crop tab.
Step 4 Remove the Watermark Area
Position the crop box in order to delete the section in the video that holds the watermark. Make sure to get the framing correct so that you remove the watermark but keep the primary content. After that, click on the Ok button to apply.

Step 5 Save the Adjusted Video
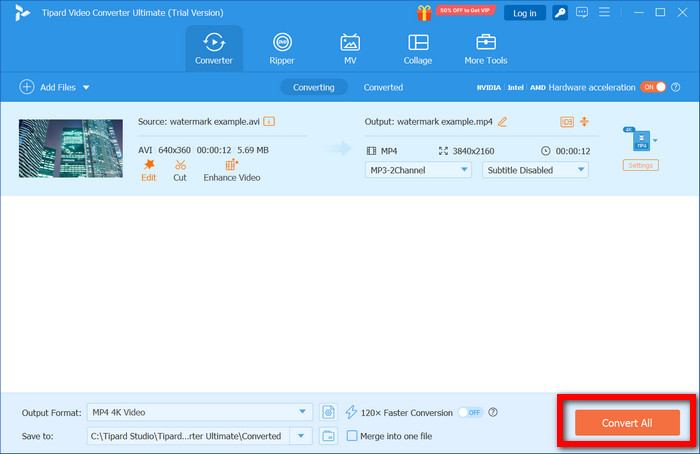
Choose the output format and the destination directory you would prefer, and press Convert All to upload the video that has no watermark to your computer.
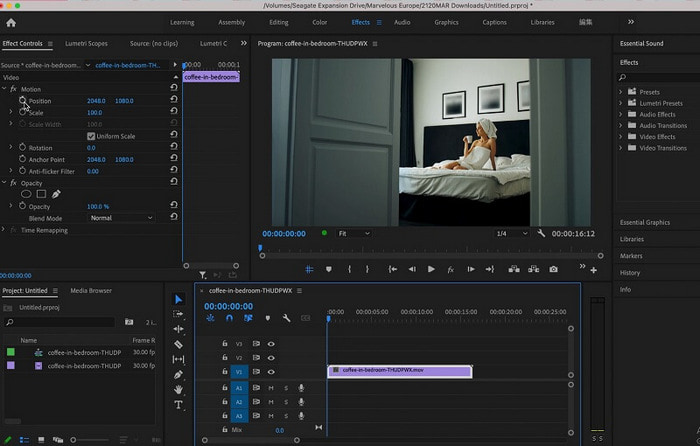
Part 2. How to Remove Watermark from Video with Adobe Premiere Pro
Adobe Premiere Pro has a lot of functionality to assist with video editing. Because of the advanced cropping, zooming, and masking features, Pro can remove watermarks in multiple ways. Because of the advanced capabilities, some prior video editing experience may yield the best outcomes.
Documented in various formats and designed to support multiple videos in a seamless editing environment, Premiere Pro provides advanced customizations in transition and visual effects. It even has supporting functionality for 360 virtual reality and provides multiple masking features to remove watermarks.
Method 1: Remove Watermark by Cropping
Step 1 Start a new session in Adobe Premiere Pro by clicking Create a New Project and opening the video for editing.
Step 2 Click on the Effect tab, and locate the section for Video Effects transform. From there, locate the Crop option and click on it.
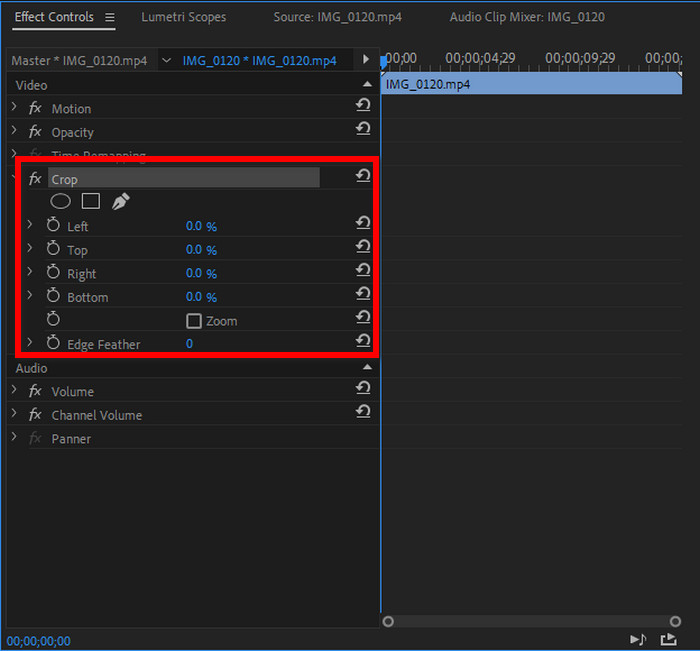
Step 3 Open the Effects control panel and use the arrow buttons to highlight and crop the area of the watermark.
Step 4 Crop just the section with the watermark instead of cropping the whole frame. Adjust the crop percentage so there remains a good balance throughout the video.
Step 5 Under the Motion section in the Effect Control panel, position the video so that it is centered, then crop the sides.
Method 2: Remove Watermark Using the Zoom Effect
While there is a trade-off of decreased resolution, the zoom effect will avoid opening a video with a visible watermark altogether. This is highly recommended because the video will be greatly enhanced with a clean appearance.
Step 1 Set up a New Project in Premiere Pro after importing the video that you will edit.
Step 2 In the Timeline, select the video you imported, then click to highlight the Effect Control section.
Step 3 From the Motion section of the Control, increase the Scale value to a point where the watermark is no longer visible in the frame.
Step 4 Save your video to your computer after adjusting your video settings within the Export option from the File tab.
Method 3: Remove Watermark Using the Masking Effect
For clean marketing videos, the other option is marketing. By efficiently replacing a watermark with content that is flowing from your video, the marking content creates a seamless transition from the content. This is an ideal option for marketing videos where the visual consistency remains.
Step 1 Drag and drop a video clip into the Premiere Pro timeline and select it so that you can see the Effects Control panel.
Step 2 Go to Effects in the main window, and then to Video Effects, then Noise and Grain, then select the effect called Median and apply it to your video. Use the shape tools or pen tools to draw a mask over the watermark.
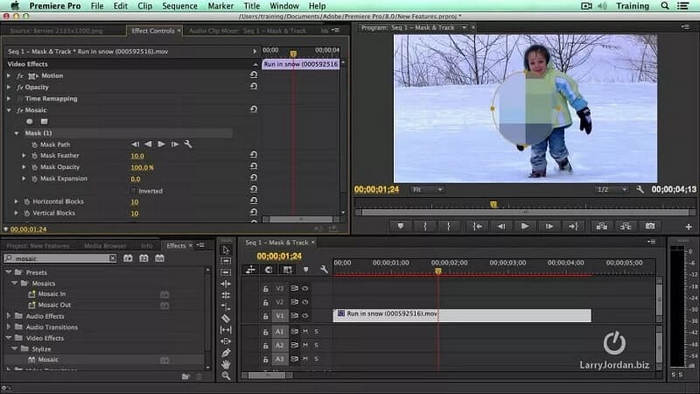
Step 3 In the Effects Control panel, increase the Radius and adjust the Feather slider until the watermark blends with the surrounding area.
Step 4 Once the watermark has been completely blended and is no longer visible, go to File, then Export, then Media to export and save the video without the watermark.
Part 3. How to Remove Watermark from Video with Online Tools
Online watermark removers are ideal for users who want quick results without installing software. These tools run directly in a web browser and work best for simple to moderate watermark removal needs.
Tool 1: Kapwing Watermark Remover (Online)
Kapwing is a popular video editor online. It can mask and crop areas and is able to remove a watermark. It works very well for simple logos that are static and positioned at the video edges when it is being edited, and makes it easier to clean up professional content. It is accessed through the web without needing to download or install anything.
Step 1 To use a watermark removal tool on Kapwing, begin by visiting the Kapwing website and opening the video editor tool online.
Step 2 Then, select the option to Upload Video and choose the video that is watermarked to import.
Step 3 Next, Crop tool to select a section of the video frame that contains the watermark and be removed. If cropping a watermark is unsuitable, consider placing a shape or overlaying a blur on that section.
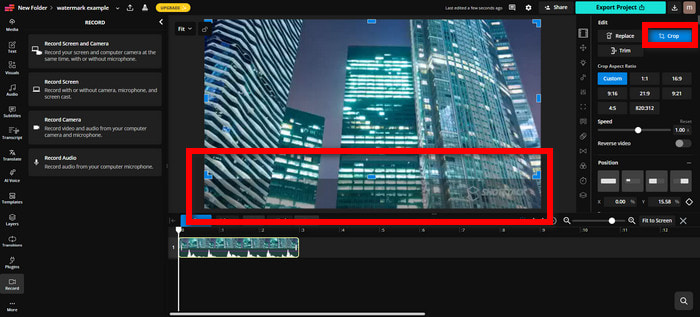
Step 4 Exporting the video and downloading the watermarked final version is the last step.
Tool 2: VEED.io Online Watermark Remover
VEED is another online video editor that can be used to remove watermarks by cropping, blurring, or overlay techniques. VEED requires no downloads, making it easy to edit videos directly in a web browser and quickly remove the watermark of video without installing any software.
Step 1 First, sign in to the VEED website and select Upload Video to insert your video file.
Step 2 Then, choose the Crop or Blur tool that will allow you to cover or remove the watermark from the video.

Step 3 Lastly, Download the video generated after the export of the final processed video is complete, where the watermark is removed.
Part 4. How to Remove Watermark from Video on iPhone/Android
Mobile apps remove watermarks from videos on smartphones, other than apps that are intended for social media and simple, fast video editing on the go.
App 1 (iPhone): iMovie
Every Apple computer comes with a program called iMovie, which allows users to edit videos with incredible ease, including the ability to remove watermarks with the cropping or reframing tool. It works best when the watermark is positioned near the edges of the frame, making it ideal for quick edits and creating clean, professional-looking videos on iPhone or iPad.
Step 1 Go to the App Store and search for the iMovie app, and go ahead and download the app.
Step 2 Now go to the app and tap on Create Project, select Movie, and choose the video that has the watermark that you want to remove.
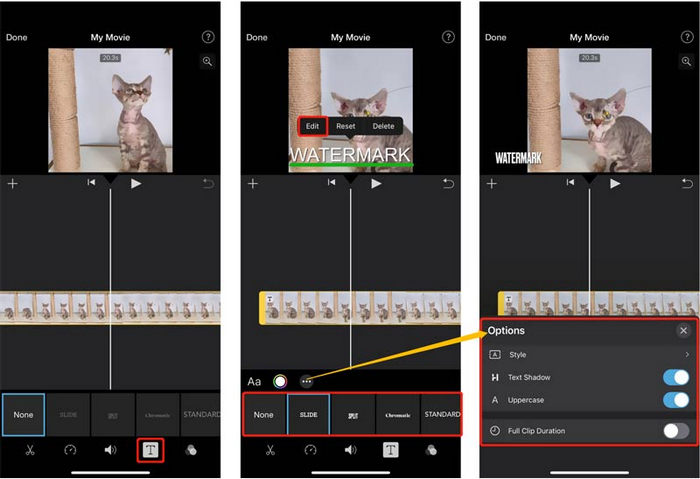
Step 3 Once you have your video, tap the video that you want to edit on the timeline. Tap the Crop to Fill option and zoom in on the video until the watermark is no longer showing.
Step 4 Tap on Done, and export and save your video to your iPhone.
App 2 (Android): CapCut
CapCut is a very popular app and is very easy to navigate. This app gives users the ability to remove TikTok watermark and others by cropping, overlaying, or blurring, making it ideal for quick and easy social media video edits.
Step 1 Go to the Google Play Store and download CapCut, and go ahead and open the app.
Step 2 Tap New Video and import the video that you want to edit.
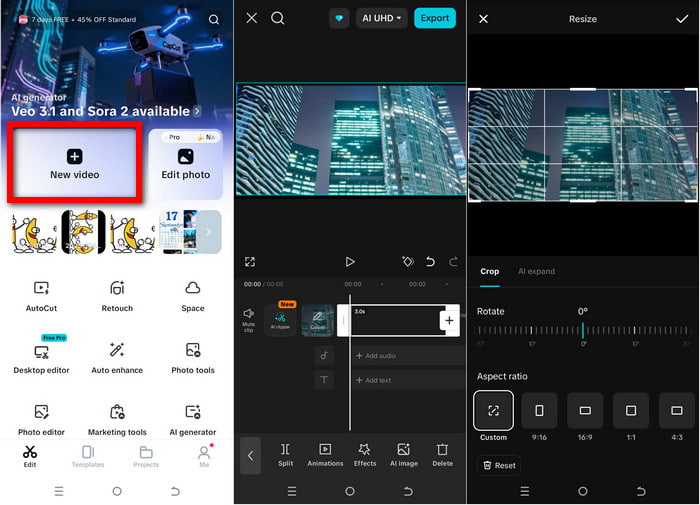
Step 3 Choose either the Crop, Blur, or Overlay features to hide/remove the watermark on the video.
Step 4 Export the video, and you can now save the video that has no watermark on your Android.
Conclusion
Deleting a watermark from a video has never been easier, whether you choose professional software, online tools, or mobile apps. Each method offers unique advantages, from precise editing in Adobe Premiere Pro to quick, beginner-friendly solutions like Tipard Video Converter Ultimate or browser-based removers. By selecting the right tool for your needs, you can maintain video quality, save time, and create polished, shareable content without distractions, ensuring your videos look professional and clean.
More Reading


About the Author