Key Takeaways
Adding a voiceover can be done after editing and exporting your video to a playable format, using tools like Tipard Screen Capture, WeVideo, or iMovie.
- Human vs AI Voiceover: Manual recordings capture a lively tone and convey emotion better, while AI text-to-speech is faster and offers stable performance and consistent voice quality.
- Audio Quality: AI noise cancellation can remove background noise, low audio, and delays. Tools like Tipard Video Converter Ultimate can help.
- Recording: Choose the right capture based on your goal: full screen, selected screen, webcam overlay, or audio-only.
- Video Export: Export in MP4, MKV, or audio formats like MP3 and WAV for better device and platform compatibility.
Adding a voice-over to a video can transform a simple tutorial, gameplay clip, or social media post into a captivating experience. Imagine your viewers instantly engaged, emotions amplified, and your message delivered clearly and professionally.

Part 1. Why Adding a Voiceover is Essential for Viral Videos
When it comes to Social Media and fast-paced videos, users will have a low to nearly zero attention span. A good quality voiceover will make the viewer more emotionally attached and will increase clarity in your video.
Why It Matters
- Attention Grabber: Great beginning voice-overs stop users from scrolling
- Emotional Attachment: The assigned tone, voice pace, and inflection will increase the overall engagement with the content.
- Explains Visuals Better: Voiceover adds narration to visuals so listeners can better understand what is being said.
- Raises Video Quality: Quality voiceover adds to credibility and professionalism.
- Voiceover Keeps Viewers Interested: Engaging voiceover encourages viewers to watch to the end.
Part 2. Top Ways to Add Voiceover to a Video
Method 1: Tipard Screen Capture (Best Overall)
If you want smooth operation, plenty of options, and the best quality from a single tool, Tipard Screen Capture is an all-in-one recording software. It lets you record screen, voice and system audio, and webcam all at the same time. It is perfect for guides, games, presentations, and training videos.
- Add a Facecam overlay while recording your voice for a more engaging presentation.
- Capture system sound and microphone audio clearly without lag.
- Preserve original resolution or record in 4K for sharp results.
- Record full screen, a window, or a custom area based on your needs.
- Trim, compress, preview, and export in MP4, MKV, MP3, AAC, and more.

Step 1 Download and Install
Go to the Tipard Screen Capture website to select and download the installer for Windows or Mac. Install the software using the on-screen instructions.
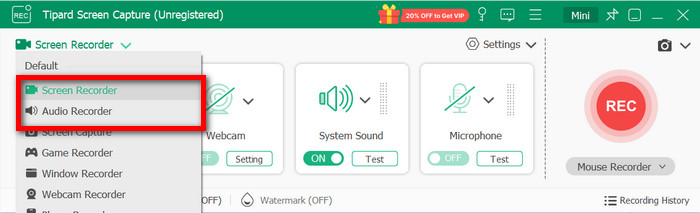
Step 2 Choose a Recording Mode
Select the recording mode you want. Choose from Screen Recorder or Audio Recorder.
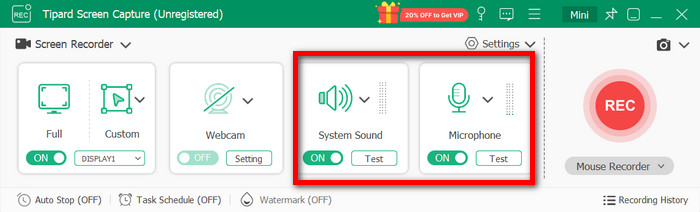
Step 3 Turn on Audio for Voiceover
Turn on the Microphone option to record your voice. If your video has an audio track, check the box for System Sound.
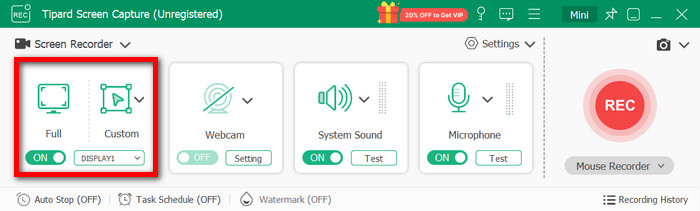
Step 4 Screen Area and Webcam Settings
Select the desired screen settings. You can choose to record in custom sizes or go Full or Custom (up to 4K). If you want to be seen, check the webcam option.
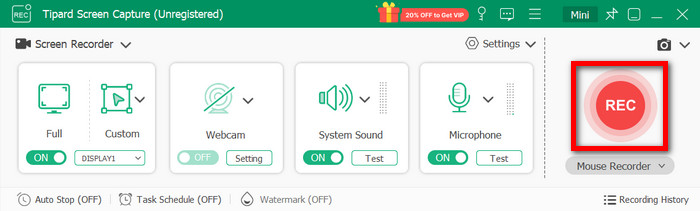
Step 5 Start Recording
Press REC and begin narrating your presentation or explanation. You can also draw or make notes on the screen while you do your recording.
Step 6 Stop, Trim, and Save
Once you finish, you can stop the recording, trim the video to remove any pieces you do not want, and then save or put the video into the format you want.
Method 2: WeVideo
If cloud editing and browser-based editing are your preference, then WeVideo is a great choice for you. All your video processing is done in the cloud, which places less strain on your computer while you create your video, record a webinar, add voiceovers, apply effects, and complete edits directly from any device.
Step 1 Sign in and create a new project.
Step 2 Import your video and put it in the timeline.
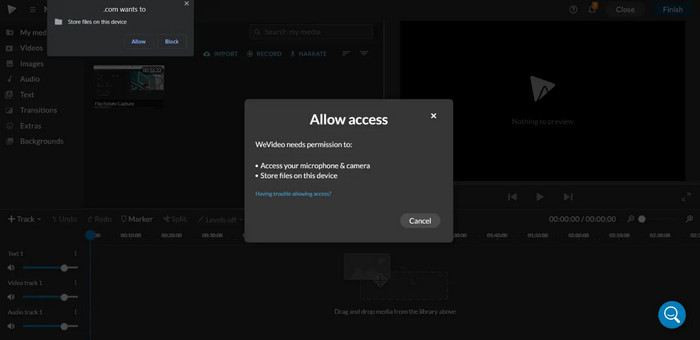
Step 3 When you see the pop-up, click Allow to give access to your microphone.
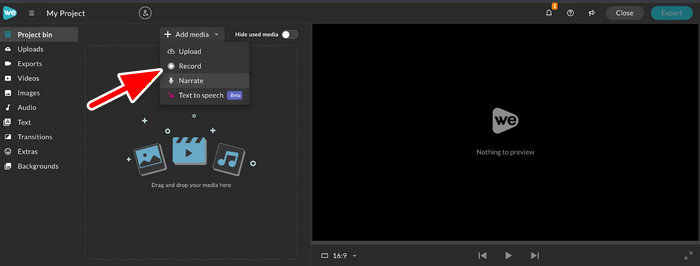
Step 4 Move the playhead, then click on Record. Try to keep your voice at the same tone and distance from the microphone for the whole recording.
Step 5 You can adjust the sound levels and remove background noise to improve the audio quality. You can also add transition fades if you want.
Step 6 When you are done with the editing, download your video.
Method 3: iMovie (Mac Users)
Recording voice-overs on iMovie is also very easy. You can use the voiceover tool to record your own narration and add it to your video directly on the iMovie timeline. This makes it easy to add custom audio to your video, extract audio from MP4, and avoid the hassles of complicated software and hardware setup.
Step 1 Import your videos.
Step 2 Arrange your videos in chronological order before recording your voice narration.
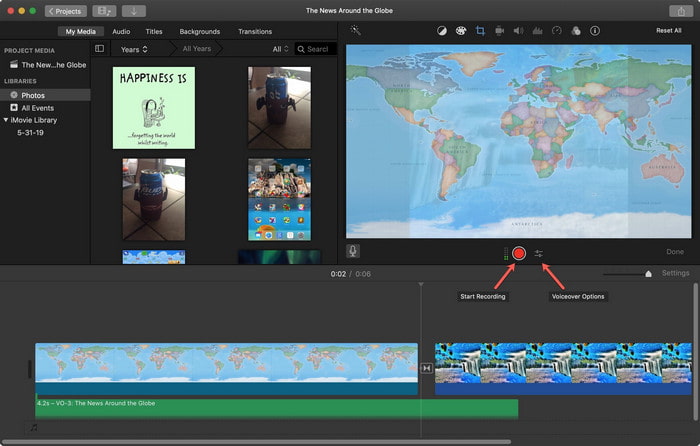
Step 3 Click on the Microphone button below the display window.
Step 4 Select the microphone you are using and make sure the audio levels are balanced before starting the recording.
Step 5 Start the recording where the blue playhead is located and click on Record.
Step 6 Afterwards, if you would like, make sure to trim the audio as necessary, change the volume, and then you can export the video.
Part 3. How to Clean Up Your Voiceover Audio with AI
In tutorials, audio delays and background noise can be a serious issue, reducing the overall quality of your voiceover, even when using a good microphone. With Tipard Video Converter Ultimate, the AI-powered Noise Removal feature helps you maintain clean, synchronized audio for tutorials, gameplay, and social media videos.
Step 1 Installing Tipard Video Converter Ultimate
Please note that you must download Tipard Video Converter Ultimate by selecting the operating system of your computer (PC or Mac). Follow the instructions provided on the screen.
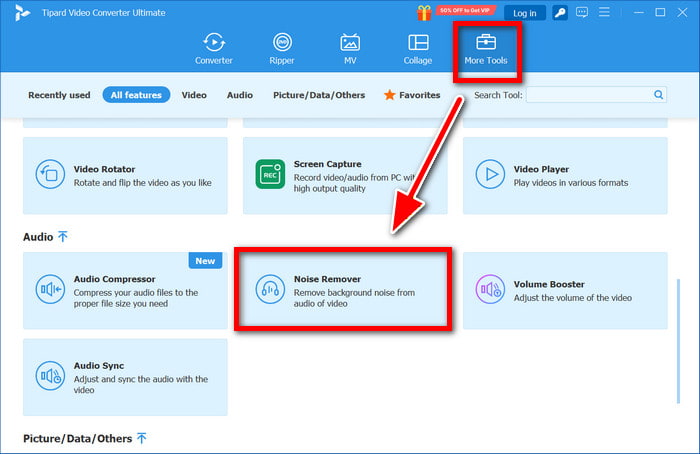
Step 2 Opening More Tools to Add Video
Select More Tools, then click on the Noise Remover option, and then click on the + button to begin the video editing process by adding the video you would like to work on.
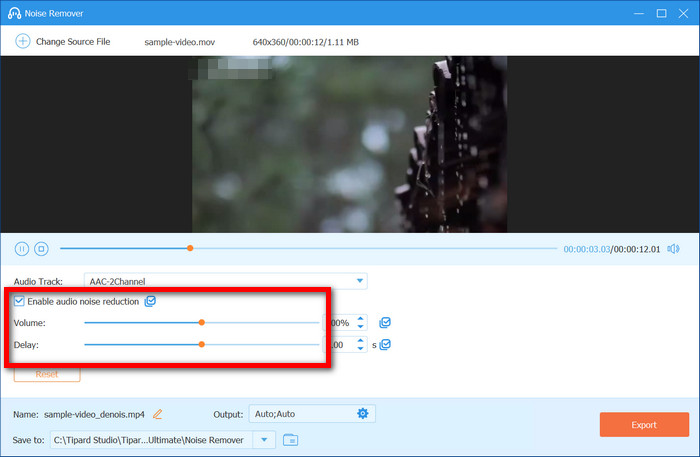
Step 3 Activating Noise Reduction
Be sure to check the Enable Audio Noise Reduction and then, if necessary, make adjustments to the Volume and Delay.
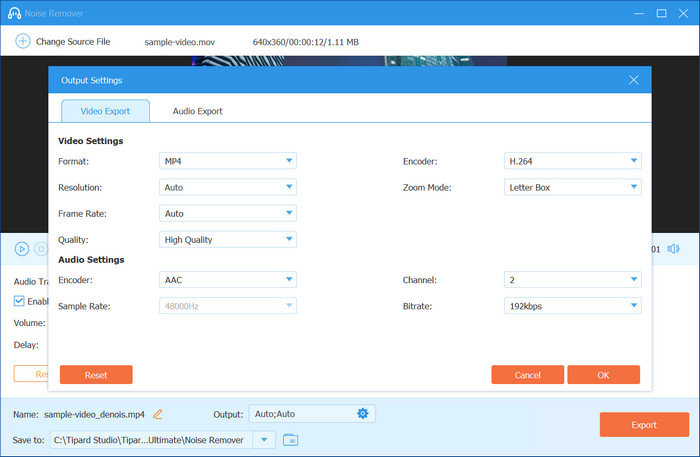
Step 4 Output Settings
Change the Output based on whatever you would like to choose (this can be an MP4, MP3, or even a WAV).
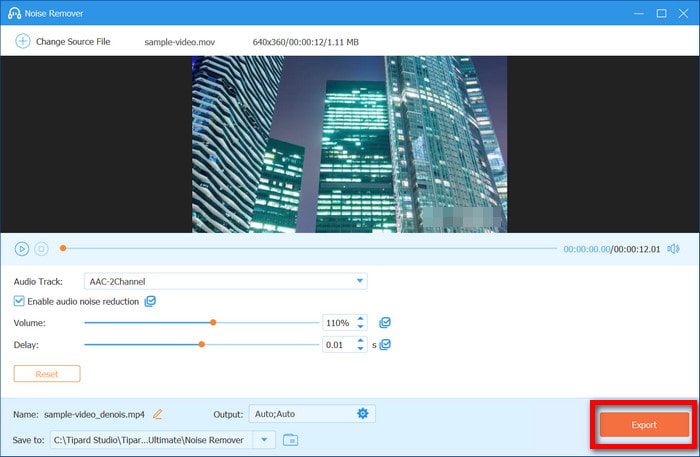
Step 5 Export Cleaned Video
Once satisfied, click Export. The cleaned voiceover video will be automatically saved to your PC.
Conclusion
To end this, learning how to voice over a video elevates any content, from tutorials to social media clips. With the right tools, preparation, and AI cleanup, you can create engaging, polished, and professional videos that capture attention and boost retention.
More Reading
About the Author