When uploading videos on YouTube, there are times when you want to introduce your brand or just let others know that the video is yours. So, if you want to create and add your watermark on your video before uploading, you must read this post. This how-to article will give detailed methods for successfully inserting watermarks into your videos. Aside from that, we will also give you simple information about YouTube watermarks, along with the ideal size, type, and reasons why you need to add one. Therefore, if you want to learn more about YouTube video watermarks, read this post.

Part 1. A Brief Introduction to YouTube Video Watermark
What is a YouTube Video Watermark?
YouTube video watermarks are considered simple yet powerful features that let creators brand their content. It is one of the trademarks of all content creators. It can help them promote their video, brand, and product. Aside from that, a watermark is a small and semi-transparent icon, text, or logo that appears on any video part. You can find it in the video's corner, edge, or middle part.
Recommended Size for YouTube Video Watermarks
The most recommended size for a video watermark for YouTube is 150 × 150 pixels. This size will ensure the watermark is clear and visible without annoying or disturbing the viewers. In addition to that, YouTube suggests using square images with a 1:1 aspect ratio. This way, the watermark will fit perfectly into the corner of the video player. Thus, if you plan to upload a video on YouTube with a perfect watermark, consider using the ideal size.
Types of Watermark
There are two types of watermarks. These are Static and Animated watermarks. Static watermarks are still photos, a logo, or a channel icon that remain fixed in a single corner of the video. This type of watermark is perfect for content creators who want a simple and non-distracting way to brand their videos. The advantage of using this watermark is it can offer a clean video.
On the other hand, Animated watermarks are moving images, which is also called GIF format. This transparent watermark is ideal for creators who want to add eye-catching elements to their videos. This way, it can draw more attention to the branding.
Why Add Watermarks?
You need to add a watermark to your YouTube videos for various reasons. Some of them are:
1.For Brand Recognition. The watermark on the video will serve as a signature to the video, which can be recognized easily. It also reinforces the brand identity of all videos, making the viewers visit the channel.
2.Channel Promotion. One of the best ways to promote your YouTube channel is by adding a watermark to your video content. With that, some users will get an idea about the creator.
3.Content Protection. One of the reasons why you need to add a watermark to the video is to protect your content. Some people might get your content without any consent. So, the best way to protect the content is by adding a watermark.
4.Cross-Platform Visibility. The best part about adding a watermark to the video is when the content is shared with another platform, the watermark ensures that the brand is still visible.
If you want to promote your channel, brand, product, and more in your videos, insert a watermark that may attract users. You can even insert a simple logo, text, icon, stickers, and more.
Part 2. Best Method to Add Watermark to YouTube Video Before Uploading
Are you interested in adding a watermark for YouTube videos? In that case, we would like to recommend Tipard Video Converter Ultimate. This offline program lets you insert any type of watermark before uploading your video to your YouTube channel. With the help of the Video Watermark feature, you can easily and quickly achieve your main objective. You can add simple text or images, making it a reliable program. The best part here is that adding a watermark is simple. Whether you are a beginner or a skilled user, there is no doubt that this is the best software you can access. What's more, you can even create an engaging watermark. You can change the text color, shape, and style. Lastly, you can select your preferred output formats before the export process. You can save and export the video as AVI, MP4, M4V, FLV, MOV, MKV, WMV, and more. If you want to add a watermark to your video using this YouTube watermark creator, see the steps below.
Step 1Download Tipard Video Converter Ultimate and launch it to start the process of adding a watermark to your video.
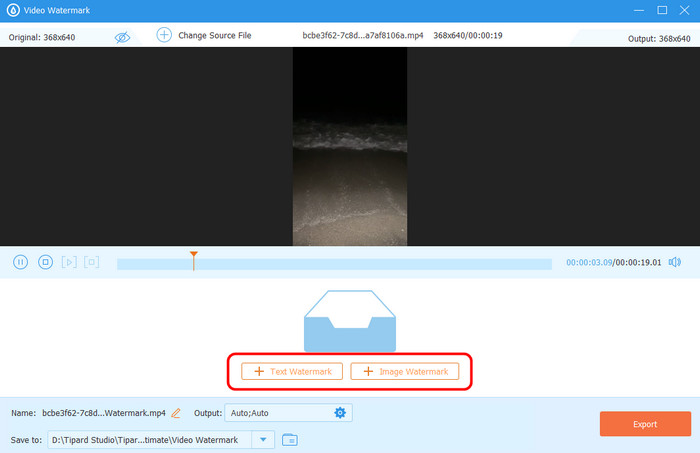
Step 2For the next process, hit the More Tools menu and click the Video Watermark feature. Then, click the + button to insert the video you want to deal with.

Step 3You can select the Text Watermark or Image Watermark options. After that, you can start adding your watermark to the video.
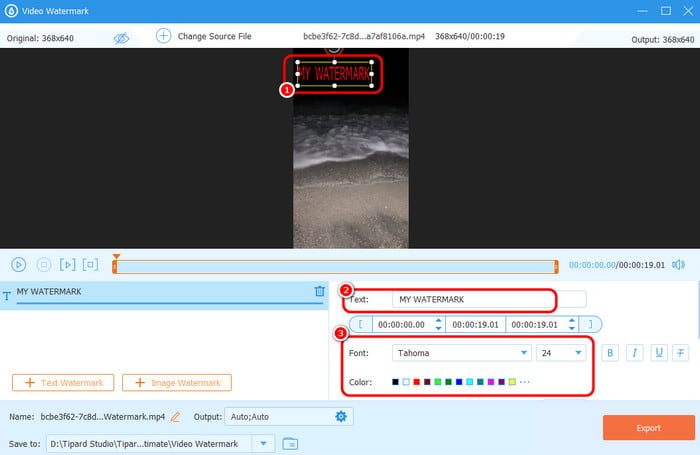
Step 4If you want to add text, then you can do various things. After adding the text from the Text section, you can modify the font color, style, and size.
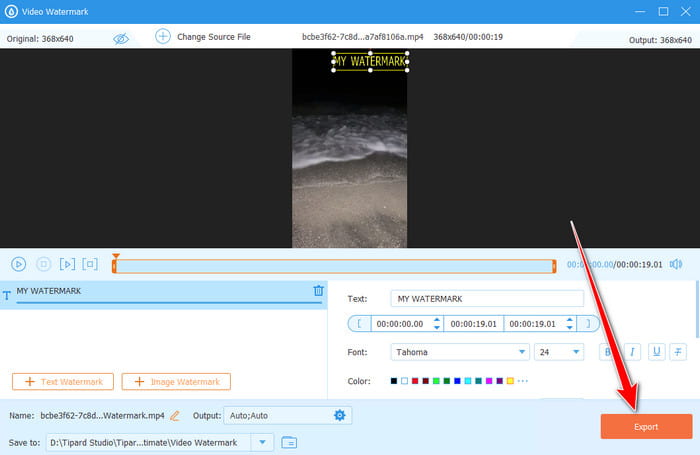
Step 5Once done, hit the Export option to save the video with a watermark. You can now upload the video with a watermark to your YouTube channel.
Part 3. How to Add Watermark to A Published YouTube Video
Can you add a watermark to your published YouTube videos? Then, the answer is yes. What we like about YouTube is it allows content creators to add a channel watermark. You can even choose your desired display time. You can just show the watermark to the end part or the entire video. You can also customize the display time based on your preferences. So, to learn how to create a YouTube watermark for the published video, see the instructions below.
Step 1Go to YouTube Studio and proceed to the Customization section. After that, scroll a little bit and click the Upload button from the Video Watermark section.
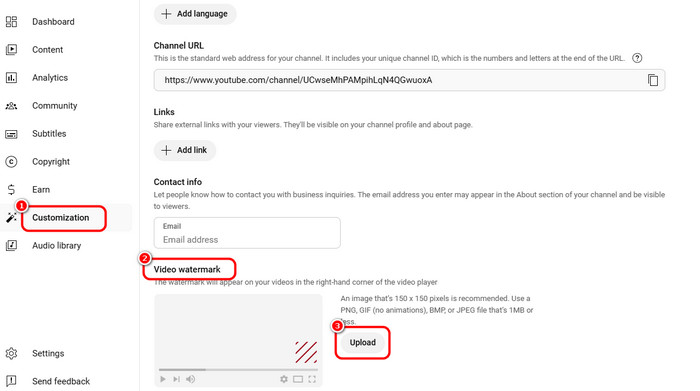
Then, you can start adding the watermark. You can also resize the watermark based on your needs. Once done, hit the Done button.
Step 2Go to the Display Time section and select your preferred option.
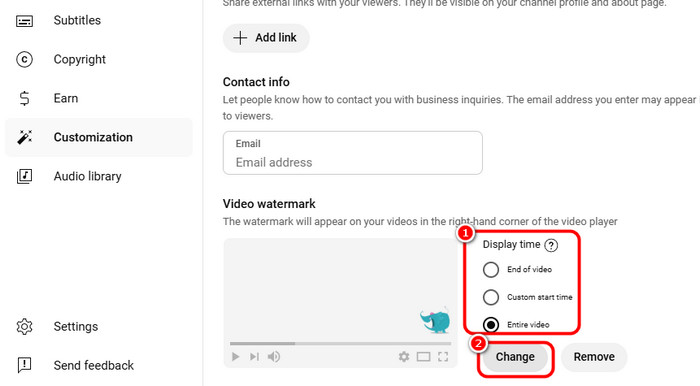
The three options are:
- End of video
- Custom start time
- Entire video
Click the Change button to apply changes.
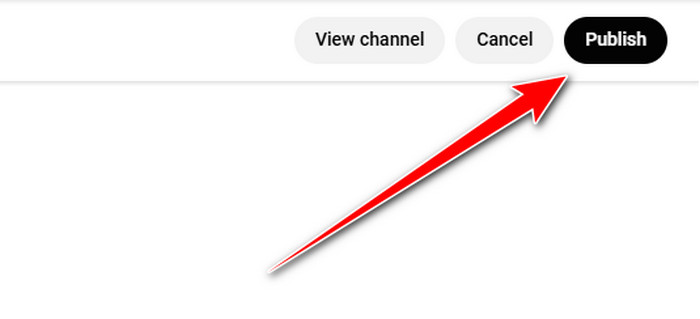
Step 3For the final process, click the Publish button above to save your videos with a watermark. With that, you can watch your published content with an engaging watermark on it.
Conclusion
Thanks to this post, you have given an idea about YouTube video watermarks. You even discovered the suggested size, watermark types, and reasons to add one. What's more, if you want to add a watermark to your video, it is better to use Tipard Video Converter Ultimate. This program's Video Watermark feature allows you to insert Text and Image watermarks smoothly, making it a potent program for Mac and Windows computers.
More Reading


About the Author