Want to know how to compress video for YouTube without losing quality? Uploading large or unoptimized files can cause slow uploads and blurry playback after YouTube compression. In this guide, you will learn how to prepare and compress your videos the right way, using recommended settings, reliable tools, and expert tricks, to keep your YouTube uploads sharp, clear, and professional-looking.
Part 1. Understanding YouTube Compression
What it is:
Uploading a video makes YouTube perform a compression trick for smoother playback and better efficiency. For every compression trick, YouTube does three main things:
1. Reducing the file size so it can stream quickly, even on the slower connections.
2. Changing the format of the file to one that is used for optimized online playback.
3. Making available multiple preset resolutions, like 144p, 360p, 720p, 1080p, and higher, so the viewers can select the one that is compatible with their device and the internet bandwidth available.
The Problem:
Compression will always be associated with a certain loss of quality. If the video uploaded is indeed low quality, it will be poorly processed on YouTube. Over-compression causes generational loss, the loss of quality in images with each step of re-encoding.
The Goal:
Your goal is always to upload the version that is highest in quality possible, which YouTube will achieve its best compression possible on the file, the stream will be detailed and sharp, and look professional.
Part 2. Recommended Upload Settings for YouTube
Here are the essential upload settings YouTube recommends:
| Setting | Recommendation | Details/Note |
|---|---|---|
| Format | MP4 (.mp4) | The most compatible and efficient format for YouTube uploads. |
| Video Codec | H.264 or H.265 (HEVC) or AV1 | Delivers high quality with reasonable file sizes; YouTube later converts to VP9 or AV1. |
| Audio Codec | AAC-LC | Use 384 kbps or higher for clear, rich audio. |
| Frame Rate | Original (24, 25, 30, 48, 50, or 60 fps) | Keep your source frame rate for natural motion. |
| Resolution | Highest available (1080p, 1440p, 2160p) | Higher resolutions like 1440p+ often trigger VP9/AV1 for better quality. |
| Bitrate | • 1080p: 8–15 Mbps • 1440p: 16–24 Mbps • 2160p: 35–45 Mbps |
Use Variable Bitrate (VBR) for best results. |
| Color Space | Rec. 709 (SDR) / Rec. 2020 (HDR) | Ensures accurate color output after upload. |
| Bit Depth | 8-bit (SDR) / 10-bit (HDR) | Maintains gradient smoothness and detail. |
| Audio Sample Rate | 48 kHz | Matches the standard for playback consistency. |
| Aspect Ratio | 16:9 | Prevents black bars or awkward cropping on playback. |
| Show MoreShow Less | ||
Part 3. How to Compress Your Video for YouTube
Below are three powerful tools that you can use, each one aimed at a different flow of work and experience.
1. Tipard Video Converter Ultimate
Tipard Video Converter Ultimate incorporates multiple features to process videos, convert videos, resize, and edit videos seamlessly and quickly. Great tool for prepping videos to upload to YouTube as it reduces the video file size while maintaining the highest quality, especially with the 60x GPU-accelerating processing feature.

- Shrinks large video files while maintaining sharpness and audio clarity.
- Compress multiple YouTube videos simultaneously.
- Converts to YouTube-friendly formats like MP4.
- Improves brightness, contrast, and stability before compression.
- Adjust the aspect ratio and trim unnecessary parts to reduce file size efficiently.

Step 1 Download and Install
Acquire Tipard Video Converter Ultimate from the official site. Install it on your Windows or Mac computer by following the on-screen prompts. After installation, open the application to begin.
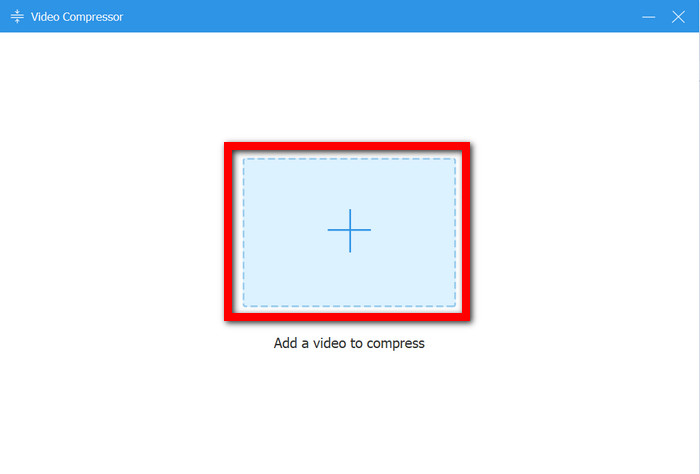
Step 2 Video Compressor
From the opened application, go to the More Tools tab and select Video Compressor. This tool is built to help you reduce the size of your video files while aiming to maintain the highest quality possible.

Step 3 Add Video
Press the Add button to select the video you want to compress. You also have the option of adding additional videos, which is great for efficient bulk processing of your YouTube uploads.
Step 4 Compression Settings
Indicate output size, file type (MP4 is best for YouTube), resolution, and other customizations. You can playback the scheduled compressed video to ensure the quality is to your liking.

Step 5 Video Compression
Choose your output folder and hit the Compress button to begin. Thanks to its Tipard's 60x GPU acceleration, the video will be compressed and ready for playback on YouTube.

2. Final Cut Pro
Final Cut Pro is a state-of-the-art video editing program for Mac, with advanced export and compression capabilities. It is ideal for users who want to compress a video and control every detail of its quality and format before uploading to YouTube.
Step 1 Start Final Cut Pro and open the project you want to export. Make sure your final edits have been made.
Step 2 Select the top Menu option and File export. Click on Share and look for the Master file (default).

Step 3 Under the Settings tab, choose compression with Video codec: H.264, and Video format: Computer (best option for compression).
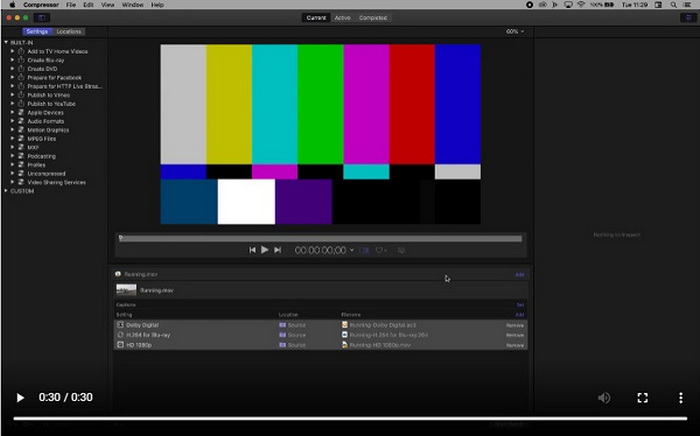
Step 4 Select the desired resolution that you prefer to upload. Set to 1080p or 720p.
Step 5 Check the estimated file size. This information is provided at the bottom of the window.
Step 6 Click on Next to provide a save location, then click Save to finish.
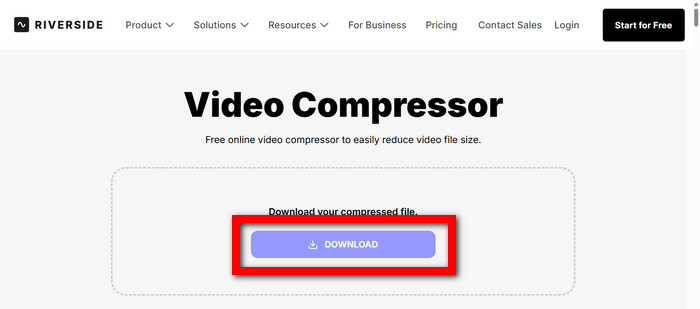
3. Riverside
Riverside is an online recording and video editing platform that can be used to compress video online. It is best suited for podcasters, interviewers, and creators who work with remote recordings, allowing fast uploading and efficient content delivery.
Step 1 Log in to Riverside, access your recordings and select the file you wish to compress by clicking the Drop files button.

Step 2 From your dashboard, go to the editor for the recording.
Step 3 Set the export settings, then select resolution and bitrate according to your needs for compressing the file.
Step 4 Using the Trim or Split tools, cut out any unnecessary parts to help lessen the file size.
Step 5 After that was done, hit Download, and select Compressed MP4 for an upload-ready file.
Part 4. How to Avoid YouTube Compression
You would not be able to fully stop YouTube from compressing your videos, but the tips below will help you reduce compression and quality loss.
1. YouTube compression works best on videos with higher resolutions. Uploading videos in 1440p or 4K will help you activate YouTube’s VP9 or AV1 codec, which is much clearer than the AVC codec.
2. For 1080p videos, export at 10-12 Mbps. Exporting at a higher bitrate allows YouTube to retain more quality in the video instead of losing it to compression.
3. H.264 and H.265 codecs compress videos while maintaining quality. H.265 will be the most beneficial for high-res videos as it compresses better.
4. You should stick to a constant frame rate. Using 30fps or 60fps throughout and avoiding a variable frame rate will reduce the chance of playback issues.
5. If your video is 16:9, keep the scaling, borders, or other export settings that result in blurry playback to a minimum. Export in 1920×1080 or 3840×2160.
Conclusion
To effectively compress a YouTube video without losing quality, always follow the recommended upload settings of YouTube and use reliable compression tools. Providing YouTube with a high-quality, well-encoded file ensures your video stays crisp after processing. With the right preparation, your uploads will stream smoothly and look professional on every device and resolution.
More Reading


About the Author