Rip Blu-ray on Mac to back up favorite movies or enable playback on a laptop without relying on physical discs. The process can be complex due to encryption, large file sizes, and format compatibility, requiring careful handling and the right tools to convert Blu-ray collections into accessible digital files efficiently.

Part 1. The Challenges of Ripping Blu-ray on Mac
It is not as simple as dragging and dropping files, as each of the following challenges requires specialized hardware.
1. Hardware Requirements
When you copy files from other discs, your Mac is able to access those files, as there is no protection stopping it. Primarily, this is an issue because of the AACS, BD+, region protection, BD-J, and the Finavia system, which, without the correct decryption bypass, protect files, making them inaccessible.
2. File Size
If you are considering ripping a Blu-ray disc, it is good to know that standard Blu-ray discs have a storage capacity of anywhere from 25-50 GB, with 4k UHD discs maxing out at around 66-100 GB.
3. Processing Time
When it comes to ripping Blu-ray discs, other than the raw data onboard, the bitrate is usually the largest contributing factor to how long it is going to take to rip. The more data, the more time it is going to take to rip the data, which is going to be dependent directly on your processing hardware.
4. Peripheral Device Compatibility
Your playback device must be compatible with the output file after ripping. Some formats may not be opened on default macOS players, TVs, and mobile devices. To avoid playback problems, you must choose the right format and codec.
5. Restrictions Placed by macOS
Strict security settings on macOS may prevent certain applications from accessing external drives or other folders on the system. Prior to ripping, you may need to modify certain privacy and security settings to enable the download to occur unhindered.
Part 2. How to Rip Any Blu-ray on Mac
Tipard Blu-ray Converter allows you to maintain a high level of efficiency and quality preservation. It can read Blu-ray discs and convert them to digital files of your choice. Each copy is saved with high quality and offers the choice of several formats. Its system offers the opportunity to improve ripping time and maintain high quality of the image and audio by utilizing advanced GPU acceleration and smart video processing.

- Handles standard and 4K Blu-ray discs while keeping original quality.
- It uses NVIDIA, AMD, and Intel GPUs to boost ripping speed up to 30×.
- AI tools help upscale resolution, reduce noise, and improve video quality.
- Supports 500+ formats, including MP4, MKV, MOV, AVI, and MP3.
- Rip multiple titles at once and adjust output settings easily.

Step 1 Install the Program
Download the software for Mac, then install it on your MacBook Air, MacBook Pro, or iMac. After that, go ahead and open the program.
Step 2 Blu-ray Disc Insertion
Using your Mac, connect your external Blu-ray drive. Then, open the program and navigate to the Ripper section.
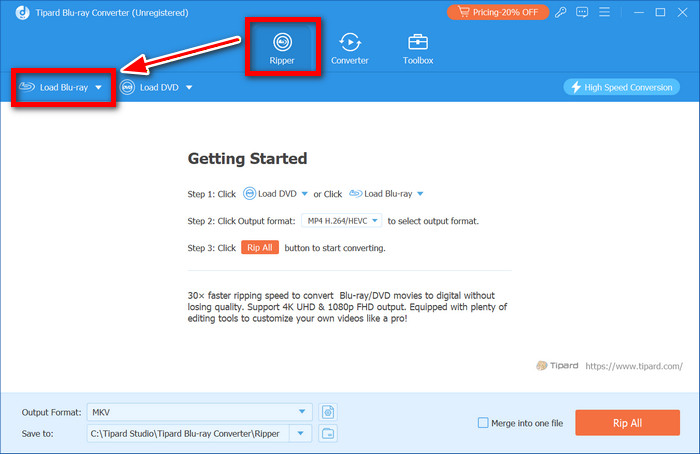
Step 3 Loading the Blu-ray
After clicking Load Blu-ray, select the Blu-ray disc from the list. The program will scan the disc to find audio tracks, subtitles, and the available chapter titles.
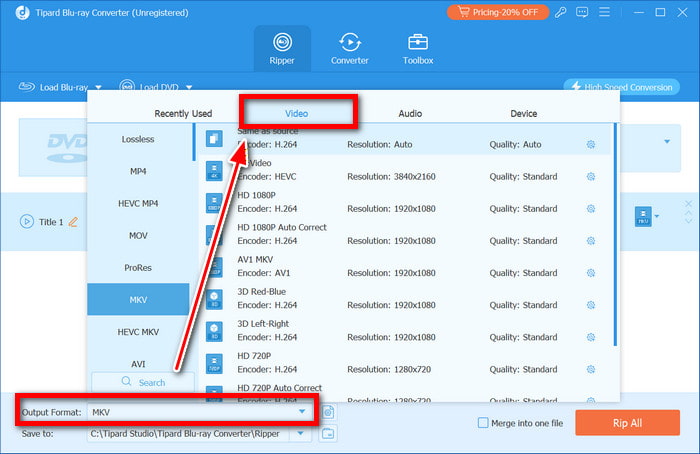
Step 4 Choose a Format
In the tab for Output Format, select the video profile and then the format you would like to have (for example, MP4, MKV, MOV, etc.). You can also change the resolution, encoder, and bitrate.
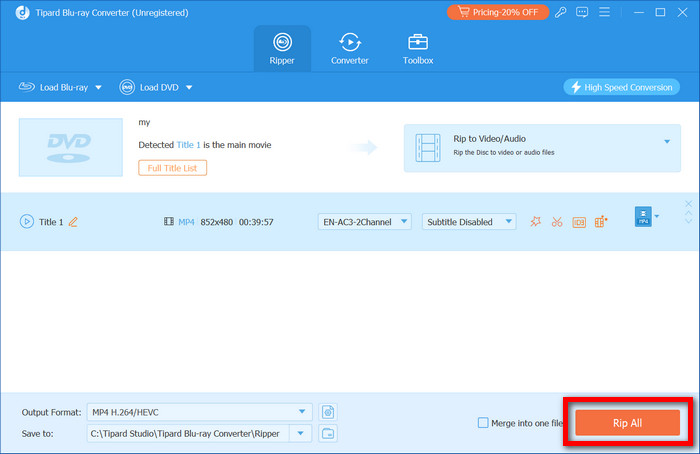
Step 5 Ripping the Blu-ray
To start the ripping process, select the output folder on your Mac and press Rip All.
Part 3. How to Rip Blu-ray to Mac with MakeMKV
MakeMKV is a Blu-ray ripping tool that converts Blu-ray discs to the MKV file format. MKV files are made by preserving the original video/audio tracks, subtitles, and chapters. MakeMKV can also bypass many Blu-ray disc protections. As a result, MakeMKV performs a lossless extraction, meaning the same quality that is on the source disc is kept. The software performs an automatic scan on the disc and allows the user to select the titles and tracks they want to keep before ripping.
Step 1 If you have not already, install MakeMKV on your Mac. Launch the program.
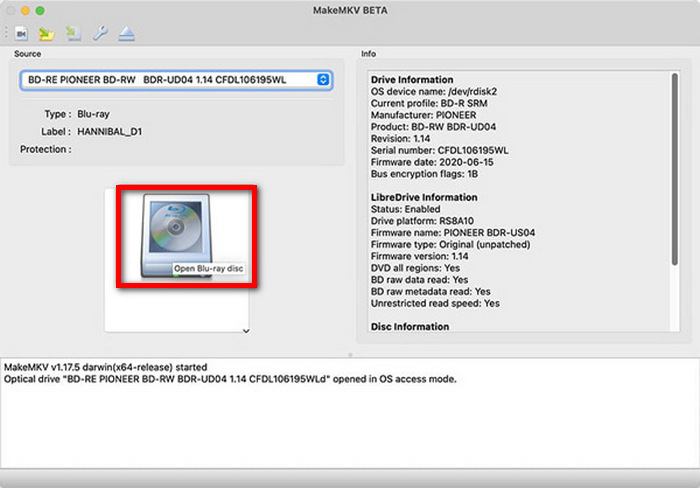
Step 2 An external Blu-ray drive will need to be connected to your Mac. Insert the Blu-ray disc into the external Blu-ray drive.
Step 3 A prompt should appear. From the options, select the Open Blu-ray Disc button to scan the files on the Blu-ray disc.
Step 4 On the left side of the window, select the checkboxes next to the titles/audio tracks and subtitles that you want to keep.
Step 5 When you are finished, select the Make MKV button to choose your MKV output location.
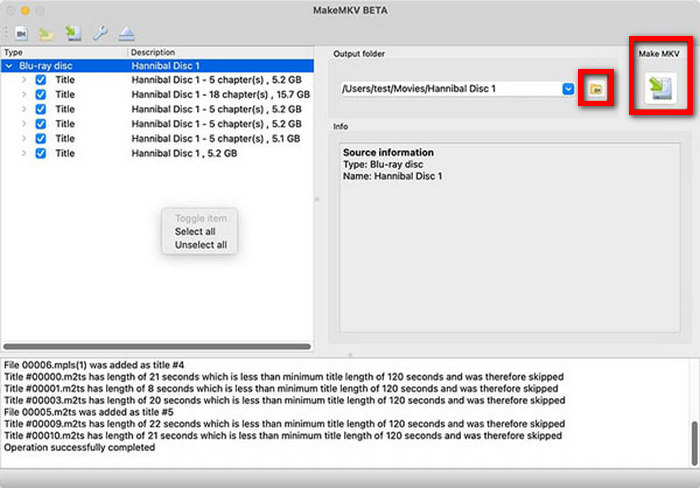
Step 6 MKV files are available after ripping the disc.
Part 4. How to Rip Blu-ray to Mac with HandBrake
HandBrake is a video transcoder that can be used for free and is also an open-source program. It can also be used to convert MP4 and MKV Blu-ray videos into different formats. A few of the formats are MP4 and MKV, and a few more of them are formats for their competition. The software has preset profiles that will save you time, and it also has the option for you to customize, which allows adjustment of the resolution, bitrate, and codecs, as well as the ability to rip Blu-ray audio for separate playback or storage.
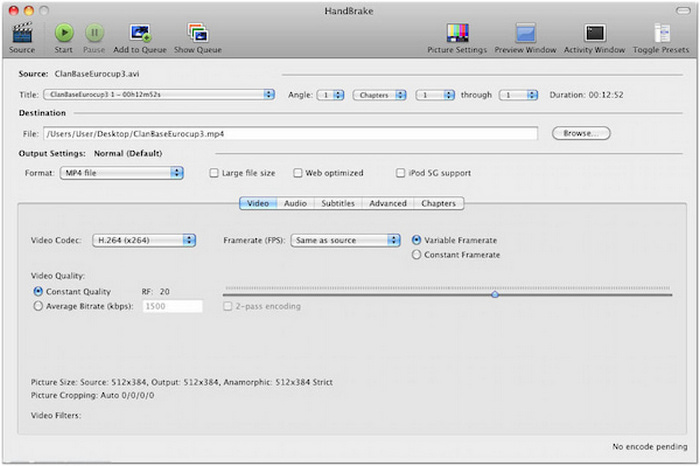
Step 1 Obtain HandBrake by downloading it.
Step 2 After you have done that, you need to open the file on your Mac.
Step 3 Load the file that is either a Blu-ray folder or an MKV file into the program.
Step 4 Change any video settings you want to customize.
Step 5 Select the output file type, e.g., MP4 or MKV.
Step 6 Hit Start Encode to start the encoding.
Pro Tips. How to Fix Disk Not Recognized and Mac Permissions
Blu-ray ripping on Mac may not work because your disc or drive is not detected. Here are some common solutions to fix this.
1. Make sure your Blu-ray drive is connected properly and that your Mac recognizes the drive.
2. If your Blu-ray disc is dirty or scratched, clean it.
3. To make it detect, restart the Mac and replug the drive.
4. Make sure the macOS privacy settings are configured for the app so it can reach external drives.
5. If you are having compatibility issues, make sure both the Blu-ray authoring software and macOS are updated to the latest version.
Conclusion
How to rip a Blu-ray on a Mac becomes easier once the right tools and preparation are in place. With proper software, compatible formats, and simple troubleshooting, Blu-ray movies can be converted into digital files for convenient playback, storage, and long‑term media backup.
More Reading


About the Author