Neat Video Denoiser is popular for its noise reduction capabilities and video enhancement quality. In this article, you'll learn all there is to know about the tool, including key features and real-world advantages of Neat Video Denoiser. Next, you will learn how to use Neat Video Denoiser, which will be a clear step process. An unbiased review then highlights its advantages, limitations, and pricing details to help you decide if it's worth it. To complete the overview, several excellent alternatives are also introduced.

Part 1. All You Want to Know About Neat Video Denoiser
Neat Video Denoiser is a professional-grade plug-in designed to remove visual noise and grain from video footage. It is especially useful for clips shot in low light, at high ISO settings, or with older cameras that struggle to capture clean images. With its advanced noise reduction algorithms, Neat Video helps editors achieve smoother, sharper, and more polished results without sacrificing important details.
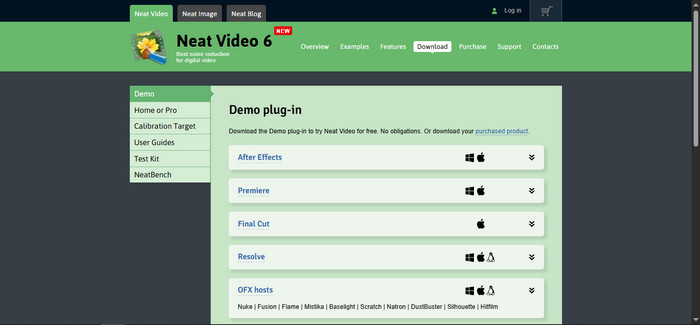
The tool integrates seamlessly with widely used video editing software, including Adobe Premiere Pro, Final Cut Pro, DaVinci Resolve, After Effects, and Sony Vegas. It uses GPU acceleration to speed up processing, ensuring that even demanding projects can be handled efficiently. Users can also customize the level of noise reduction through a range of settings, allowing full control over the final output.
When it comes to pricing, Neat Video offers two main editions. The Home edition is a low-cost option with fundamental functions and is best for casual editors or hobbyists. The Pro edition has complete compatibility with high-end editing tools, includes higher resolutions, and is intended for those doing work in the editing process who need the most flexibility.
Neat Video Denoiser provides incredible noise reduction quality, solid compatibility with leading editors in the industry, customizable filters, and a powerful GPU optimizer. Although Neat Video Denoiser has a lot of power, first-time users may face a learning curve, rendering can demand a lot of resources from your machine, and the Pro version can feel a bit on the expensive side for casual users. All of these things are not detractors from Neat Video Denoiser being one of the most reputable tools to denoise video, as well as achieve a different professional product with superb results!
Part 2. How to Use Neat Video Denoiser to Denoise Video
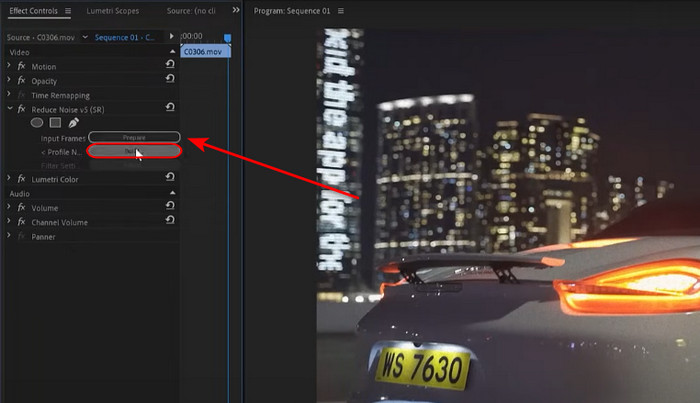
Step 1Assuming that you have launched Adobe Premiere Pro and imported your video, the first thing you want to do is to click on your video and select the Prepare button and import Neat Video as a profile. After you have imported Neat Video, simply click the Start button beside it.
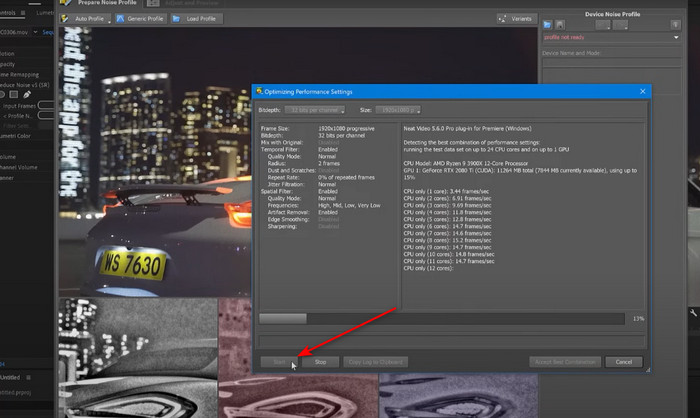
Step 2After you have launched Neat Video, press F10 on your keyboard or navigate to Tool > Preferences. After that, navigate to Performance > Optimize Settings > Start. This will denoise your video with ease.
Step 3After the process has finished, you can now go back to Premiere Pro and continue editing your video and exporting. Make sure to review the denoised part of your video; if not denoised properly, repeat the process.
Part 3. Unbiased Neat Video Denoiser Review
Neat Video Denoiser is free and has been regarded as one of the most trusted solutions for cleaning up noisy footage, and many editors praise its ability to produce noticeably smoother results without making videos look overly artificial. In real-world use, it handles challenging conditions - such as grainy night shots, high ISO recordings, or old camcorder footage - with impressive consistency. The balance between noise reduction and detail preservation is one of its biggest advantages, helping footage look cleaner while still retaining natural textures.
Another strength lies in its flexibility. The plug-in provides users explicit control of each setting, letting them make small adjustments or apply heavy filtering, depending on the project at hand. This level of control is respected and valued by professionals, but the number of settings available can be overwhelming for beginners who desire easy, one-click solutions.
The main trade-offs are speed and cost. While GPU acceleration improves performance, the video noise reduction process can still be resource-heavy, particularly with high-resolution files. This means longer rendering times on less powerful systems. In addition, the Pro version's price tag may not be ideal for casual editors, though it offers the most complete feature set.
Part 4. Alternative Denoiser to Neat Video
No doubt, Neat Video Denoiser is an excellent program by any standard, but its pricing and so many advanced features may deter some users. For the more user-friendly yet reliable alternative types, Tipard Video Converter Ultimate stands out. With its great price-performance ratio, it would be a great budget alternative with no quality deficit. Denoise, crop, enhance, and apply changes to your videos with ease. Even those who've never attempted a single editing job before could do it with just a few clicks.
Alternatively, it has an effect preview so that you will see what changes are implemented in real-time, thus providing you with the ability to make changes confidently and maintain control before export. Both on Windows and on Mac, Tipard Video Converter Ultimate guarantees high-quality output every time. A simple and effective way to enhance your video experience.
Step 1Download and Launch App
Assuming that you have not downloaded the app, click the download button available below. After that, launch the app by clicking the app shortcut that is available on your desktop.
Step 2Select Tool and Import Files
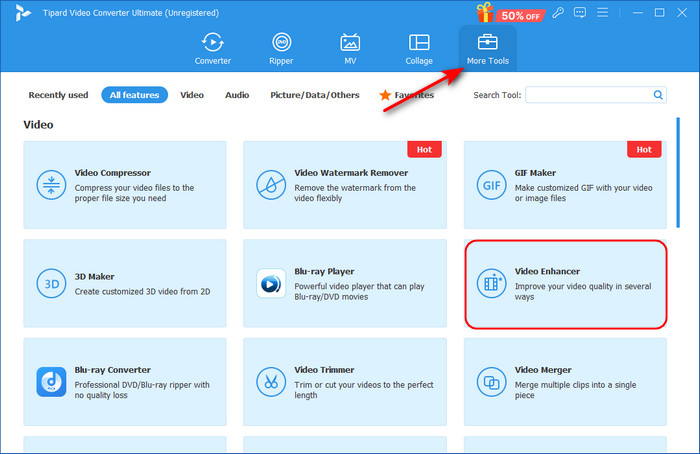
After you have launched the application, navigate to More Tools > Video Enhancer, and then you can start importing your files. Simply click the + button, which will open your directory where you can search for your files.
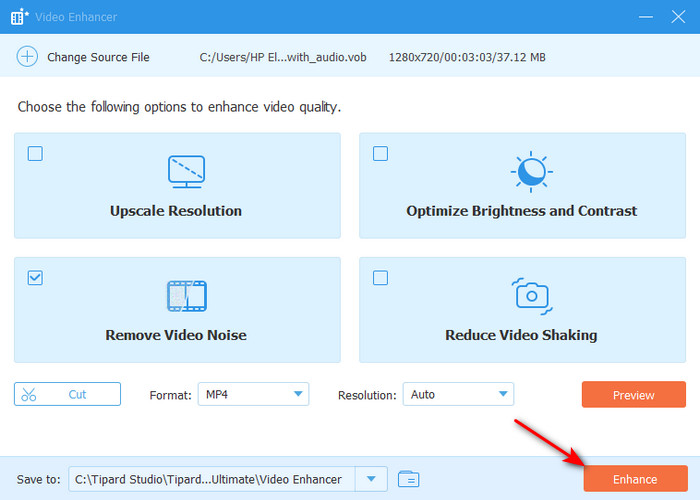
Step 3Enhance Files
After you have imported your files, you can start enhancing your videos. Simply tick the Remove Video Noise option, and denoising will be applied to your video.

Step 4Convert Files
After you have applied the changes you want, you can now convert your file. Click on the Enhance button to start the conversion process.
Conclusion
Enhancing video quality requires the right tools to balance clarity and detail. With this Neat Video denoiser review, even grainy or low-light footage can be transformed into smooth, professional-looking results, helping creators produce more engaging and visually appealing content.
More Reading


About the Author