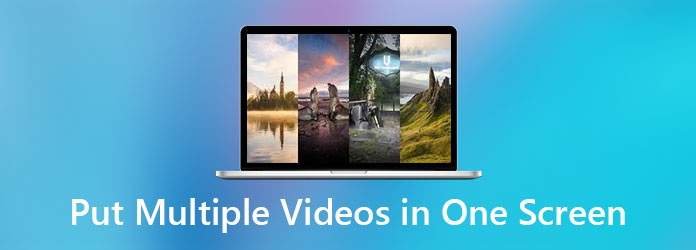
- Part 1. Purposes of Putting Multiple Videos on One Screen
- Part 2. Put Multiple Videos on One Screen Easily on a Desktop
- Part 3. How to Put Multiple Videos on One Screen with iMovie
- Part 4. How to Put Multiple Videos on One Screen with CapCut
- Part 5. How to Put Multiple Videos on One Screen Free Online
Key Takeaways
You can show multiple videos on one screen by merging two or more videos using split-screen or multi-screen videos. Keep in mind the following important factors when creating this type of video:
- Layout options: It includes side-by-side, stacked, or grid layouts.
- Synchronization: Some videos require timing adjustments to play in sync.
- Aspect ratio: Adjust sizing by resizing, cropping, or changing the ratio of the video.
- Export quality: Adjust settings for resolution and playback to improve compatibility.
Imagine hosting a live online tutorial and needing to show reactions, demonstrations, and comparisons all at once. Placing multiple videos on one screen makes this possible, allowing viewers to follow every angle, highlight, and perspective simultaneously for a more engaging experience.
- Part 1. Purposes of Putting Multiple Videos on One Screen
- Part 2. Put Multiple Videos on One Screen Easily on a Desktop
- Part 3. How to Put Multiple Videos on One Screen with iMovie
- Part 4. How to Put Multiple Videos on One Screen with CapCut
- Part 5. How to Put Multiple Videos on One Screen Free Online
Part 1. Purposes of Putting Multiple Videos on One Screen
In order to make a successful video, a pre-production stage is needed, planning out the concept, theme, and locations with the crew is going to make the shoot a lot smoother.
In videos, split-screen editing can help in:
1. Side-by-side comparison: Great for before-and-after clips, tutorials, and product demos.
2. Multiple perspectives: Shows different angles or viewpoints simultaneously.
3. Reaction and response videos: Ideal for duets, commentary, and reaction content.
4. Better storytelling: Connects related scenes or events in one frame.
5. Stronger social media impact: Helps videos stand out in crowded feeds.
6. Creative visual style: Adds a modern, artistic touch to videos.
Part 2. Put Multiple Videos on One Screen Easily on a Desktop
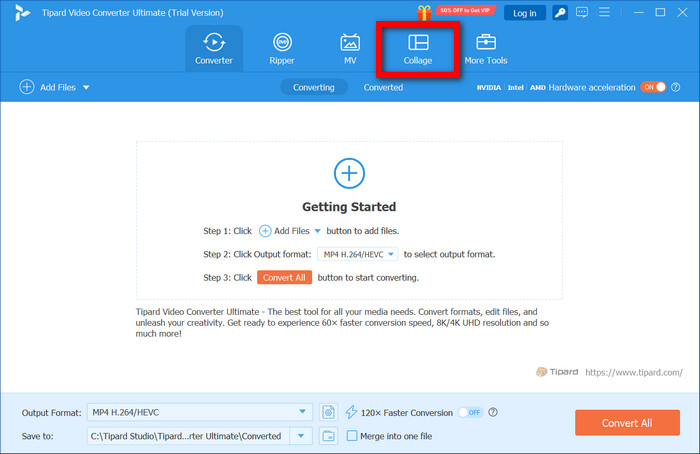
Videos can be edited more easily on a computer. Desktop software usually provides more control, more features, and more stability. One of the simplest tools for making split screens and multi-screen videos on the desktop is Tipard Video Converter Ultimate. It has a Collage Maker tool within the converter that offers multiple videos on one screen using templates (no editing skills needed).
Supported Platforms: Windows & macOS
- Offers multiple stylish collage templates for split-screen and multi-screen videos
- It lets you create split-screen videos without any editing skills
- Allows you to edit each video on the screen individually
- Includes filters and video enhancement tools to improve video quality
- Supports over 500 video and audio formats, including MP4, MOV, MKV, AVI, and more

Step 1 Download and Install the Tool
Go to the Tipard Video Converter Ultimate official site and download the software to your Windows or macOS computer. Install the software afterwards.
Step 2 Launch and Open the Collage Feature
Once you open the software, you can access the collage options by clicking the Collage tab from the main menu.
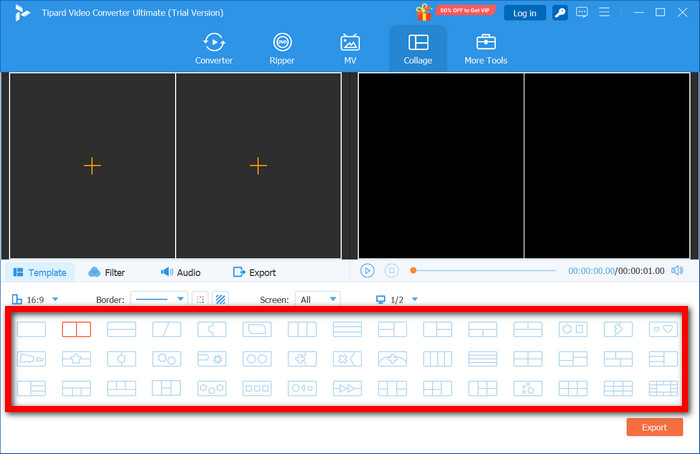
Step 3 Choose a Collage Template
From the options presented, choose a layout you want. Make sure to choose a split-screen or multi-frame template depending on the orientation of your videos.
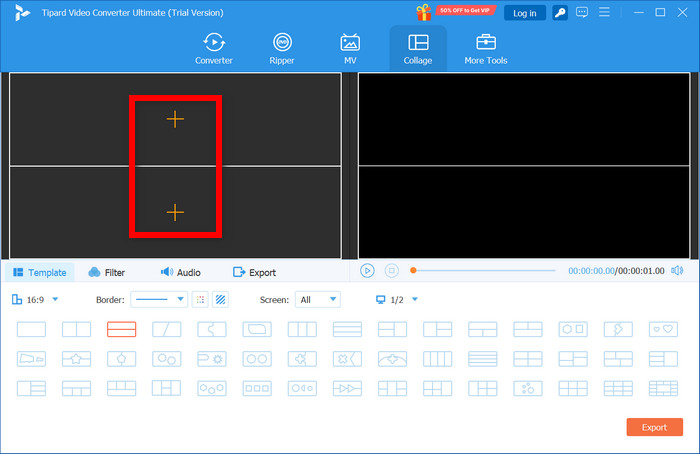
Step 4 Import Multiple Videos
To upload your videos, click the + sign on the frame of the collage layout as many videos as the layout accommodates can be added.
Step 5 Make Final Edits to Your Videos
From the Filter tab, you can add a filter to all your videos. Make sure your videos have the same brightness, contrast, and saturation.
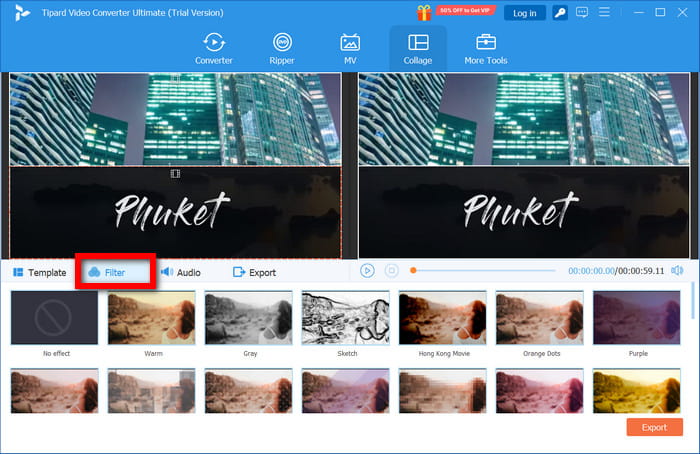
Step 6 Edit Audio for Each Video
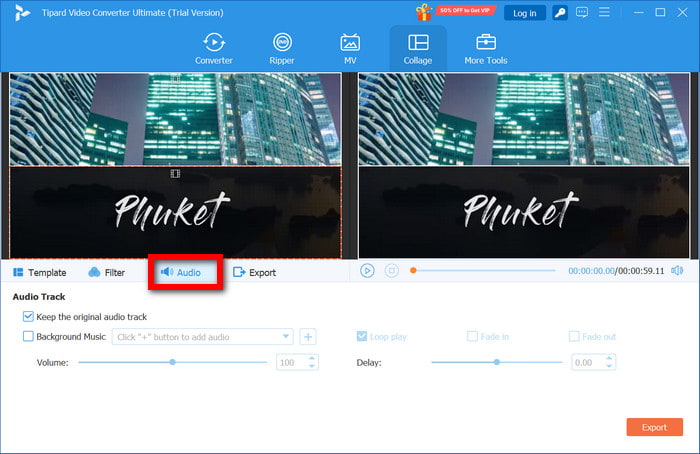
In the Audio tab, you will find options to adjust mics on the videos, mute some clips, add background music and modify the audio to achieve a clean sound and good balance on the final video.
Step 7 Save and Export the Collage Video
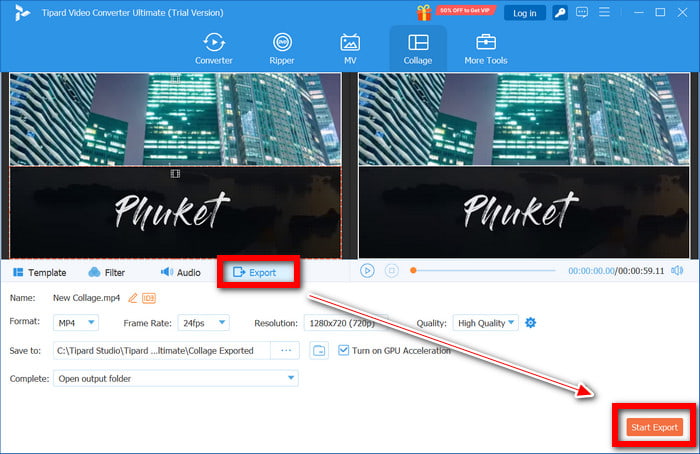
To save the completed video to your device, click the Export tab, select the desired format, resolution, and choose a folder for it. Then, click Start Export.
- It has a template collage maker and is very simple to use.
- All the necessary editing and enhancement features are included.
- There is a rapid processing rate due to hardware acceleration.
- Output is of high quality, and multiple formats are supported.
- You can work offline on the desktop.
- You have to install the program.
Part 3. How to Put Multiple Videos on One Screen with iMovie
Imovie is a good choice for video editing on Mac and mobile because it is user-friendly and includes split screen and picture-in-picture as well as overlays and a video editing suite. Combining multiple clips is simple, including resizing and repositioning clips so that you can make videos that look good without spending a lot of time on it.
Step 1 Open the iMovie application and start a new project.
Step 2 Upload the various video clips you wish to mix
Step 3 Base clips are the main videos, and they go to the timeline.
Step 4 Above the main clips in the timeline is where the second videos go.
Step 5 Select the Video Overlay Settings button above the preview screen.
Step 6 A selection menu will appear; choose Split Screen or Picture in Picture.
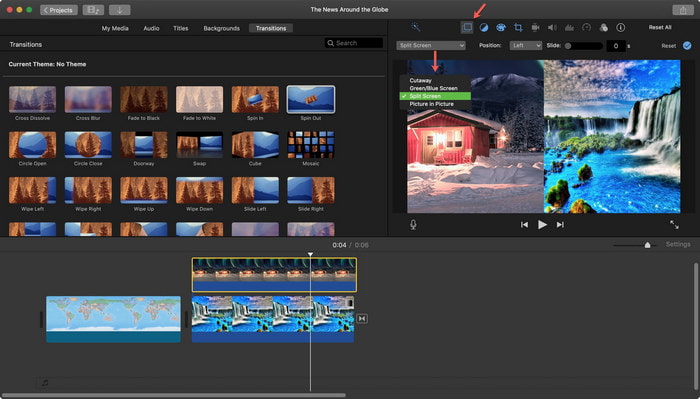
Step 7 In the preview screen, resize and reposition the videos.
Step 8 Change the duration of the files so that they play simultaneously.
Step 9 Check the outcome, then export the file.
Part 4. How to Put Multiple Videos on One Screen with CapCut
Creating split-screen and multi-screen videos is simple with the overlay tools of CapCut. The app is free, user-friendly, and works on both desktop and mobile devices, allowing you to combine, resize, and arrange multiple videos effortlessly. You can also learn how to make a collage on an iPhone for similar results.
Step 1 Go to CapCut and start a new project.
Step 2 Bring in all the video files you want to split-screen.
Step 3 Add the primary video to the timeline as the base clip.
Step 4 Click on the Overlay option and put in the other videos.
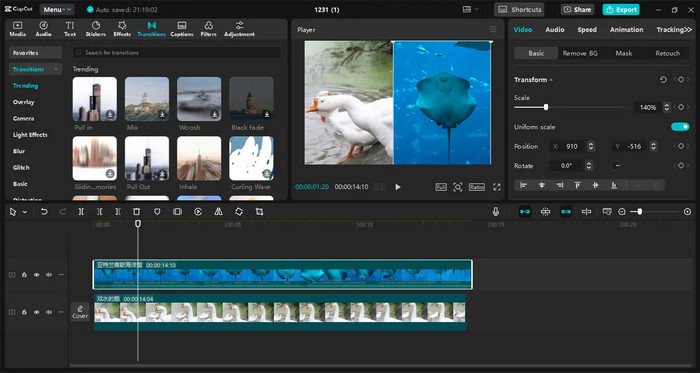
Step 5 Adjust the size, position and order of the videos.
Step 6 Edit the timing of the split, and include other features like text, effects, and music. Finally, export the video.
Part 5: How to Put Multiple Videos on One Screen Free Online
You can use free online video editors like Clideo or a video joiner to combine multiple videos on a single screen directly from your web browser, allowing you to create split-screen layouts quickly without downloading or installing any software on your device.
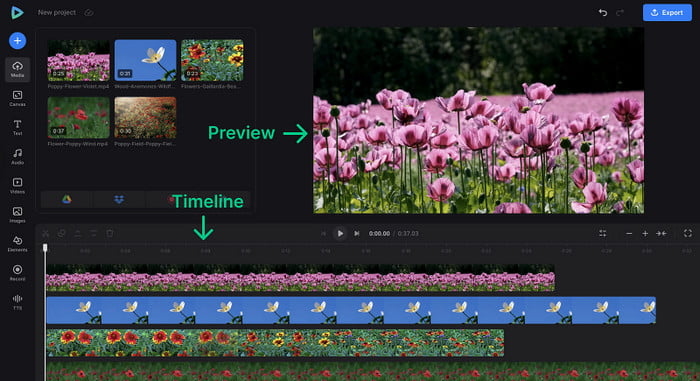
Step 1 Go to your free online video editor Clideo.
Step 2 Add all the video files you want to combine within one project.
Step 3 Arrange the uploaded files on the timeline so they are adjacent.
Step 4 Each video can be resized and positioned anywhere on the editing canvas.
Step 5 Adjust video timings to ensure they all play simultaneously.
Step 6 Incorporate text, music, and effects if necessary.
Step 7 Check video layout and playback synchronization in the preview.
Step 8 Download the video after finalizing export settings.
Conclusion
How to combine multiple videos on one screen becomes essential when you want to present comparisons, reactions, or tutorials at the same time. Whether editing on desktop, mobile, or online, split-screen videos help deliver clearer messages, save time, and keep viewers engaged with dynamic visuals.
More Reading


About the Author