If you want to compress a video and have VLC installed on your computer, you can rely on it. Besides being a media player, it also offers a VLC compress video feature that lets you reduce file size. Impressively, it gives different ways to do it. Are you ready to learn all these approaches? If yes, please read until the end of this post.
Part 1. 4 Ways to Compress Video with VLC
VLC offers 4 effective ways to compress your videos. Each how to compress video with VLC gives you a different approach. So, please check each one below, and see which one works best for you.
1. VLC Compress Video - Preset Profiles
VLC offers preset profiles that make compressing videos speedily and easy. These profiles are ready-made settings for popular formats like H.264 or H.265. Using them means you do not have to worry about complicated details. It is a fast way to shrink your videos without guessing the settings.
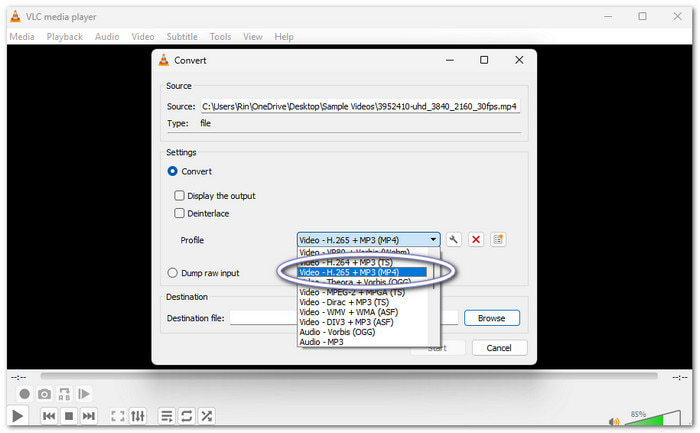
Step 1 Open VLC and go to Media > Convert / Save or press Ctrl + R. Click Add to select the video you want to compress.
Step 2 Click Convert / Save. Then, choose a profile like Video - H.265 + MP3 (MP4) or Video - H.264 + MP3 (MP4).
Step 3 Press Browse to pick where you want to save the new video. Lastly, click Start. VLC will compress the video using the profile you chose.
2. VLC Compress Video – Customize Video Codec
You can take full control by customizing the video codec. It lets you configure bitrate, resolution, and frame rate. Lowering these makes the file smaller. It is more hands-on but gives better results for specific needs.
Check the guide provided to discover how to compress a video in VLC by customizing the video codec:
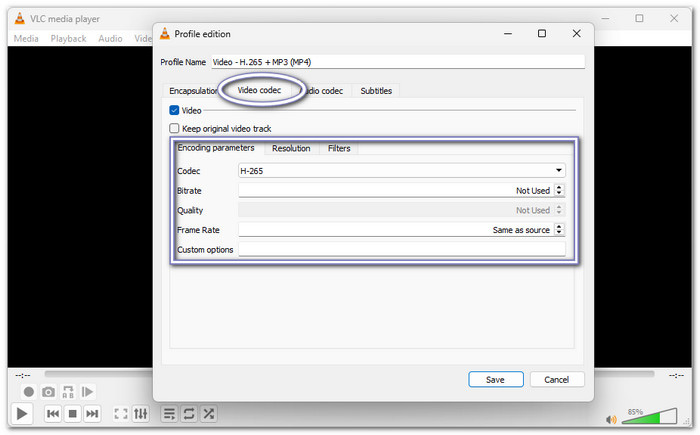
Step 1 Open the Convert / Save window. Next to the Profile, click the Wrench button to edit it.
Step 2 Go to the Video codec tab. You can reduce the Bitrate, lower the Resolution, or decrease the Frame Rate. Lower values make the file smaller.
Step 3 Once done, click Save and then Start. VLC will compress the video with your custom settings.
3. VLC Compress Video - Cut Useless Footagec
Removing unwanted parts can reduce video size in VLC. Yes, VLC does not have a direct cut feature, but the Record function works well. You can select only the important parts and save them as a new video.
Step 1 Open your video in VLC. Go to View > Advanced Controls. It will show a new toolbar at the bottom.
Step 2 Play the video or scroll to the part where you want to start cutting. Then, hit the red Record button to begin. Click it again to stop at the end of the section you want.
Step 3 VLC saves the trimmed video automatically in your videos folder. This method reduces the size because extra parts are removed.

4. VLC Compress Video – Reduce Audio Details
Audio can take up a lot of space in a video. Good thing, VLC allows you to reduce the audio bitrate or switch from stereo to mono. It is an easy way to save space when the sound does not need to be super high clarity, like for casual viewing or sharing online.
Learn how VLC video compression works by reducing the audio details below:
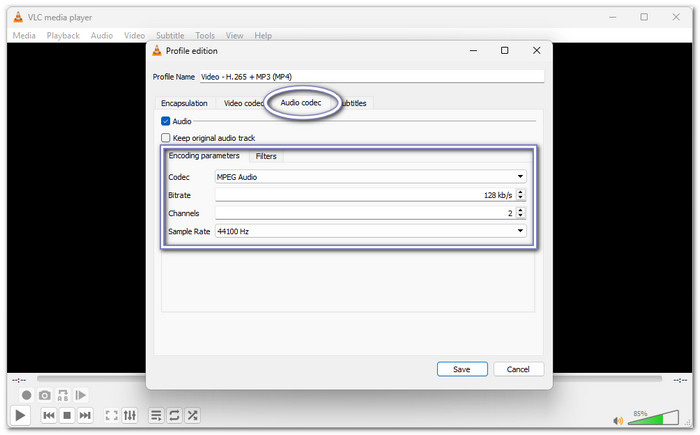
Step 1 Go to Media > Convert / Save and add your video.
Step 2 Click the Wrench option next to the Profile to edit it. Then, go to the Audio codec tab. Reduce the Bitrate (for example, from 192 kbps to 128 kbps or 96 kbps). You can also change Channels from Stereo to Mono.
Step 3 Press Save, then Start. The video will have a smaller audio size, which helps make the whole file smaller.
Part 2. VLC Compress Video Limitations
While VLC is great for playing almost any video, it has several limitations when it comes to compressing videos, and below, you will learn what they are.
1. Limited Control over Bitrate & Quality
VLC gives only basic control over video compression. Most users must rely on predefined profiles. You cannot easily set a specific bitrate or use advanced features like two-pass encoding. It often results in files that are either too large or lose noticeable quality. Users seeking precise control may feel restricted.
2. Slow Encoding & Stability Issues
VLC uses software-based encoding, which is slower than programs with hardware acceleration like NVIDIA NVENC or Intel QSV. Compressing large or high-resolution videos can take a long time. VLC can also crash or fail when handling complex files, making it unreliable for big projects.
3. Limited Format & Codec Optionss
While VLC supports many codecs, its Convert interface is confusing and limited. It does not make newer, high-efficiency codecs like AV1 easy to access. Because of this, users often rely on older standards that compress less efficiently and create larger files. Picking the best video compression formats can be challenging in VLC.
4. No Reliable Quality Preview
VLC does not show an accurate visual preview before compression. It makes it hard to predict the final video quality. Users often need multiple attempts to balance size and quality, which can be time-consuming and frustrating.
Part 3. Easier VLC Media Player Alternative to Compress Videos
If you want an easier way to compress videos, meet Tipard Video Converter Ultimate. It is not just a video converter; it also comes with many handy features, and one of the best is its dedicated video compressor. It allows you to set the size you need, and also change the format and resolution. On top of that, the simple interface and easy workflow make compressing videos fast and stress-free.
- Supports hardware acceleration for faster processing.
- Preview the first 10 seconds of your video before compression.
- Batch conversion is available when using and customizing presets.
- Offer a high compression rate with the HEVC codec for smaller files.
- Compatible with a broad range of video file formats for compression.
You already know how to compress video with VLC, now it is time to learn the easier way to compress video:
Step 1 To get started, download and install Tipard Video Converter Ultimate. Just like VLC, it is available on both Windows and Mac computers.
Step 2 Go to the More Tools tab and select Video Compressor. It is the first tool on the list, so you can find it easily without searching.

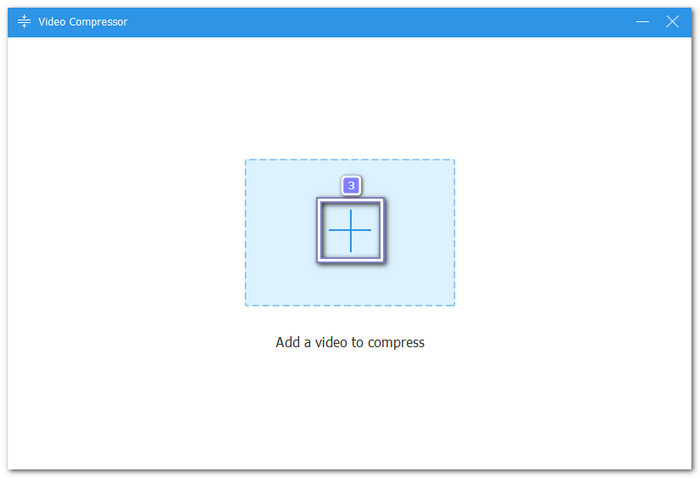
Step 3 Hit the Add button or drag and drop it to the center to import the video you want to compress.
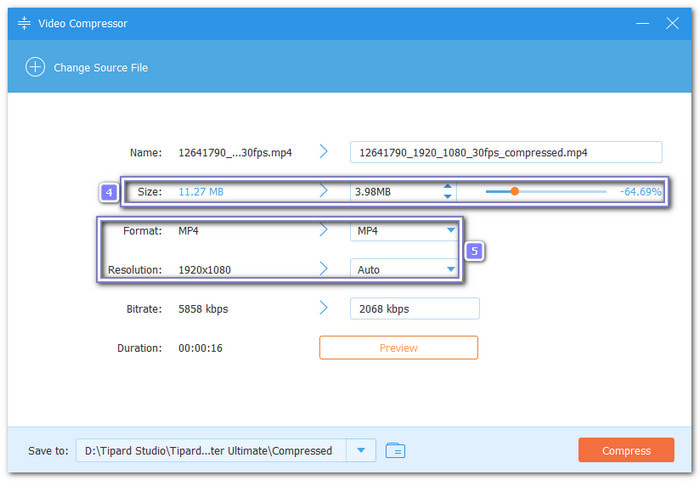
Step 4 Adjust the video size using the Slider or the Down Arrow button until it reaches the size you want. You can also change the format and resolution to control clarity and file size better.
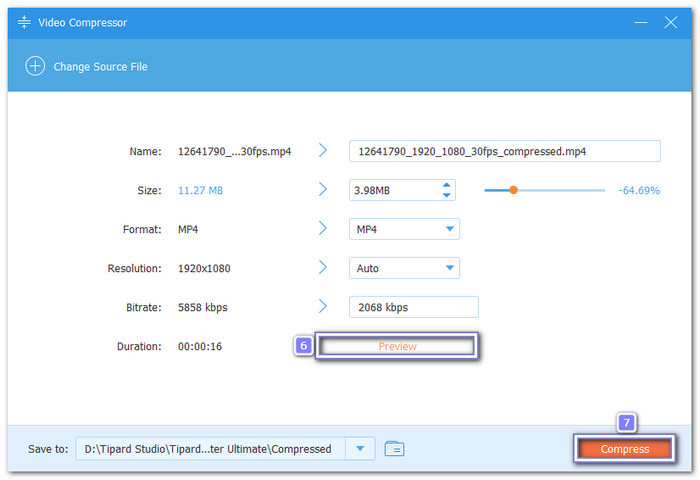
Step 5 Press the Preview button to check how your video will look after compression. Then, rename your video and choose a destination folder. Once ready, click the Compress button to start the process. After that, your compressed video will be saved in the destination folder you selected.
There you go! You have successfully reduced your video file size. It is perfect if you want to compress videos for YouTube, Facebook, Instagram, or any other platform.
Conclusion
Can VLC compress video? The answer is yes, but if you want an easier and faster way, try Tipard Video Converter Ultimate. It makes compressing your videos simple with its dedicated video compressor. You can choose the exact size, format, and resolution you want. With this program, you are in control, and shrinking videos has never been this easy.
More Reading


About the Author