- Method 1. How to Record Minecraft with Tipard Screen Capture
- Method 2. How to Record Minecraft with OBS Studio
- Method 3. How to Record Minecraft with Xbox Game Bar
- Method 4. How to Record Minecraft with Replay Mod
- Method 5. How to Record Minecraft Bedrock (Android & iOS)
- Method 6. How to Record Minecraft Timelapse
- FAQs of Recording Minecraft
Minecraft recording has never been easier, whether you are building epic worlds, battling mobs, or creating tutorials. Capturing your gameplay in high quality allows you to relive every moment, share your adventures, or produce cinematic content. This guide explores six reliable methods, showing step-by-step how to record Minecraft smoothly on PC, Mac, or mobile devices.

- Method 1. How to Record Minecraft with Tipard Screen Capture
- Method 2. How to Record Minecraft with OBS Studio
- Method 3. How to Record Minecraft with Xbox Game Bar
- Method 4. How to Record Minecraft with Replay Mod
- Method 5. How to Record Minecraft Bedrock (Android & iOS)
- Method 6. How to Record Minecraft Timelapse
- FAQs of Recording Minecraft
Method 1: How to Record Minecraft with Tipard Screen Capture
Tipard Screen Capture, as versatile and smooth as it comes, has the perfect tools to record all of the Minecraft shenanigans you are about to engage in, as well as the ones you have completed. With the ability to record video and stream audio at the same time, no in-game battle or block placement will be missed. Just use it to record your Minecraft Java or Bedrock Edition with low CPU usage while maintaining high smoothness.
- Record your Minecraft screen in full resolution without lag.
- Capture audio from both the game and your microphone simultaneously.
- Add a webcam overlay to record your reactions during gameplay.
- Draw on-screen, highlight actions, and add annotations in real-time.
- Export recordings in multiple formats like MP4, WMV, MKV, or GIF for easy sharing.

Step 1 Downloading and Installing
Head to the Tipard website and download the appropriate version for your Windows or Mac, and install it.
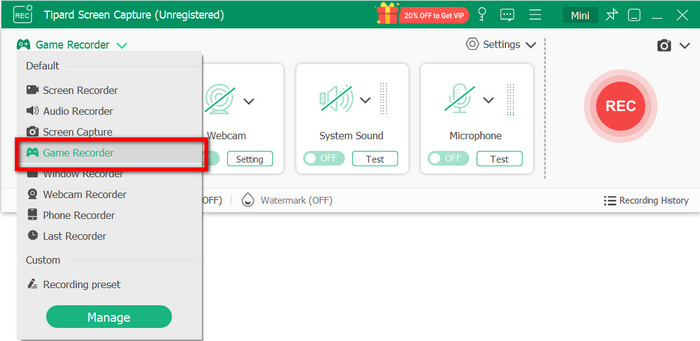
Step 2 Selecting the Game Recorder Mode
Open the Tipard Screen Capture and click on the Game Recorder option on the main menu.
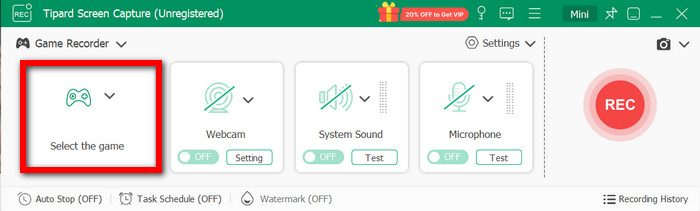
Step 3 Selecting the Minecraft Window
Select the Game option and now click on the Minecraft window that you are currently using.
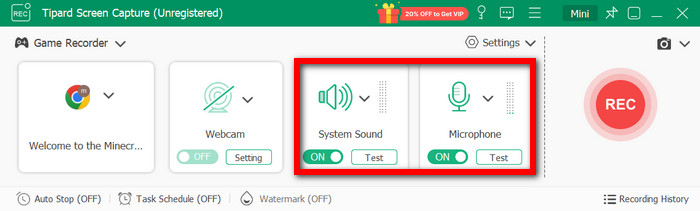
Step 4 Activating All of the Audio Sources
If you would like to capture the audio from the game, toggle System Sound on to be on. Turn the Microphone on if you would like to add additional commentary.
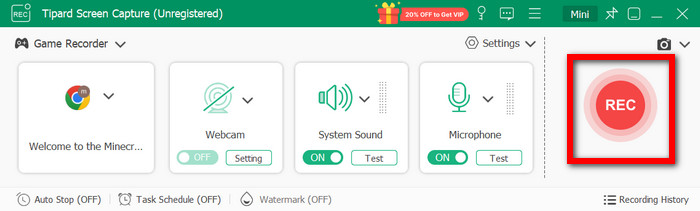
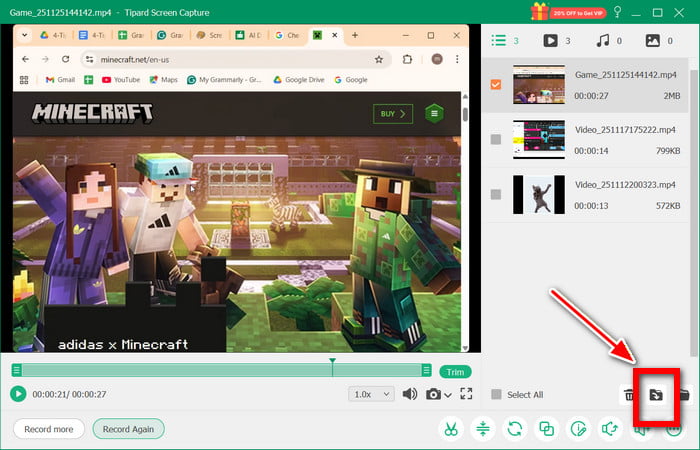
Step 5 Beginning the Recording
Press the REC button to start your recording of the Minecraft gameplay.
Step 6 Ending and Saving the Recording
Once you are all done recording your gameplay, click the Stop button. Then, to automatically save your recording to your computer, click Import from the editing preview window.
Method 2: How to Record Minecraft with OBS Studio
As a powerhouse in the industry, OBS Studio is a free, open-source software that provides professional-grade recording and streaming for both Minecraft Java and Bedrock editions on Windows and Mac. It leverages hardware-accelerated encoding (like NVIDIA NVENC or AMD AMF) to ensure smooth, high-bitrate gameplay capture without dropping frames. Beyond gaming, its advanced Scene Collection and VST plugin support for audio filtering have made it a go-to tool for educators and professional broadcasters alike.
Step 1 Navigate to the OBS Studio website and download the installer.
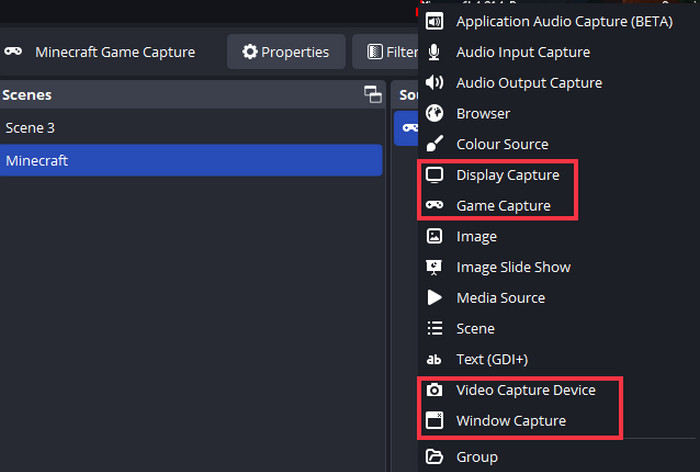
Step 2 Open OBS. On the screen that appears, create a new scene from the bottom left corner, and then create a new source by clicking the bottom right button. Use the Game Capture option to record directly from Minecraft, or select Display Capture to record the whole screen.
Step 3 On the bottom right, OBS displays the Mixer, which controls the Microphone and Desktop audio. Check to see that the desktop audio is enabled and that the microphone is set to the appropriate device.
Step 4 To start recording, click the Start Recording button.

Step 5 When you are done, click the Stop Recording button to end the capture. OBS Studio will create a new MP4 or mkv in the folder you set.
Method 3: How to Record Minecraft with Xbox Game Bar
Xbox Game Bar is a system-level, built-in toolkit integrated into Windows 10 and 11, designed for high-performance efficiency with minimal CPU impact. It allows users to quickly and conveniently record gameplay on PC, capture 4K screenshots, and manage multi-channel audio via the Audio Mixer, all without installing third-party software. Beyond basic recording, it features a Performance Overlay to monitor FPS, CPU, and GPU usage in real-time, making it the most seamless solution for Minecraft Bedrock players and casual creators.
Step 1 While Minecraft is open, pressing Win and G will open the Game Bar.
Step 2 If you need to, you can adjust the game and microphone audio in the settings. You can also adjust the video quality for the recording if you need.
Step 3 To record your screen, join the video meeting, then push the Record button, or use the shortcut Windows + ALT + R.
Step 4 Stop the recording by using the same shortcut used to start the recording.
Step 5 The recording will be available in the Captures folder within the Videos section.
Step 6 You can use the Xbox Game Bar to edit and share the recording immediately, or use another editor you prefer.
Method 4: How to Record Minecraft with Replay Mod
Unlike traditional screen recorders, Replay Mod records the entire environment as data, allowing for zero-lag Minecraft gameplay during the session. It is the premier choice for Minecraft Java players on servers like 2b2t or Hypixel to capture epic moments from a third-person perspective. With its powerful built-in rendering engine, you can add sophisticated camera movements and special effects to your replays, making it the ultimate tool for high-level content creation and cinematic storytelling.
Step 1 Download the Replay Mod and put it in the Minecraft mods folder for the version you are using with Forge or Fabric.
Step 2 Launch Minecraft with Replay Mod.
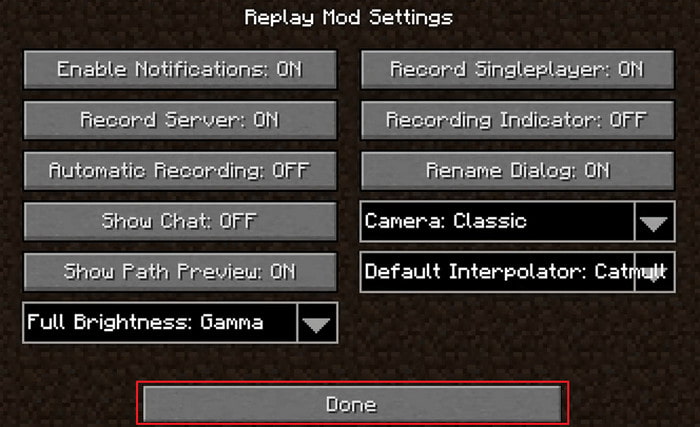
Step 3 Press F1 to hide the user interface.
Step 4 Press Start Recording to record the gameplay.
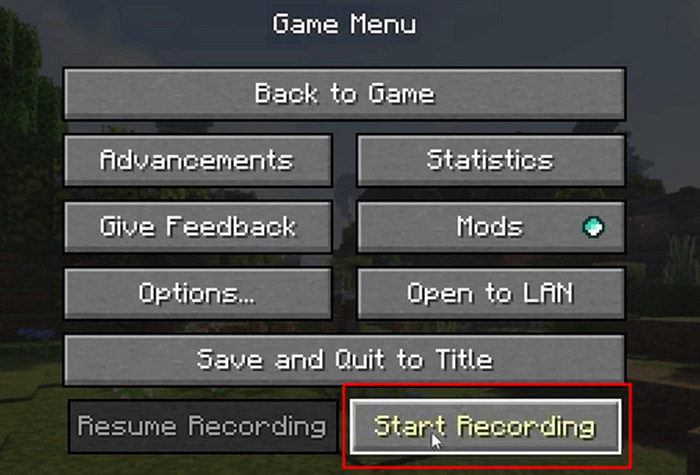
Step 5 When you are finished recording, press ESC and select Stop Recording.
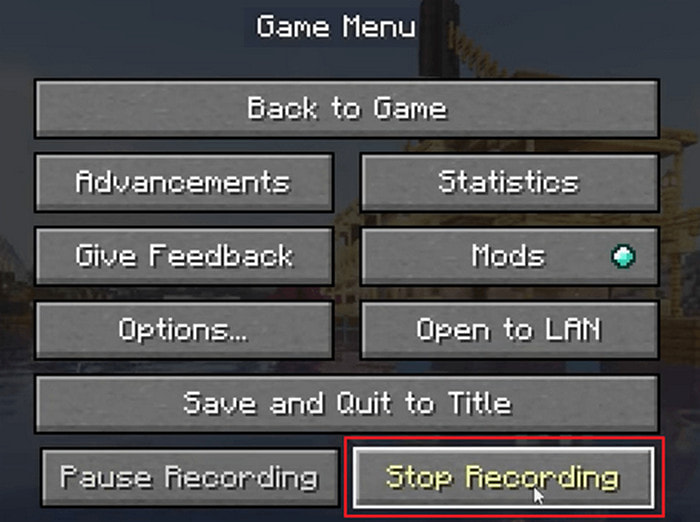
Step 6 Use the Replay Viewer to view the recording.
Method 5: How to Record Minecraft Bedrock (Android & iOS)
For players on Minecraft Bedrock Edition (PE), mobile recording has evolved to support high-fidelity capture. AZ Screen Recorder remains the top choice for Android users, offering stable 60 FPS recording at up to 4K resolution and, crucially, supporting internal audio (on Android 10+) to capture crisp game sounds without background noise. On the other hand, iOS users can leverage the system-integrated Screen Recording tool found in the Control Center. This native feature is highly optimized for iPhone and iPad, allowing for lag-free capture of complex Marketplace maps or Realms gameplay, with the option to toggle the microphone for real-time commentary.

Step 1 If you are on Android, download AZ Screen Recorder from the Google Play Store and open the app. For iOS, go to the Control Center and enable Screen Recording.
Step 2 Set the recording resolution, frame rate, and toggle on the microphone to capture narration.
Step 3 Open Minecraft Bedrock and press the Record button to begin recording gameplay.
Step 4 Record yourself playing the game while you capture the system audio, and any commentary that you provided on the microphone.
Step 5 When you are finished, tap Stop. Whether you record Clash Royale, Minecraft or any other app, your videos will be saved automatically. On Android, the recordings are stored in your Gallery, while on iOS, they appear in your Photos app.
Method 6: How to Record Minecraft Timelapse
Time-lapse videos are a great way to condense longer Minecraft recording sessions into a fast-motion highlight. This is especially great for showcasing builds or progress in a world. If you want to capture smooth gameplay while having the ability to control frame rate for time-lapse effects, use Bandicam.
Step 1 Go to the official website and download Bandicam to your device, and install it.
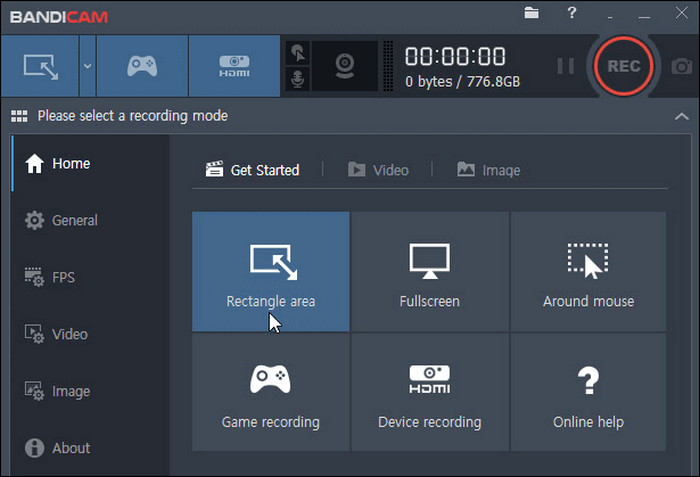
Step 2 Open Bandicam and switch to the Game Recording mode to get ready to capture Minecraft.
Step 3 Adjust the recording resolution and FPS in the recording settings. For a time-lapse effect, set a lower FPS.
Step 4 Press the REC button to begin recording your Minecraft session.
Step 5 When your session is complete, stop recording. Bandicam locally saves recorded videos in MP4 or AVI file formats.
Step 6 Import the recording into a video editor and increase playback speed to create the time-lapse.
FAQs of Recording Minecraft
Does Minecraft have a built-in recorder?
No, Minecraft does not have a built-in screen recording feature. But you can use default system tools, like the Game Bar on Windows or QuickTime Player on macOS, or download a profesional recorder like Tipard Screen Capture to record your gameplay.
How to screen record Minecraft for the last 3 minutes on PC?
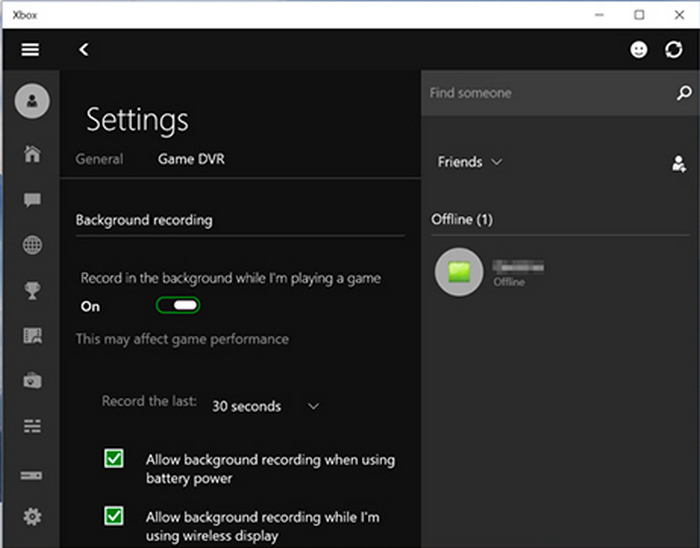
To record the last 3 minutes of your Minecraft gameplay on a PC, you need to use a feature called Instant Replay (or Background Recording). Game Bar on Windows 10 and 11 has this feature. Go to Settings > Gaming > Captures. Turn on Record what happened and set the dropdown for Record the last to 3 minutes. While playing Minecraft, press Win + Alt + G. The last 3 minutes will be saved to your Videos\Captures folder.
How do I record myself in Minecraft?
You can use Tipard Screen Capture. Enable Webcam to record yourself and overlay on the Minecraft recording screen.
Conclusion
How to record Minecraft effectively depends on your device and desired features. Whether you choose Tipard Screen Capture, OBS Studio, Xbox Game Bar, Replay Mod, AZ Screen Recorder, or Bandicam, each method provides unique tools to capture, edit, and share your gameplay, ensuring every adventure is perfectly preserved.
More Reading


About the Author