Learning how to disable Xbox Game Bar on Windows can transform your PC experience, especially if you value performance and a clutter-free system. While the Game Bar is designed to help gamers capture clips, monitor performance, and chat with friends, it often becomes more of a nuisance than a benefit. Non-gamers rarely need it, and even dedicated players sometimes find it buggy or resource-hungry. This guide walks you through deactivating it on Windows 11 and 10, explains why it may be worth turning off, and introduces a better recording alternative.

Part 1. How to Disable Xbox Game Bar on Windows 11
Together with the other gaming features of Windows 11, the Xbox Game Bar comes pre-installed with the operating system. This application has overlays that allow users to take screenshots, record video clips, and analyze system metrics. Of course, not everyone is a gamer, and some people may prefer other applications. If you would like to prevent it from running in the background, here is the complete guide to disabling Xbox Game Bar on Windows 11 and the best free screen recorder you can try.
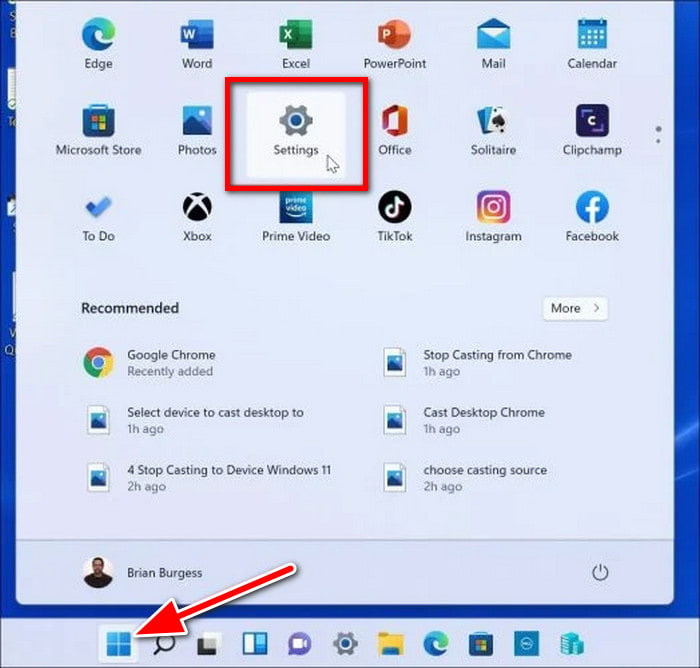
Step 1 Press the Start button and select the Settings button.
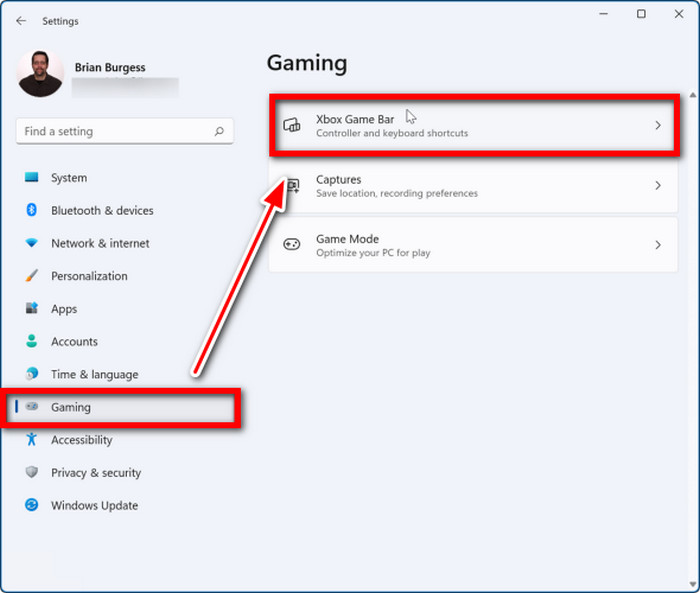
Step 2 In the left column of the Settings window, select Gaming and on the right, select Xbox Game Bar.
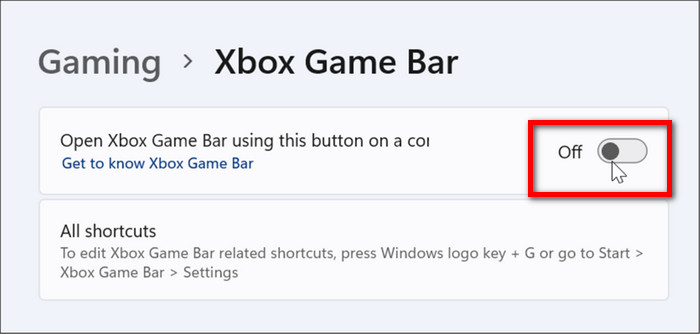
Step 3 Disable Open Xbox Game Bar using this button on a controller option.
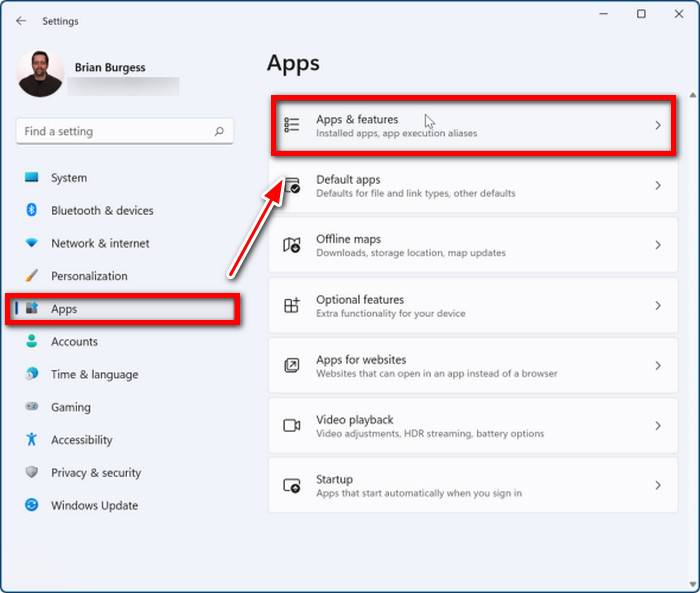
Step 4 Then from Settings, click on the left side on Apps and on the right side on Apps & features.
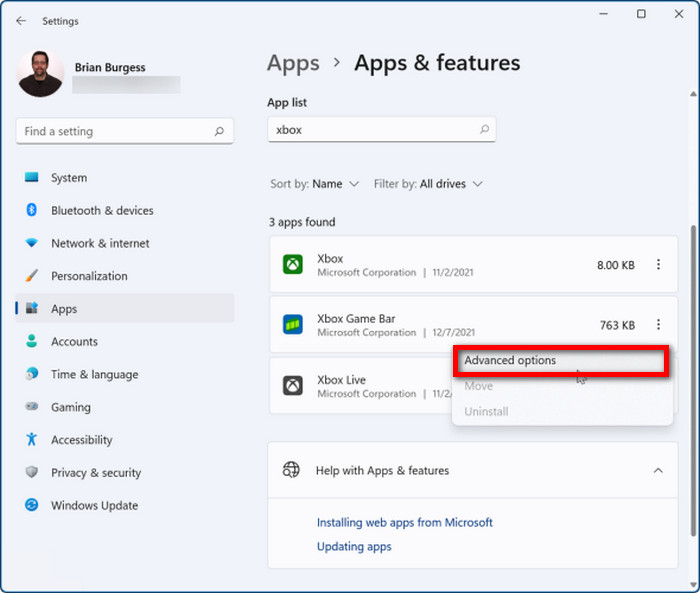
Step 5 In the Apps & Features area, enter xbox in the App list field.
Step 6 In the list, find Xbox Game Bar, click on the three-dot menu next to it, and select Advanced Options from the dropdown.
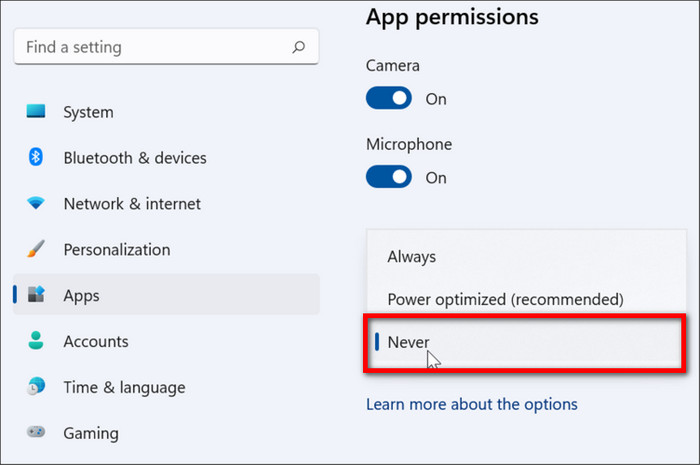
Step 7 Change the settings in the Background apps permissions to Never.
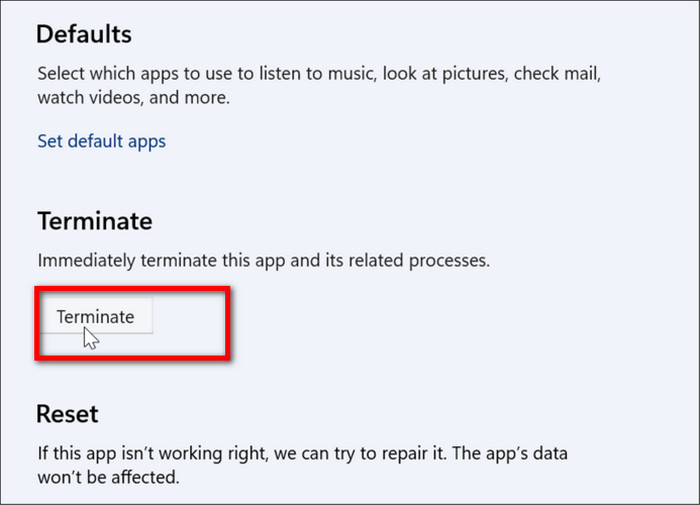
Step 8 Scroll further down and click the Terminate button to stop the app from running in the background.
Part 2. How to Disable Xbox Game Bar on Windows 10
Similar to how Windows 11 comes with the Xbox Game Bar pre-installed, Windows 10 also offers this feature, albeit with the added benefit of it being integrated into the operating system. It can help with recording videos, but it is an overlay that is unnecessary for any gamer who does not stream or record. Some players experience overlay lag or unwanted notifications during gameplay. Thankfully, Windows permits you to turn it off completely within the Settings app, relieving you of the unwanted game overlay burden. To turn it off with Windows 10, follow the steps below.
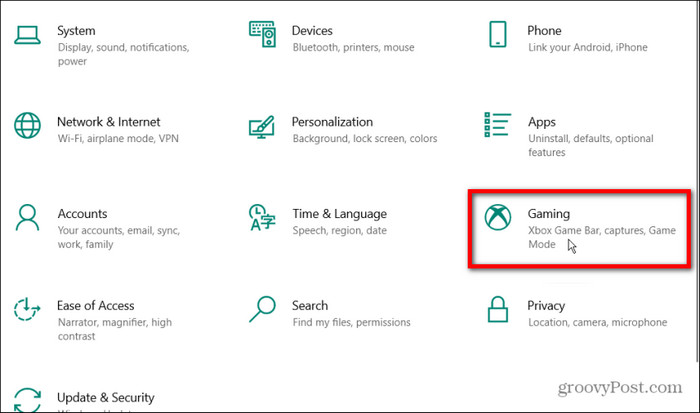
Step 1 To access the Settings menu, right-click on the Start menu and select it.
Step 2 In the Settings menu, click on Gaming.
Step 3 In the next window, select Xbox Game Bar and turn off the toggle.
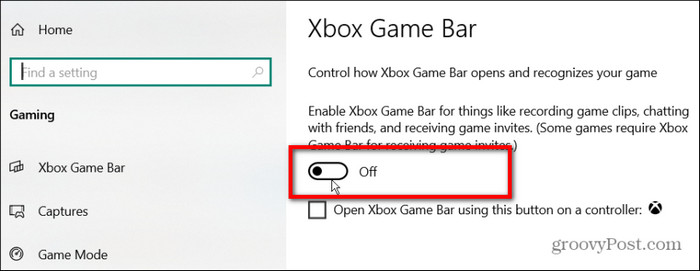
Step 4 For those who play with a controller, make sure the option that allows the Xbox button to launch Xbox Game Bar is unchecked.
Part 3. Why Need to Disable Xbox Game Bar
While the Xbox Game Bar comes equipped with features designed to assist gamers, not every Windows user requires these capabilities. For numerous users, there are a range of differences from usability to preference that make the option to remove it and use other game capture tools more appealing. For users who deem the overlay unnecessary or annoying, turning it off will enhance the performance of your system. Below are the main purposes as to why turning off the Xbox Game Bar is the best option.
- System Performance: Background processes can strain resources, and turning them off may increase speed.
- Unwanted Pop-ups: You may click the overlay mistakenly, and it can disrupt your work.
- Alternative Tools: Other recording and streaming tools, such as OBS Studio or Nvidia ShadowPlay, are favored by most users.
- Not a Gamer: The app becomes redundant if you do not play games.
- Bugs and Stability Issues: Encountering glitches, some users face crashes, and turning it off helps mitigate issues.
- No purchase necessary, built-in tools, and no additional software needed.
- Instant access to screen capture, recording, screenshots, and system diagnostics.
- Integrates with Xbox for chatting and social functions.
- Less heavy than some third-party tools.
- System performance issues or resource consumption.
- Unwanted overlay interruptions.
- Basic editing and customization are unavailable.
- Reported by some users: bugs, crashes, or unstable performance.
- Does not apply to non-gamers; recording or overlay features are deemed unnecessary.
Part 4. Best Alternative to Xbox Game Bar to Record Screen
The Xbox Game Bar is often used for recording; however, it may not be the most reliable option for all users. For those looking for something more professional but simple to operate, Tipard Screen Capture is arguably one of the best choices. You can record the screen, gameplay, webcam, and audio, plus external devices such as iPhones or Androids, all at the same time and without interrupting other applications. Tipard works great for tutorials, capture gameplay, recording calls, and more. With Tipard, you're guaranteed great quality whether you are on Mac or Windows.
- Runs smoothly without slowing down or interfering with apps.
- Capture your screen in high resolution with crisp, clear audio quality.
- Works on both Windows and Mac, giving users flexible platform support.
- Record webcam and microphone together, ideal for tutorials, gameplay, and presentations.
- Record full screen, a window, or a custom area, with scheduling options.

Follow these simple steps to start recording with Tipard:
Step 1 Download and Install
Grab the Tipard Screen Capture from the official site and install it on your Windows or Mac computer, and you are good to go.
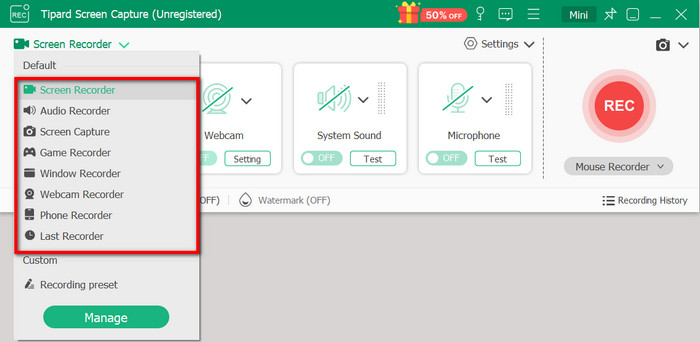
Step 2 Choose Recording Mode
Start up the software and choose whichever recording you want. You can choose between Screen Record, Audio Recorder, Screen Capture, Game Recorder, and more.
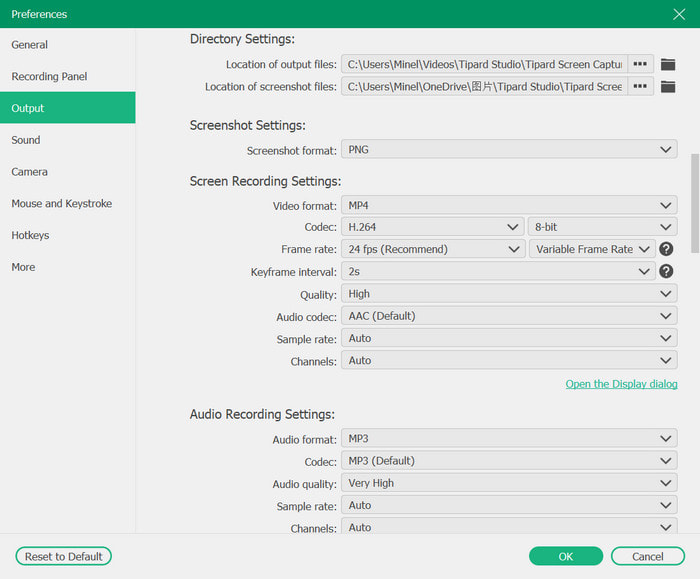
Step 3 Adjust Settings
For your preferences, such as output format, resolution, and audio source, you may select from system sound, microphone, or both, and click the Settings button.
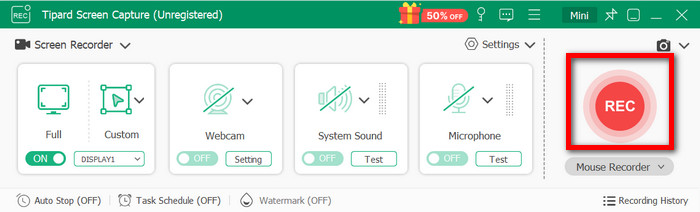
Step 4 Start Recording
To commence recording, just click the REC button. While the software is recording, a webcam overlay can be added, drawing can be done on the screen, and mouse and keystroke highlighting can be enabled.
Step 5 Stop and Save
Once you have clicked on the Stop button, you can view the recording. If you feel some adjustments are necessary, you can modify the recording.
Conclusion
Having full knowledge of how to turn off Xbox Game Bar will help your computer run smoothly in the background without any pauses and distractions for any operating systems, Windows 10 or 11. It is quite simple and takes very little time. If you need more advanced functionality, then you can consider using Tipard Screen Capture, which allows you to record your screen with video and audio in high quality without the limitations of Game Bar.
More Reading


About the Author